
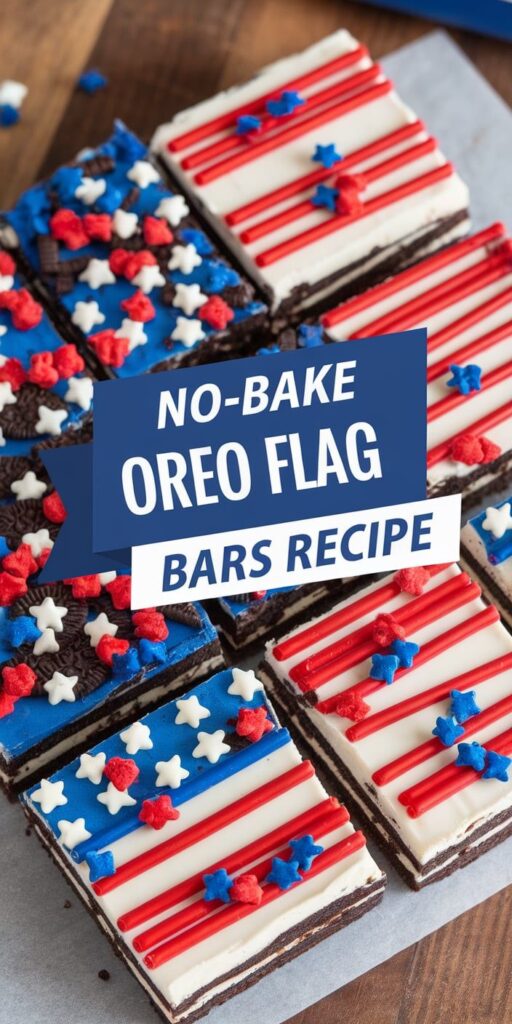
Summer celebrations call for an exciting no-bake dessert that captures the spirit of American pride. My No-Bake Oreo Flag Bars are the perfect patriotic recipe that combines delicious flavor with festive design. These flag-themed treats will be the star of any Fourth of July gathering, Memorial Day picnic, or weekend barbecue.
Crafting these Oreo dessert bars is incredibly simple and requires minimal kitchen skills. With just a few ingredients and no baking required, you can create a visually stunning treat that will impress your family and friends. The red, white, and blue layers make these bars not just a dessert, but a celebration of color and creativity.
Whether you’re hosting a summer party or looking for a cool dessert to bring to a potluck, these No-Bake Oreo Flag Bars are guaranteed to be a crowd-pleaser. The combination of crushed Oreo cookies, creamy layers, and patriotic colors makes this recipe a must-try for anyone wanting to add some festive flair to their dessert table.
The Perfect Patriotic Treat for Summer Celebrations
Summer parties demand show-stopping desserts that are both delicious and visually stunning. My No-Bake Oreo Flag Bars are the ultimate solution for anyone seeking easy party treats that will impress guests without hours of kitchen work.
Why These Flag Bars Are a Must-Try
These summer dessert ideas combine simplicity with spectacular presentation. The no-bake design means you’ll stay cool while preparing a crowd-pleasing treat. Guests will be amazed by the intricate red, white, and blue layered design that looks like it took hours to create.
- Perfect for Fourth of July gatherings
- Takes less than 30 minutes to prepare
- No oven required during hot summer days
- Kid-friendly and adult-approved
Make-Ahead Benefits for Party Planning
As a busy host, I love make-ahead desserts that reduce day-of stress. These Oreo Flag Bars can be prepared up to 2-3 days in advance, keeping your refrigerator and schedule organized. Simply cover and store them until your event, ensuring maximum convenience.
Storage and Serving Tips
Storing these bars is a breeze. Keep them refrigerated in an airtight container, and they’ll maintain their perfect texture and vibrant colors. For maximum visual impact, slice them just before serving to showcase the beautiful flag design.
- Refrigerate up to 3 days before serving
- Use a sharp knife for clean cuts
- Serve chilled for best taste and texture
Essential Ingredients for Oreo Flag Bars
Creating the perfect no-bake Oreo Flag Bars requires careful selection of Oreo dessert ingredients and precise preparation. I’ll walk you through everything you’ll need to make this delightful patriotic dessert that’s sure to impress at any summer celebration.
Required No-Bake Recipe Tools
Before diving into the recipe, gather these essential kitchen tools:
- 9×13 inch baking pan
- Food processor
- Large mixing bowls
- Electric mixer
- Measuring cups and spoons
- Spatula
- Parchment paper
Key Oreo Dessert Ingredients
Your dessert substitutions can make this recipe flexible and fun. Here are the core ingredients you’ll need:
- 24 Original Oreo cookies
- 16 oz cream cheese (softened)
- 1/4 cup unsalted butter
- 1/2 cup powdered sugar
- Red and blue food coloring
- Whipped cream for topping
Ingredient Substitutions and Alternatives
I understand dietary restrictions can impact dessert choices. For those needing alternatives, consider these swaps:
- Gluten-free Oreo-style cookies
- Dairy-free cream cheese
- Vegan butter alternatives
- Sugar-free powdered sweetener
Measuring and Preparation Guidelines
Precision matters when preparing no-bake recipe tools and ingredients. Always use room temperature cream cheese for smooth mixing. Measure dry ingredients using level cups and spoons. Crush Oreo cookies uniformly to ensure consistent texture throughout your dessert.
No-Bake Oreo Flag Bars Recipe
Creating these easy no-bake bars is a delightful step-by-step dessert recipe that will impress your guests. I’ll walk you through the entire Oreo crust recipe and layering process to ensure perfect results every time.
Ingredients You’ll Need
- 24 Oreo cookies
- 1/2 cup unsalted butter, melted
- 16 oz cream cheese, softened
- 1 cup powdered sugar
- Red and blue food coloring
- Whipped cream for topping
Step-by-Step Preparation
- Crush Oreo cookies into fine crumbs for the crust
- Mix cookie crumbs with melted butter
- Press mixture into a 9×13 inch pan
- Chill crust for 15 minutes
- Beat cream cheese and powdered sugar
- Divide mixture into three separate bowls
- Color one portion red, another blue
- Layer colors carefully on Oreo crust
- Refrigerate for 2 hours before serving
Expert Mixing Tips
When preparing these easy no-bake bars, ensure your cream cheese is room temperature for smooth mixing. Use gel food coloring for vibrant red and blue layers that will make your flag bars pop!
Helpful Measurement Guide
| Ingredient | Measurement | Purpose |
|---|---|---|
| Oreo Cookies | 24 cookies | Crust Base |
| Butter | 1/2 cup | Bind Crust |
| Cream Cheese | 16 oz | Filling Base |
These step-by-step dessert recipe instructions guarantee a stunning patriotic treat that’s both delicious and visually impressive. Your Oreo flag bars will be the star of any summer celebration!
Creating the Red, White, and Blue Layers
Crafting the perfect patriotic dessert design requires attention to detail and some creative layered dessert techniques. My No-Bake Oreo Flag Bars are all about creating a stunning visual masterpiece that captures the spirit of American celebrations.
Decorating Techniques for the Perfect Flag Design
When working on your patriotic dessert design, food coloring tips become crucial. I recommend using gel food coloring for vibrant, true colors that won’t compromise the texture of your dessert. Start with these key steps:
- Use clear glass or white ceramic dishes to showcase the layers
- Divide your white cream mixture into three separate bowls for precise coloring
- Add red and blue gel food coloring gradually, mixing thoroughly
- Use a small offset spatula for clean, sharp layer lines
Troubleshooting Common Assembly Issues
Layered dessert techniques can be tricky. To prevent color bleeding, allow each layer to set slightly in the refrigerator for 10-15 minutes before adding the next. If your layers start to mix, use a chilled spatula and move slowly and carefully.
Professional Presentation Tips
For a professional finish, chill your dessert completely before cutting. Use a hot knife wiped clean between each slice to create sharp, clean edges that showcase your patriotic design. Garnish with fresh berries or a light dusting of powdered sugar to elevate the presentation.
Creative Variations and Serving Suggestions
I love exploring dessert variations with these No-Bake Oreo Flag Bars! For those wanting to mix things up, try using different Oreo dessert adaptations like Golden Oreos or Chocolate Mint Oreos to create unique flavor profiles. You can easily swap out the traditional red, white, and blue color scheme for other festive palettes perfect for birthdays, graduations, or team celebrations.
My favorite patriotic serving ideas include creating mini individual bars using small rectangular molds. These bite-sized treats work wonderfully for larger gatherings and allow guests to enjoy the dessert without cutting. For a dramatic presentation, arrange the bars on a white platter with fresh strawberries and blueberries to enhance the color scheme and add a fresh fruit element.
When experimenting with Oreo dessert adaptations, consider incorporating additional mix-ins like crushed peppermint during winter holidays or adding colorful sprinkles for a funfetti-style twist. These creative variations can transform the classic recipe into a versatile dessert that suits multiple occasions while maintaining the delightful no-bake convenience that makes this treat so appealing.
Pro tip: Always chill your bars thoroughly before serving to ensure they hold their shape and deliver that perfect creamy texture. With these creative suggestions, you’ll never serve a boring dessert again!


