
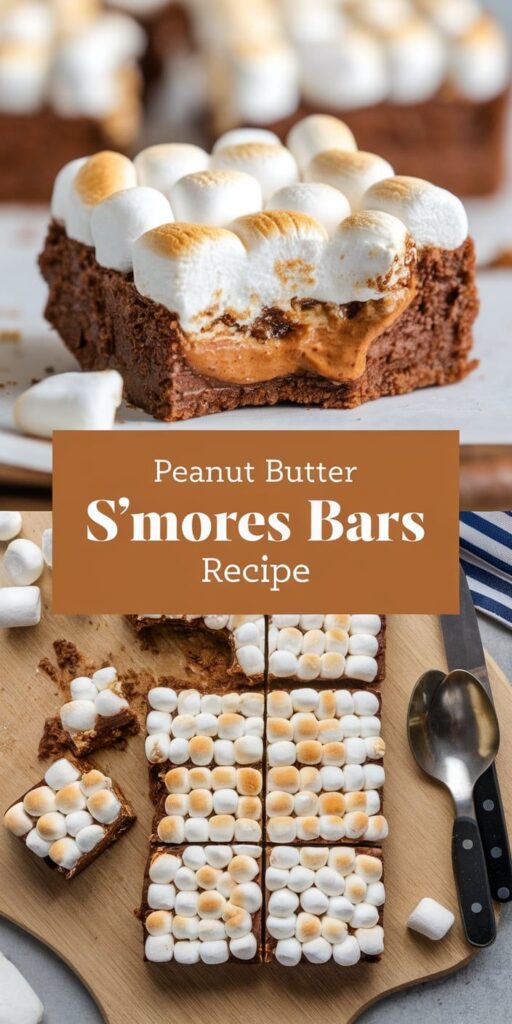
Craving a delightful no-bake dessert that combines the classic campfire treat with creamy peanut butter? My homemade s’mores bars are about to become your new favorite sweet indulgence! These peanut butter s’mores bars deliver all the gooey, chocolatey goodness you love, with an irresistible twist that will make your taste buds dance.
Forget traditional s’mores that require an open flame. These bars bring the magic of summer treats right into your kitchen. With simple ingredients and easy preparation, you’ll create a dessert that looks impressive and tastes absolutely incredible. Perfect for family gatherings, potlucks, or just satisfying your sweet tooth, these bars are sure to become a instant classic.
I’ve crafted this recipe to capture the essence of campfire memories while offering a convenient, delicious treat you can enjoy any time of year. Get ready to transform basic ingredients into a spectacular dessert that will have everyone asking for seconds!
Why You’ll Love These Decadent Peanut Butter S’mores Bars
Get ready to fall in love with the ultimate easy s’mores dessert that will transform your sweet treat experience! These peanut butter dessert bars are more than just a simple recipe – they’re a delightful culinary adventure that captures the essence of campfire-inspired treats without needing an actual campfire.
I’ve crafted these bars to be incredibly versatile and perfect for any gathering or moment of craving. Let me share why these bars are about to become your new favorite dessert:
Perfect for Any Occasion
- Ideal for summer barbecues
- Comforting winter indulgence
- Impressive potluck contribution
- Quick dessert for unexpected guests
Make-Ahead Friendly
Busy home bakers will appreciate how simple these peanut butter dessert bars are to prepare in advance. You can make them hours or even a day before serving, which means less stress and more enjoyment.
No Campfire Required
Craving that classic s’mores flavor? These bars deliver all the nostalgic taste of traditional campfire-inspired treats directly from your kitchen. No outdoor cooking needed!
| Feature | Benefit |
|---|---|
| Preparation Time | 30 minutes or less |
| Skill Level | Easy for all bakers |
| Storage | Up to 5 days in airtight container |
Whether you’re a dessert enthusiast or a casual baker, these peanut butter s’mores bars will become your go-to recipe for delicious, crowd-pleasing treats that bring joy to any moment.
Essential Ingredients for S’mores Bar Success
Creating the perfect peanut butter s’mores bars starts with selecting high-quality s’mores bar ingredients that will elevate your dessert from good to extraordinary. The right combination of ingredients can transform a simple treat into a memorable culinary experience.
Chocolate Selection Tips
When choosing the best chocolate for s’mores bars, quality matters significantly. I recommend using premium chocolate that melts smoothly and provides rich flavor. Consider these chocolate options:
- Milk chocolate bars for classic s’mores taste
- Dark chocolate for deeper, more intense flavor
- Semi-sweet chocolate chips for balanced sweetness
Peanut Butter Options
The creamy vs. crunchy peanut butter debate is real when making s’mores bars. My preference leans towards creamy peanut butter for a smoother texture, but both styles can work beautifully:
- Creamy peanut butter: Provides silky consistency
- Crunchy peanut butter: Adds delightful texture
- Natural peanut butter: Offers more authentic flavor
Graham Cracker Guidelines
Graham crackers form the foundation of your s’mores bars. Select crackers that are fresh and crisp. Honey or cinnamon graham crackers can add an extra layer of flavor to your dessert.
Pro tip: Aim for about 2 cups of graham cracker crumbs, which typically requires 14-16 full graham cracker sheets. Crush them finely for the best base texture.
Kitchen Tools and Equipment Needed
Creating delicious peanut butter s’mores bars requires the right baking tools for s’mores bars and no-bake dessert equipment. I’ll walk you through the essential kitchen gear to make your baking experience smooth and enjoyable.
Essential Baking Equipment
- 9×13 inch baking pan (glass, ceramic, or metal)
- Parchment paper for easy bar removal
- Food processor or zip-top bag with rolling pin
- Medium saucepan
- Large mixing bowl
- Sturdy spatula or wooden spoon
- Measuring cups and spoons
When selecting your baking tools for s’mores bars, precision is key. A high-quality baking pan ensures even heat distribution, while parchment paper makes cleanup a breeze. I recommend using a food processor to create fine graham cracker crumbs, but a rolling pin works perfectly as an alternative.
Optional Specialty Equipment
- Kitchen torch for marshmallow toasting
- Offset spatula for smooth spreading
- Cooling rack
| Tool Category | Recommended Items | Purpose |
|---|---|---|
| Mixing Tools | Large bowl, spatula | Combine ingredients thoroughly |
| Preparation Tools | Food processor, rolling pin | Crush graham crackers |
| Baking Tools | 9×13 inch pan, parchment paper | Create and line baking surface |
My secret tip for no-bake dessert equipment is investing in quality measuring tools. Accurate measurements can make or break your s’mores bars. Don’t worry if you don’t have a kitchen torch – your oven’s broiler works wonderfully for achieving that perfect golden-brown marshmallow finish.
Peanut Butter S’mores Bars Recipe
Get ready to create the ultimate no-bake s’mores bars recipe that combines the classic campfire treat with creamy peanut butter. This peanut butter dessert recipe is sure to become a family favorite, delivering all the delicious flavors of s’mores in an easy-to-make bar form.
Base Layer Instructions
Crafting the perfect base is crucial for these irresistible s’mores bars. You’ll need:
- 2 cups graham cracker crumbs
- 1/2 cup unsalted butter, melted
- 1/2 cup creamy peanut butter
- Pinch of salt
Start by mixing the melted butter and peanut butter until smooth. Fold in the graham cracker crumbs and salt. Press the mixture firmly into a 9×13 inch pan, creating an even, compact base.
Filling Preparation
For the chocolate layer, you’ll need:
- 2 cups milk chocolate chips
- 2 tablespoons heavy cream
Melt the chocolate chips in the microwave, stirring every 30 seconds. Add cream for extra smoothness. Pour the melted chocolate over the graham cracker base, spreading evenly. Chill for 15 minutes until set.
Topping Application
The final touch for these peanut butter s’mores bars involves:
- 3 cups mini marshmallows
- Optional: Kitchen torch or broiler
Spread marshmallows over the chocolate layer. For a classic campfire look, use a kitchen torch to lightly brown the marshmallows or carefully broil for 1-2 minutes. Chill for 2 hours before cutting into squares.
Pro tip: This recipe yields approximately 24 delectable bars that will disappear quickly at any gathering!
Tips for Perfect Texture and Consistency
Crafting the ultimate s’mores bars texture requires careful attention to detail. My expert peanut butter bar tips will help you create a no-bake dessert consistency that’s absolutely irresistible. The key lies in understanding how each layer contributes to the overall mouthfeel of your delectable treat.
- Graham Cracker Base: Press the base firmly into the pan to create a solid foundation
- Chocolate Melting: Use gentle 30-second microwave intervals to prevent graininess
- Marshmallow Topping: Aim for a light golden color with slightly gooey consistency
When working with a no-bake dessert consistency, temperature control is crucial. I recommend chilling your s’mores bars for at least 2 hours to ensure perfect set and clean cutting. The refrigeration process helps stabilize the layers and intensify the flavors.
| Texture Element | Ideal Characteristic | Pro Tip |
|---|---|---|
| Base Layer | Firm but not crumbly | Press firmly when preparing |
| Chocolate Layer | Smooth and glossy | Melt carefully in short intervals |
| Marshmallow Topping | Lightly golden, slightly soft | Watch carefully when toasting |
For serving, let the bars sit at room temperature for 10-15 minutes. This slight warming softens the texture, allowing the rich flavors of peanut butter and chocolate to truly shine through. Remember, patience is your secret weapon in achieving the perfect s’mores bars texture.
Storage and Serving Suggestions
Preserving the delightful flavor and texture of your Peanut Butter S’mores Bars requires some careful attention. I’ll share my top tips for how to store s’mores bars to keep them at their absolute best.
Keeping Bars Fresh
Proper storage is crucial for maintaining the quality of your dessert. Here are my recommended storage methods:
- Refrigerator storage: Place bars in an airtight container
- Maximum refrigerator shelf life: Up to 7 days
- Freezing option: Wrap individually in plastic wrap
- Freeze for up to 3 months for extended enjoyment
Reheating Methods for Peanut Butter Desserts
When it comes to reheating peanut butter desserts, I’ve discovered a few techniques that work perfectly:
- Microwave: 10-15 seconds for a quick warm-up
- Room temperature thawing: 30 minutes for gentle warming
- Avoid overheating to prevent marshmallow from becoming too runny
Serving Temperature Secrets
The serving temperature for dessert bars can make or break your culinary experience. I recommend letting the bars sit at room temperature for 10-15 minutes before serving. This allows the chocolate to soften slightly and the flavors to fully develop.
Pro tip: The ideal serving temperature is when the chocolate is firm but not hard, and the marshmallow remains soft and slightly gooey. Your taste buds will thank you for the perfect balance of textures and temperatures!
Variations and Substitutions
I love exploring s’mores bar variations that can transform this classic dessert into something uniquely delicious. When it comes to peanut butter dessert alternatives, switching out traditional ingredients can create exciting new flavor profiles. Almond butter or cashew butter can easily replace peanut butter, offering a different nutty dimension to the recipe.
Chocolate lovers will appreciate dietary substitutions for dessert bars. Dark chocolate or white chocolate can replace milk chocolate, and creating a marbled effect adds visual appeal. For those with dietary restrictions, gluten-free graham crackers or crushed gluten-free cookies work perfectly as a base.
Vegan bakers can adapt this recipe by using plant-based alternatives like vegan butter, chocolate, and marshmallows. I recommend experimenting with additional flavor enhancers such as a sprinkle of cinnamon in the graham cracker base or a thin layer of raspberry jam between chocolate and marshmallow layers.
Remember that ingredient substitutions might slightly alter the texture and setting time of your bars. My best advice is to embrace creativity and make these Peanut Butter S’mores Bars your own culinary masterpiece. Each variation brings a unique twist to this beloved dessert.


