
If you’re hosting a party and need some sweet ideas that won’t stress you out, you’re in the right place! This list of 24 easy desserts is perfect for impressing your guests without breaking a sweat. From quick treats to make-ahead options, these recipes will have everyone raving about your delicious contributions. Get ready to serve up some smiles!
Chocolate-Dipped Strawberries

Chocolate-dipped strawberries are a classic treat that never fails to impress. They look stunning on any dessert table and are surprisingly easy to make. The combination of sweet, juicy strawberries and rich chocolate creates a delightful contrast that everyone loves.
To make these treats, start with fresh strawberries. The key is to choose ripe, firm berries for the best flavor. Melt some chocolate, dip each strawberry, and let them cool on a baking sheet. You can even drizzle extra chocolate on top for a decorative touch!
These strawberries are perfect for parties, date nights, or just a sweet snack. They’re simple yet elegant, making them a go-to dessert for any occasion.
Ingredients
- 1 pound fresh strawberries
- 8 ounces semi-sweet chocolate chips
- 1 tablespoon coconut oil (optional, for smoothness)
Instructions
- Wash and dry the strawberries thoroughly, ensuring no water remains.
- In a microwave-safe bowl, combine the chocolate chips and coconut oil. Microwave in 30-second intervals, stirring in between, until melted and smooth.
- Hold each strawberry by the stem and dip it into the melted chocolate, covering about two-thirds of the berry.
- Place the dipped strawberries on a baking sheet lined with parchment paper.
- If desired, drizzle extra melted chocolate over the dipped strawberries for decoration.
- Refrigerate for about 30 minutes to allow the chocolate to set.
Fruit Tart with Glazed Berries
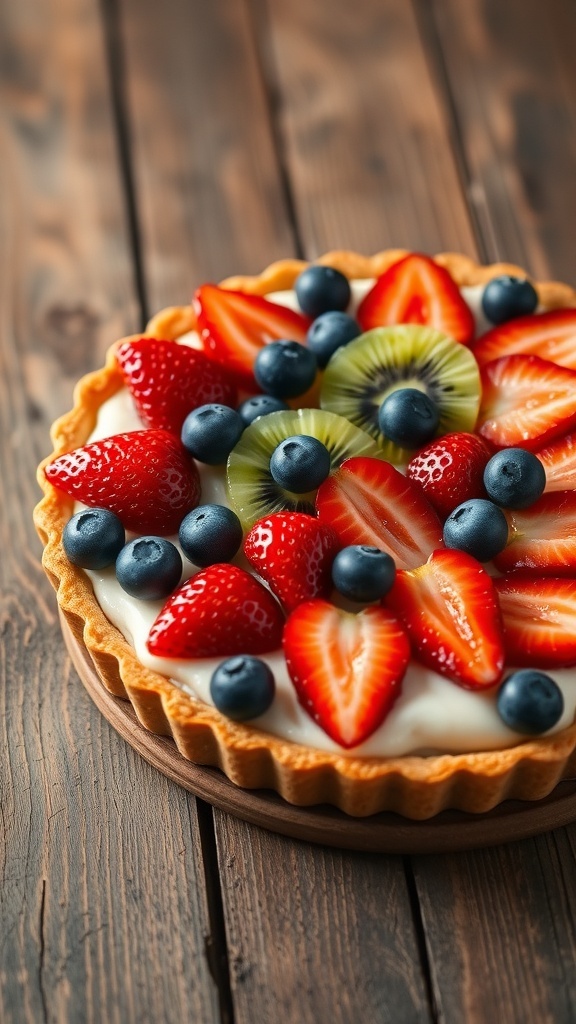
Fruit tarts are a delightful way to showcase fresh fruits. This tart features a buttery crust filled with creamy custard and topped with vibrant berries. The combination of strawberries, blueberries, and kiwi not only looks stunning but also offers a burst of flavor in every bite.
The tart crust is perfectly baked to a golden brown, providing a crunchy base that contrasts beautifully with the smooth filling. The glossy glaze over the berries adds a touch of shine, making it an eye-catching centerpiece for any gathering.
This dessert is not just about looks; it’s also easy to make. You can prepare the crust ahead of time and fill it just before serving. This way, the fruits stay fresh and vibrant, ensuring your tart is a hit at any party.
Ingredients
- 1 pre-made tart shell (9-inch)
- 1 cup heavy cream
- 1/2 cup granulated sugar
- 2 tablespoons cornstarch
- 2 large egg yolks
- 1 teaspoon vanilla extract
- 1 cup strawberries, sliced
- 1 cup blueberries
- 1 kiwi, sliced
- 1/4 cup fruit glaze (store-bought or homemade)
Instructions
- Make the Custard: In a saucepan, whisk together the sugar, cornstarch, and egg yolks. Gradually add the heavy cream while stirring. Cook over medium heat until thickened, about 5-7 minutes. Remove from heat and stir in vanilla extract.
- Fill the Tart Shell: Pour the custard into the pre-made tart shell, spreading it evenly. Let it cool in the fridge for at least 1 hour.
- Top with Fruit: Once the custard is set, arrange the sliced strawberries, blueberries, and kiwi on top of the custard.
- Add Glaze: Brush the fruit with the fruit glaze to give it a shiny finish.
- Serve: Slice and enjoy your beautiful fruit tart!
Lemon Bars with Powdered Sugar
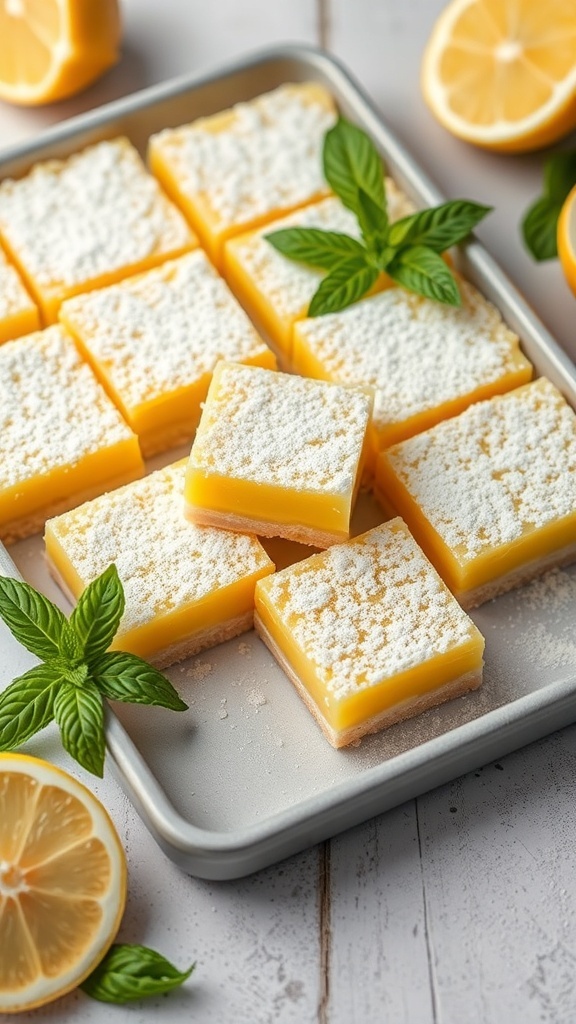
Lemon bars are a classic dessert that never fails to impress. Their bright yellow color and dusting of powdered sugar make them visually appealing and inviting. The combination of sweet and tart flavors creates a refreshing treat that’s perfect for any gathering.
These bars have a buttery crust that crumbles just right, topped with a smooth lemon filling. The powdered sugar adds a touch of sweetness, balancing the tangy lemon flavor. They are easy to cut into squares, making them perfect for serving at parties.
Whether you’re hosting a summer barbecue or a cozy indoor gathering, lemon bars are sure to be a hit. They can be made ahead of time, allowing you to enjoy the party without worrying about dessert. Just keep them chilled until it’s time to serve!
Ingredients
- 1 cup all-purpose flour
- 1/4 cup powdered sugar
- 1/2 cup unsalted butter, softened
- 1 cup granulated sugar
- 2 large eggs
- 1/2 cup fresh lemon juice
- 1 teaspoon lemon zest
- 1/2 teaspoon baking powder
- Powdered sugar for dusting
Instructions
- Preheat the oven to 350°F (175°C). Grease an 8×8 inch baking dish.
- Make the crust: In a bowl, mix flour and powdered sugar. Cut in the butter until crumbly. Press the mixture into the bottom of the prepared dish.
- Bake the crust for 15 minutes until lightly golden.
- While the crust is baking, prepare the filling: In another bowl, whisk together granulated sugar, eggs, lemon juice, lemon zest, and baking powder until smooth.
- Pour the lemon filling over the hot crust and bake for an additional 20-25 minutes, or until set.
- Allow to cool completely before cutting into squares. Dust with powdered sugar before serving.
Decadent Chocolate Lava Cake
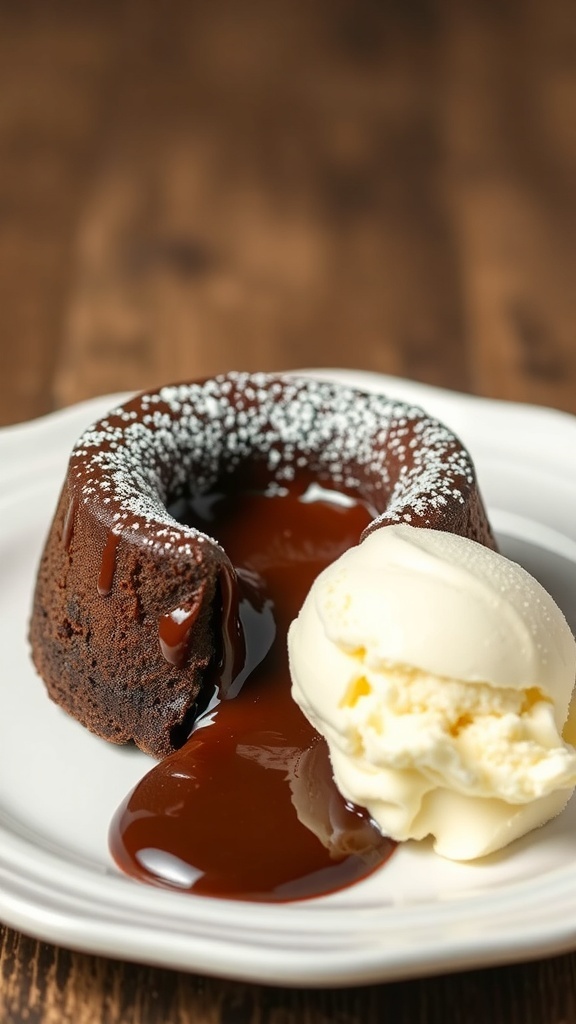
Chocolate lava cake is a classic dessert that never fails to impress. This treat features a warm, gooey center that flows out when you cut into it. The combination of rich chocolate and a soft, molten core makes it a favorite at parties and gatherings.
In the image, you can see a beautifully plated chocolate lava cake, dusted with powdered sugar. The cake sits next to a scoop of creamy vanilla ice cream, which perfectly complements the intense chocolate flavor. The warm chocolate sauce drizzled on the plate adds an extra touch of indulgence.
Making chocolate lava cake at home is easier than you might think. With just a few simple ingredients, you can create a dessert that looks and tastes like it came from a fancy restaurant.
Ingredients
- 1/2 cup unsalted butter
- 1 cup semi-sweet chocolate chips
- 2 large eggs
- 2 large egg yolks
- 1/4 cup granulated sugar
- 2 tablespoons all-purpose flour
- 1/4 teaspoon salt
- Powdered sugar for dusting
- Vanilla ice cream for serving
Instructions
- Preheat your oven to 425°F (220°C). Grease four ramekins with butter and dust with flour.
- In a microwave-safe bowl, melt the butter and chocolate chips together in 30-second intervals, stirring until smooth.
- In another bowl, whisk together the eggs, egg yolks, and granulated sugar until pale and thick.
- Fold the melted chocolate mixture into the egg mixture. Gently stir in the flour and salt until just combined.
- Divide the batter evenly among the prepared ramekins. Place them on a baking sheet.
- Bake for 12-14 minutes, until the edges are firm but the center is soft. Remove from the oven and let cool for 1 minute.
- Carefully invert each ramekin onto a plate. Dust with powdered sugar and serve immediately with a scoop of vanilla ice cream.
Mango Mousse with Coconut Whipped Cream
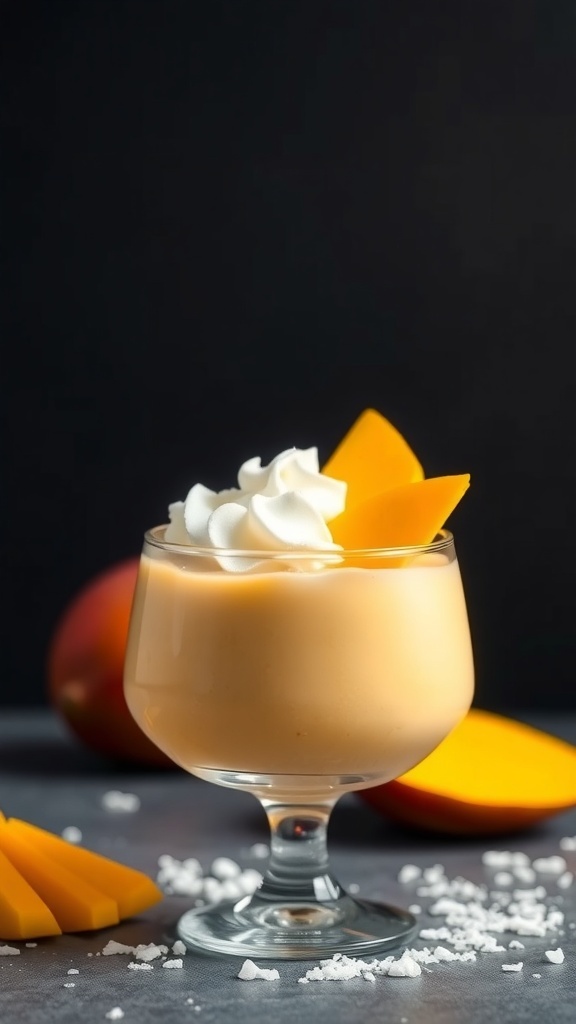
Mango mousse is a delightful treat that brings a tropical twist to any gathering. The image showcases a creamy, smooth mousse topped with fluffy coconut whipped cream and garnished with fresh mango slices. It’s not just a feast for the eyes; it’s a burst of flavor that will impress your guests.
This dessert is light and airy, making it perfect for warm days or festive occasions. The combination of sweet mango and rich coconut creates a refreshing taste that everyone will love. Plus, it’s easy to make, so you can whip it up without any hassle!
Ingredients
- 2 ripe mangoes, peeled and diced
- 1/2 cup sugar
- 1 cup heavy cream
- 1 teaspoon vanilla extract
- 1 tablespoon gelatin powder
- 3 tablespoons water
- 1 cup coconut cream
- Fresh mango slices for garnish
Instructions
- Prepare the Gelatin: In a small bowl, sprinkle gelatin over water and let it sit for about 5 minutes until it blooms.
- Blend the Mango: In a blender, combine diced mango and sugar. Blend until smooth.
- Heat the Gelatin: Gently heat the bloomed gelatin in the microwave for about 10 seconds until dissolved. Stir it into the mango puree.
- Whip the Cream: In a separate bowl, whip the heavy cream and vanilla extract until soft peaks form.
- Combine: Gently fold the whipped cream into the mango mixture until well combined.
- Chill: Pour the mousse into serving glasses and refrigerate for at least 2 hours until set.
- Make Coconut Whipped Cream: In a bowl, whip the coconut cream until fluffy. Top the chilled mousse with coconut whipped cream and garnish with fresh mango slices before serving.
Pavlova with Passion Fruit and Kiwi
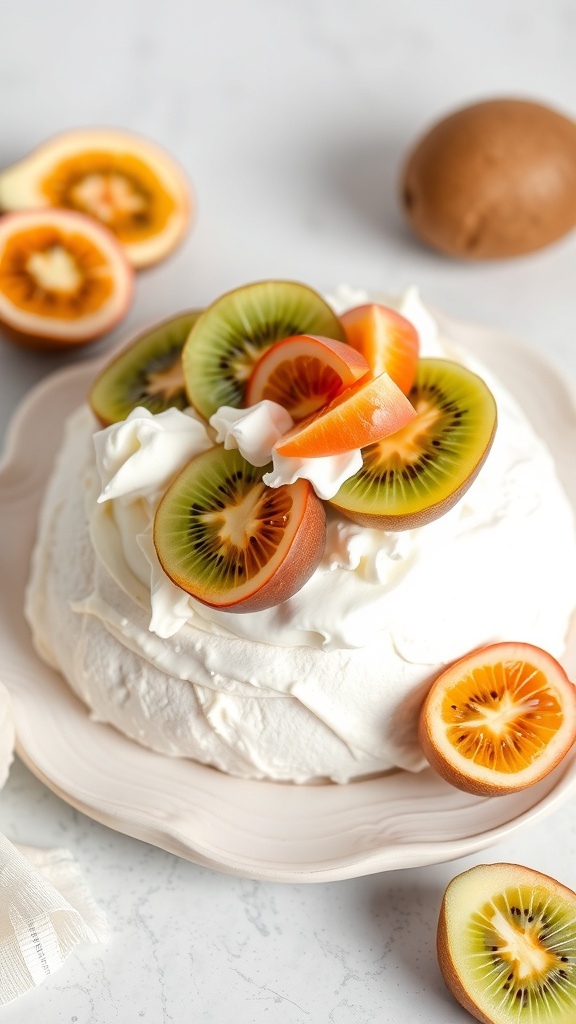
Pavlova is a light and airy dessert that is sure to impress at any gathering. This version is topped with vibrant passion fruit and kiwi, adding a burst of color and flavor. The crisp exterior and soft, marshmallow-like interior make it a delightful treat.
The combination of sweet whipped cream and tangy fruit creates a perfect balance. Each slice offers a satisfying crunch followed by a creamy finish. It’s a showstopper that’s surprisingly simple to make!
Gather your friends and family, and watch their faces light up when you serve this stunning dessert. It’s perfect for celebrations or just a sweet treat at home.
Ingredients
- 4 large egg whites
- 1 cup granulated sugar
- 1 teaspoon vanilla extract
- 1 teaspoon white vinegar
- 2 cups heavy whipping cream
- 2 tablespoons powdered sugar
- 2 ripe kiwis, peeled and sliced
- 2 passion fruits, halved
Instructions
- Preheat your oven to 250°F (120°C). Line a baking sheet with parchment paper.
- In a large bowl, beat the egg whites until soft peaks form. Gradually add sugar, continuing to beat until stiff peaks form and the mixture is glossy.
- Gently fold in vanilla extract and vinegar. Spoon the mixture onto the prepared baking sheet, shaping it into a circle with a slight well in the center.
- Bake for 1 hour, then turn off the oven and let the pavlova cool completely inside.
- Once cooled, whip the heavy cream with powdered sugar until soft peaks form. Spread the whipped cream over the pavlova.
- Top with sliced kiwi and spoon out the passion fruit pulp over the cream. Serve immediately and enjoy!
Classic Tiramisu with Coffee Dusting
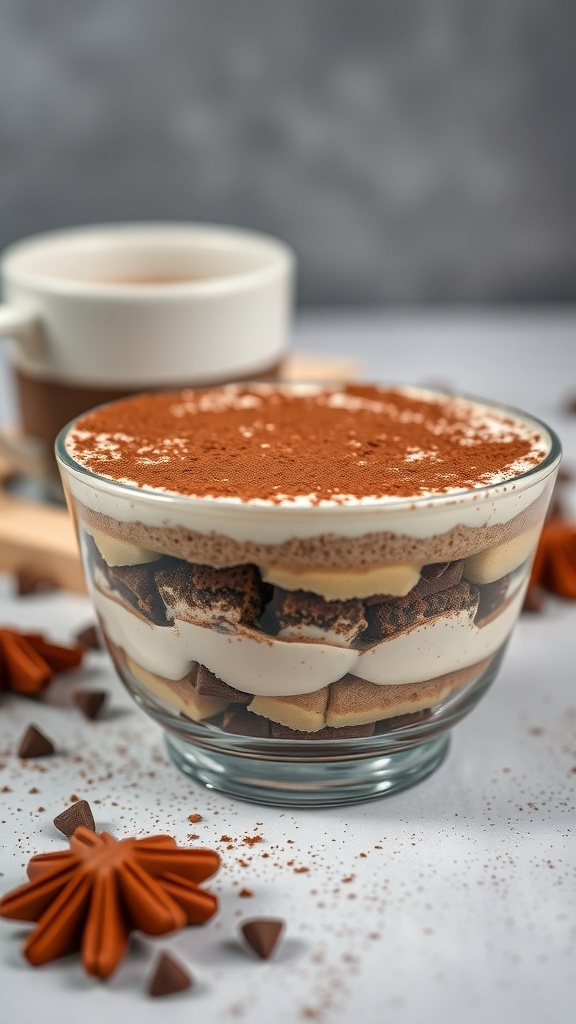
Classic tiramisu is a crowd-pleaser that never goes out of style. This delightful dessert features layers of coffee-soaked ladyfingers and a rich mascarpone cream. The finishing touch is a light dusting of cocoa powder, adding a touch of elegance and flavor. The image captures the beauty of this dessert, showcasing its creamy layers and inviting texture. A warm cup of coffee in the background hints at the perfect pairing for this treat.
Making tiramisu is easier than you might think. It’s a great choice for parties, as it can be prepared ahead of time and served chilled. Your guests will be impressed by its delicious taste and beautiful presentation.
Mini Cheesecakes with Berry Compote
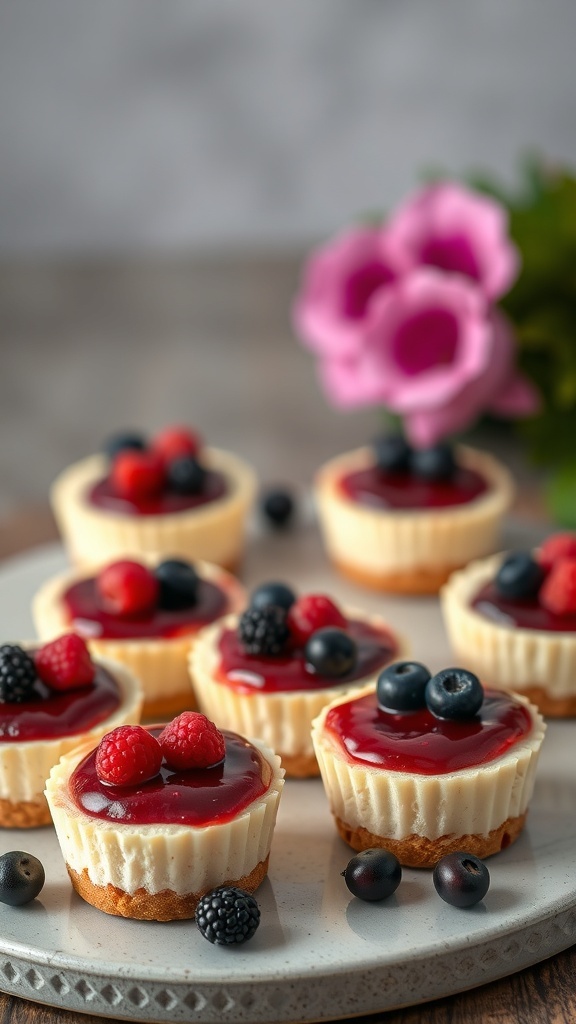
Mini cheesecakes are a delightful treat that can brighten up any gathering. These little desserts are not only cute but also packed with flavor. Topped with a vibrant berry compote, they offer a perfect balance of sweetness and tartness. The creamy texture of the cheesecake pairs wonderfully with the fresh berries, making each bite a joy.
These mini cheesecakes are easy to make and can be prepared ahead of time. They look stunning on a dessert table, especially when garnished with extra berries. Your guests will be impressed by your baking skills, and they won’t believe how simple these are to whip up!
Ingredients
- 1 cup graham cracker crumbs
- 1/4 cup granulated sugar
- 1/2 cup unsalted butter, melted
- 16 oz cream cheese, softened
- 1/2 cup granulated sugar
- 1 teaspoon vanilla extract
- 2 large eggs
- 1 cup mixed berries (strawberries, blueberries, raspberries)
- 1/4 cup sugar (for compote)
- 1 tablespoon lemon juice
Instructions
- Preheat the oven to 325°F (160°C). Line a muffin tin with paper liners.
- In a bowl, mix graham cracker crumbs, 1/4 cup sugar, and melted butter until combined. Press the mixture into the bottom of each muffin liner to form a crust.
- In another bowl, beat cream cheese and 1/2 cup sugar until smooth. Add vanilla and eggs, mixing until just combined.
- Pour the cream cheese mixture over the crusts in the muffin tin, filling each liner about 3/4 full.
- Bake for 18-20 minutes, or until the centers are set. Let them cool completely before removing from the tin.
- For the berry compote, combine mixed berries, 1/4 cup sugar, and lemon juice in a saucepan. Cook over medium heat until the berries break down and the mixture thickens, about 10 minutes.
- Once the cheesecakes are cool, top each with the berry compote. Chill in the refrigerator until ready to serve.
Raspberry Sorbet in Elegant Cups
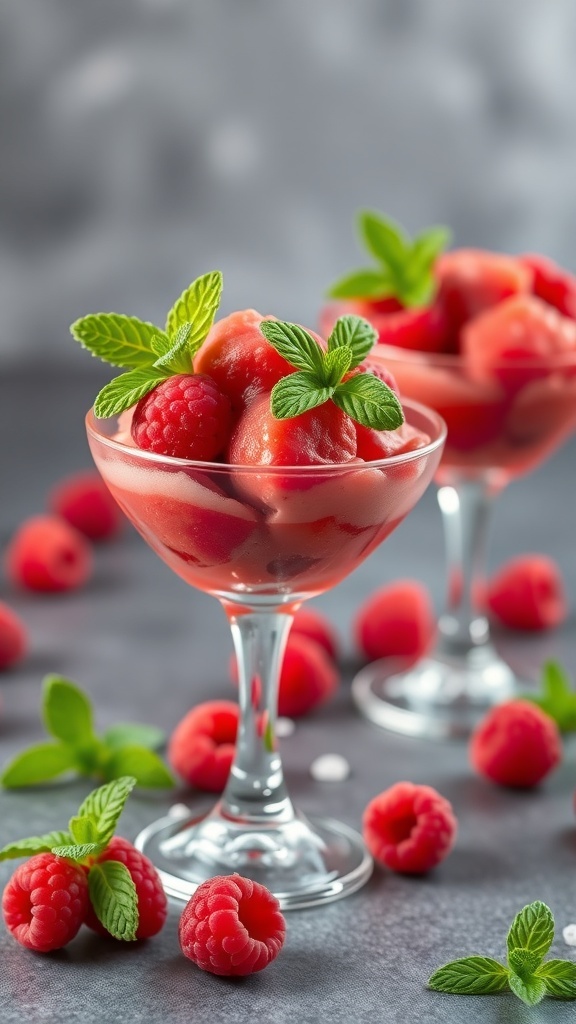
Raspberry sorbet is a refreshing treat that never fails to impress. The vibrant red color and smooth texture make it a perfect dessert for any gathering. Served in elegant cups, this sorbet looks as good as it tastes. The bright raspberries are not just a feast for the eyes; they pack a punch of flavor that everyone will love.
Making raspberry sorbet is simple and requires just a few ingredients. It’s a great way to showcase fresh raspberries, especially during their peak season. The sorbet is light, fruity, and a fantastic palate cleanser between courses or a sweet finish to a meal.
To prepare this delightful dessert, you’ll need fresh raspberries, sugar, lemon juice, and water. The combination of these ingredients creates a sweet and tangy flavor that’s hard to resist. Plus, it’s dairy-free, making it suitable for various dietary preferences.
Once you’ve whipped up this sorbet, serve it in stylish cups and garnish with mint leaves for that extra touch. Your guests will be impressed by both the presentation and the taste!
Almond Joy Cake Pops
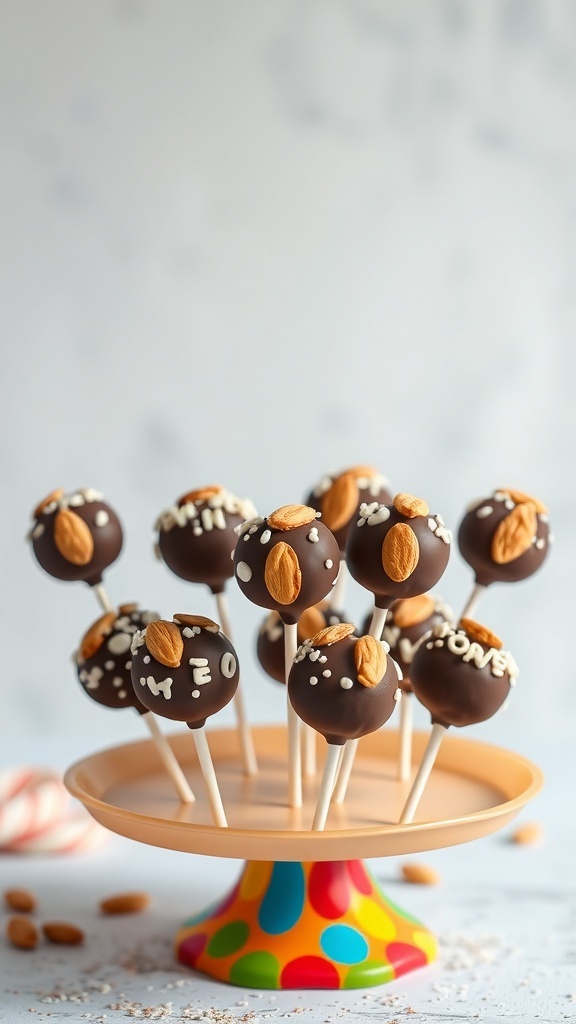
Almond Joy Cake Pops are a delightful treat that combines the flavors of chocolate, coconut, and almonds. These little bites of joy are perfect for any gathering, making them a hit at parties. The image showcases a colorful platter filled with these cake pops, each topped with an almond and decorated with white sprinkles. They look fun and inviting, making it hard to resist grabbing one!
Making these cake pops is a breeze. Start by baking a chocolate cake, then crumble it into fine pieces. Mix in some frosting to bind the crumbs together. Roll the mixture into small balls and insert sticks. After chilling, dip them in melted chocolate and add your toppings. The result is a sweet treat that everyone will love!
Ingredients
- 1 chocolate cake (store-bought or homemade)
- 1 cup chocolate frosting
- 12 ounces chocolate melting wafers
- Almonds for topping
- White sprinkles
- Cake pop sticks
Instructions
- Crumble the chocolate cake into a large bowl. Mix in the chocolate frosting until well combined.
- Roll the mixture into small balls, about 1 inch in diameter. Place them on a baking sheet lined with parchment paper.
- Insert cake pop sticks into each ball and freeze for about 30 minutes until firm.
- Melt the chocolate wafers according to package instructions. Dip each cake pop into the melted chocolate, allowing excess to drip off.
- Before the chocolate sets, top each pop with an almond and sprinkle with white sprinkles.
- Let the cake pops cool completely before serving. Enjoy your Almond Joy Cake Pops!
Peanut Butter Cup Ice Cream Sundae
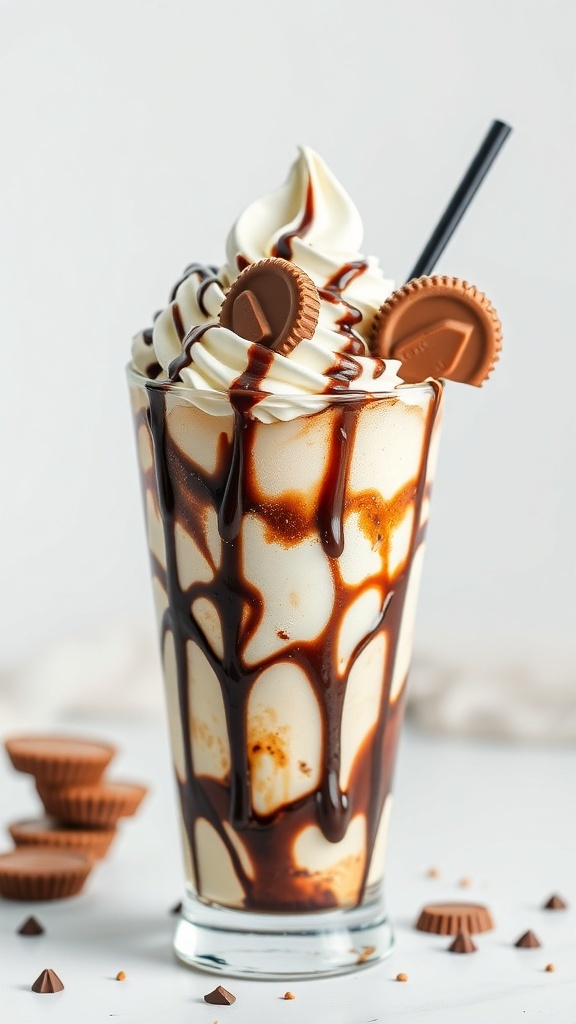
This Peanut Butter Cup Ice Cream Sundae is a showstopper at any gathering. Imagine a tall glass filled with creamy vanilla ice cream, drizzled generously with chocolate syrup, and topped with fluffy whipped cream. The pièce de résistance? Mini peanut butter cups peeking out from the top, making it impossible to resist.
Creating this dessert is simple and fun. You can customize it to your liking, adding more toppings or even switching up the ice cream flavors. It’s a delightful treat that brings joy to both kids and adults alike.
Let’s get into how to whip up this delicious sundae!
Ingredients
- 4 cups vanilla ice cream
- 1/2 cup chocolate syrup
- 1 cup whipped cream
- 1 cup mini peanut butter cups, halved
- 1/4 cup crushed peanuts (optional)
- 1/4 cup caramel sauce (optional)
Instructions
- Start by scooping the vanilla ice cream into a tall glass, filling it about halfway.
- Drizzle chocolate syrup over the ice cream, allowing it to flow down the sides.
- Add another layer of ice cream on top, filling the glass to the rim.
- Top with a generous dollop of whipped cream.
- Garnish with halved mini peanut butter cups and crushed peanuts if desired.
- Finish with an extra drizzle of chocolate syrup or caramel sauce for added sweetness.
- Grab a spoon and enjoy your delicious Peanut Butter Cup Ice Cream Sundae!
Coconut Macaroons with Chocolate Drizzle
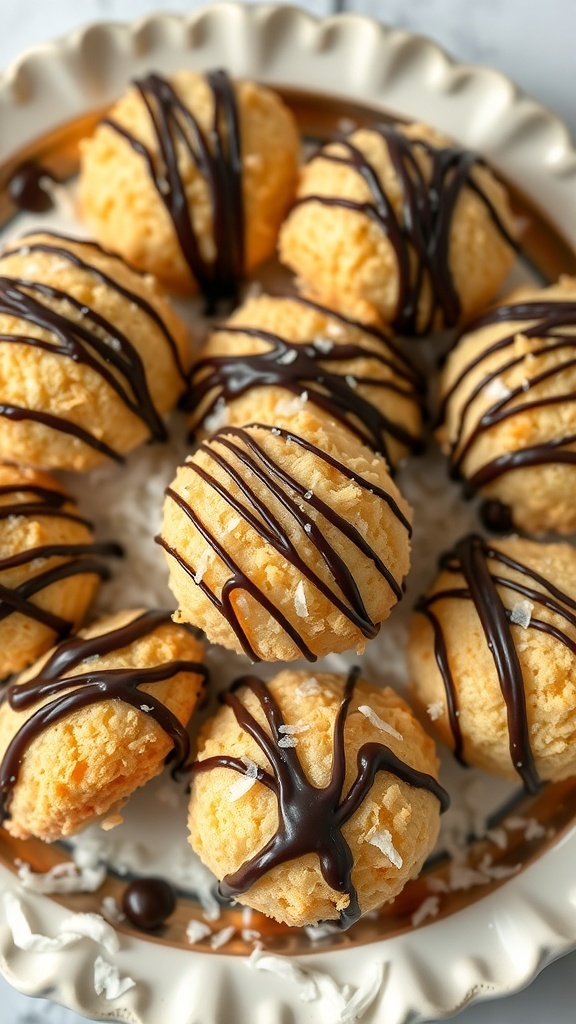
Coconut macaroons are a delightful treat that combines the sweetness of coconut with a rich chocolate drizzle. These little bites are perfect for any gathering, adding a touch of sweetness to your dessert table. The golden, toasted coconut paired with dark chocolate creates a flavor combination that is hard to resist.
Making coconut macaroons is simple and fun. You only need a few ingredients, and the process is quick. Once baked, the macaroons are drizzled with melted chocolate, making them look as good as they taste. They’re sure to impress your guests!
Ingredients
- 3 cups sweetened shredded coconut
- 1 cup sweetened condensed milk
- 1 teaspoon vanilla extract
- 1/4 teaspoon salt
- 1 cup semi-sweet chocolate chips
Instructions
- Preheat the oven to 325°F (160°C) and line a baking sheet with parchment paper.
- In a large bowl, combine the shredded coconut, sweetened condensed milk, vanilla extract, and salt. Mix until well combined.
- Using a cookie scoop or your hands, form small balls of the coconut mixture and place them on the prepared baking sheet.
- Bake for 20-25 minutes, or until the macaroons are golden brown. Remove from the oven and let them cool completely.
- While the macaroons cool, melt the chocolate chips in a microwave-safe bowl in 30-second intervals, stirring until smooth.
- Drizzle the melted chocolate over the cooled macaroons using a fork or a piping bag. Allow the chocolate to set before serving.
Chocolate Mousse in Chocolate Cups
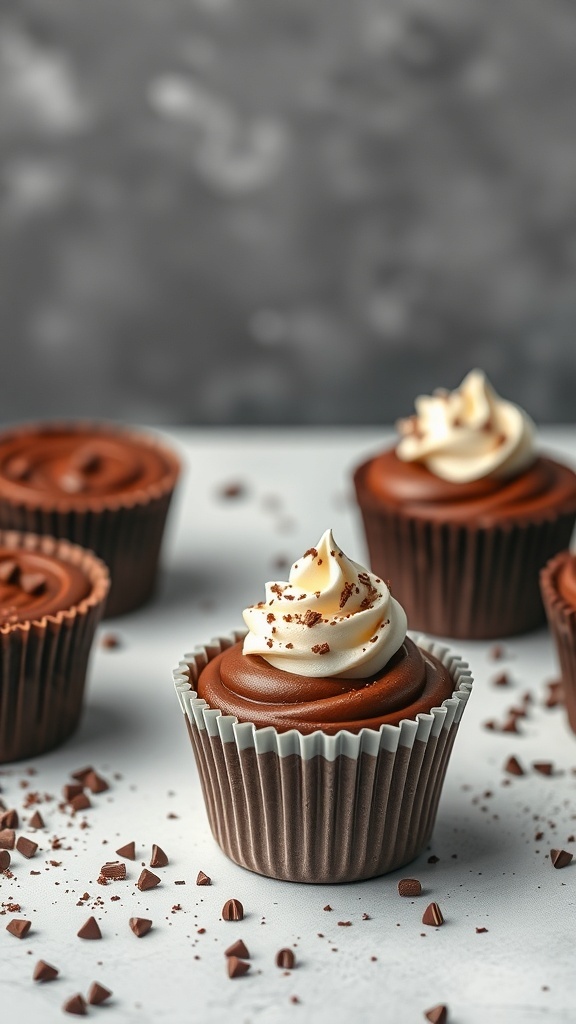
Chocolate mousse in chocolate cups is a delightful treat that combines rich flavors with an elegant presentation. These little cups are not just visually appealing; they also pack a punch of chocolate goodness. The creamy mousse is smooth and airy, making it a perfect dessert for any gathering.
To make these chocolate cups, you can easily melt chocolate and mold it into cup shapes. Once set, fill them with a luscious chocolate mousse that will have everyone coming back for seconds. Top them off with a swirl of whipped cream and a sprinkle of chocolate shavings for that extra touch.
This dessert is sure to impress your guests and is surprisingly simple to make. Whether it’s a birthday party, a holiday gathering, or just a casual get-together, these chocolate mousse cups will steal the show.
Ingredients
- 8 oz dark chocolate, chopped
- 1 cup heavy cream
- 2 tablespoons sugar
- 1 teaspoon vanilla extract
- 2 large eggs, separated
- 1 tablespoon cocoa powder
- Whipped cream, for topping
- Chocolate shavings, for garnish
Instructions
- Make the Chocolate Cups: Melt the dark chocolate in a microwave or double boiler until smooth. Let it cool slightly. Using a spoon, coat the insides of silicone cupcake molds with the melted chocolate. Place in the freezer for about 15 minutes to set.
- Prepare the Mousse: In a bowl, whip the heavy cream with sugar and vanilla until soft peaks form. In another bowl, beat the egg yolks until pale. Gently fold the whipped cream into the egg yolks.
- In a separate bowl, beat the egg whites until stiff peaks form. Gradually fold the egg whites into the chocolate mixture, then fold in the whipped cream mixture until combined.
- Fill the Cups: Remove the chocolate cups from the molds and fill each with the chocolate mousse. Smooth the tops and refrigerate for at least 2 hours.
- Serve: Before serving, top each cup with a dollop of whipped cream and sprinkle with chocolate shavings. Enjoy!
Banoffee Pie with Whipped Cream
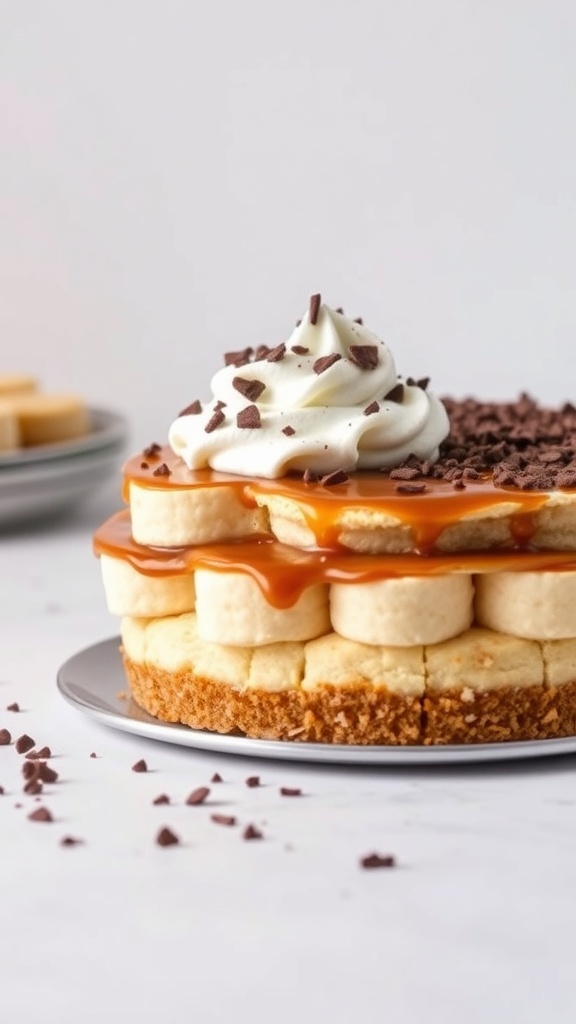
Banoffee pie is a delightful treat that combines the rich flavors of bananas, toffee, and whipped cream. This dessert is not just a feast for the taste buds; it’s also a visual delight. Imagine a pie with layers of creamy toffee, fresh banana slices, and a generous dollop of whipped cream on top, all resting on a buttery biscuit base. The combination of textures and flavors makes it a sure hit at any gathering.
The beauty of banoffee pie lies in its simplicity. You can whip it up in no time, making it perfect for parties or casual get-togethers. The sweet caramel sauce drizzled over the bananas adds a touch of indulgence, while the whipped cream lightens the dish, creating a balance that everyone will love.
Ready to impress your friends and family? Here’s how to make this scrumptious dessert!
Ingredients
- 1 ½ cups digestive biscuits, crushed
- ½ cup unsalted butter, melted
- 1 can (14 oz) sweetened condensed milk
- 2 ripe bananas, sliced
- 1 cup heavy whipping cream
- 2 tablespoons powdered sugar
- Chocolate shavings, for garnish
Instructions
- Prepare the Base: In a bowl, combine the crushed digestive biscuits with melted butter. Press this mixture into the bottom of a pie dish to form a crust. Chill in the fridge for about 30 minutes.
- Make the Toffee: In a saucepan, cook the sweetened condensed milk over low heat, stirring constantly for about 10-15 minutes until it turns a caramel color. Pour this over the chilled crust.
- Add Bananas: Layer the sliced bananas over the toffee, spreading them evenly.
- Whip the Cream: In a mixing bowl, beat the heavy cream with powdered sugar until soft peaks form. Spread this whipped cream over the bananas.
- Garnish: Sprinkle chocolate shavings on top for a finishing touch. Chill the pie for at least an hour before serving.
Caramel Pecan Brownies
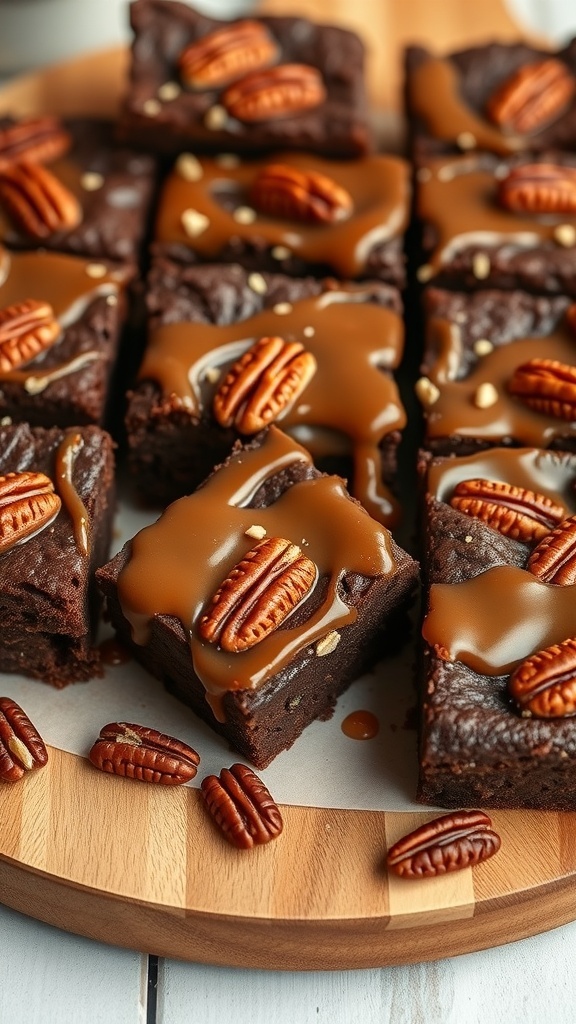
Caramel Pecan Brownies are a delightful treat that combines rich chocolate with the crunch of pecans and a sweet caramel drizzle. These brownies are perfect for any gathering, making them a crowd favorite. The glossy caramel on top adds a touch of elegance, while the pecans provide a satisfying crunch. They look great on a dessert table and taste even better!
Making these brownies is simple and fun. Start with a basic brownie mix, then fold in chopped pecans for that nutty flavor. Once baked, drizzle warm caramel over the top and add a few whole pecans for decoration. Your guests will be impressed by both the presentation and the taste!
Ingredients
- 1 cup unsalted butter
- 2 cups granulated sugar
- 4 large eggs
- 1 teaspoon vanilla extract
- 1 cup all-purpose flour
- 1 cup cocoa powder
- 1/2 teaspoon salt
- 1 cup chopped pecans
- 1 cup caramel sauce
- 1/2 cup whole pecans for topping
Instructions
- Preheat your oven to 350°F (175°C). Grease a 9×13 inch baking pan.
- In a large bowl, melt the butter. Stir in the sugar until well combined.
- Add the eggs one at a time, mixing well after each addition. Stir in the vanilla extract.
- In another bowl, mix the flour, cocoa powder, and salt. Gradually add this to the wet mixture, stirring until just combined.
- Fold in the chopped pecans.
- Pour the batter into the prepared pan and spread evenly.
- Bake for 25-30 minutes or until a toothpick comes out clean.
- Once cooled, drizzle caramel sauce over the brownies and top with whole pecans.
- Cut into squares and serve!
Vanilla Panna Cotta with Berry Sauce
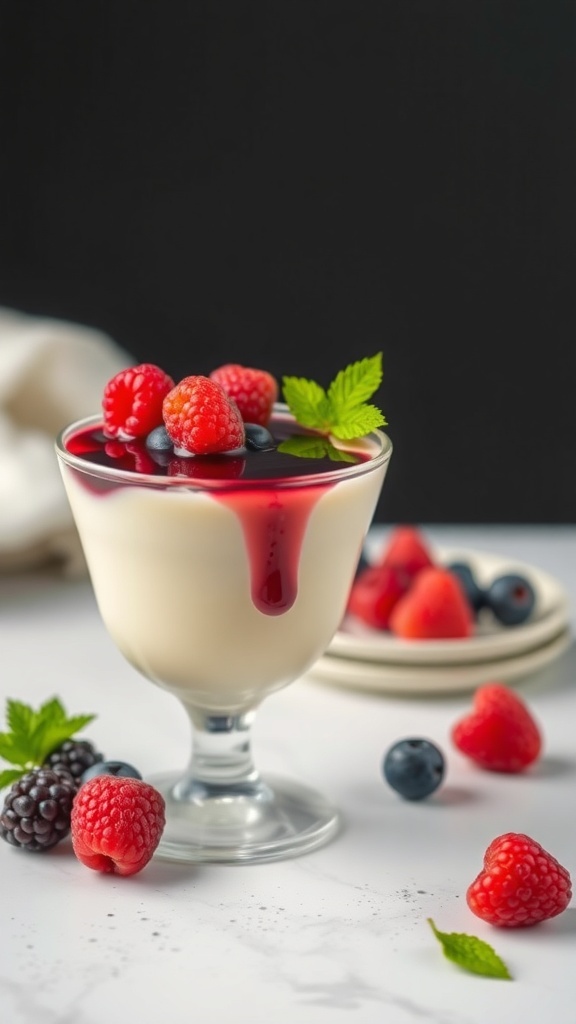
Vanilla panna cotta is a classic dessert that never fails to impress. Its creamy texture and delicate vanilla flavor make it a favorite at any gathering. Topped with a vibrant berry sauce, this dessert is not just a treat for the taste buds but also a feast for the eyes.
The panna cotta itself is smooth and silky, while the berry sauce adds a fresh, tangy contrast. This combination creates a delightful balance that guests will love. Plus, it’s simple to make, allowing you to focus on enjoying the party.
To prepare this dessert, you’ll need just a few ingredients. The panna cotta requires heavy cream, sugar, gelatin, and vanilla. For the berry sauce, fresh berries like raspberries and blueberries work beautifully. You can use a mix or stick to your favorites!
Here’s how to make it:
Ingredients
- 2 cups heavy cream
- 1/2 cup granulated sugar
- 1 teaspoon vanilla extract
- 1 packet (2 1/4 teaspoons) unflavored gelatin
- 3 tablespoons cold water
- 1 cup mixed berries (raspberries, blueberries, blackberries)
- 1/4 cup water (for sauce)
- 1 tablespoon sugar (for sauce)
Instructions
- Prepare the Gelatin: In a small bowl, sprinkle gelatin over cold water. Let it sit for about 5 minutes until it blooms.
- Heat the Cream: In a saucepan, combine heavy cream and sugar. Heat over medium until sugar dissolves, but do not boil. Remove from heat and stir in the bloomed gelatin and vanilla extract until fully dissolved.
- Pour into Molds: Divide the mixture into serving cups or molds. Refrigerate for at least 4 hours or until set.
- Make the Berry Sauce: In a small saucepan, combine mixed berries, water, and sugar. Cook over medium heat until the berries break down and the sauce thickens, about 5-7 minutes. Strain if desired.
- Serve: Once the panna cotta is set, gently unmold if using molds. Top with berry sauce and fresh berries before serving.


