
Brighten up your next gathering with a splash of color and creativity! This collection of 30 delightful desserts is perfect for parties, bringing together fun flavors and eye-catching presentations. From fruity treats to candy-coated delights, these sweet options will surely impress your guests and make any celebration unforgettable.
Neon Jello Cups
Neon Jello Cups are a fun and colorful treat perfect for any party. These vibrant desserts are not just a feast for the eyes; they are also a delightful burst of flavor. Each cup features layers of bright, neon-colored jello, creating a stunning visual effect that will impress your guests.
The layers can be made in various flavors, allowing you to mix and match to suit your taste. Topped with a generous swirl of whipped cream, these cups are sure to bring a smile to everyone’s face. They are easy to make and can be prepared ahead of time, making them a great choice for busy party planners.
To create your own Neon Jello Cups, gather your favorite jello flavors and some whipped cream. The layering process is simple: prepare each flavor separately, let them set, and then layer them in clear cups. The result is a colorful, eye-catching dessert that’s as fun to eat as it is to look at!
Fruit Tart with Glazed Berries
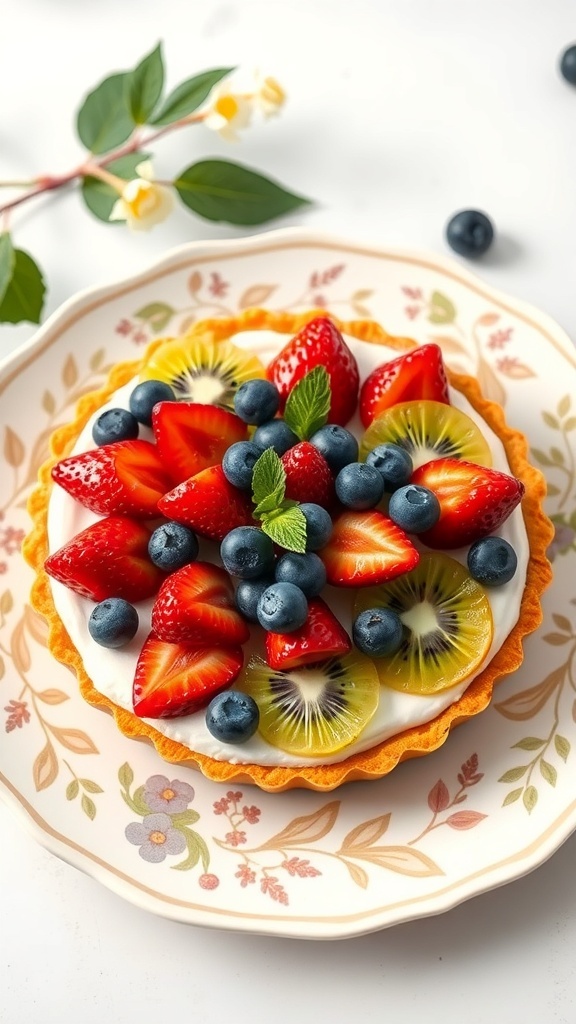
This fruit tart is a showstopper for any gathering. The bright colors of the glazed berries make it visually appealing and inviting. With a crisp crust and creamy filling, it’s a delightful treat that everyone will love.
The tart features a buttery crust filled with a smooth vanilla cream. Topped with fresh strawberries, blueberries, and kiwi, it’s a refreshing dessert that bursts with flavor. The glaze adds a shiny finish, making the fruits look even more tempting.
Perfect for parties, this dessert is not just pretty but also easy to slice and serve. It’s a great way to showcase seasonal fruits and impress your guests!
Ingredients
- 1 pre-made tart crust
- 1 cup heavy cream
- 1/2 cup powdered sugar
- 1 teaspoon vanilla extract
- 1 cup strawberries, sliced
- 1 cup blueberries
- 2 kiwis, peeled and sliced
- 1/4 cup apricot jam
- 1 tablespoon water
Instructions
- Prepare the Cream: In a mixing bowl, whip the heavy cream with powdered sugar and vanilla extract until soft peaks form.
- Fill the Tart: Spread the whipped cream evenly into the pre-made tart crust.
- Add the Fruits: Arrange the sliced strawberries, blueberries, and kiwi on top of the cream.
- Make the Glaze: In a small saucepan, heat apricot jam and water until melted. Brush the glaze over the fruits to give them a shiny finish.
- Chill and Serve: Refrigerate the tart for at least 1 hour before serving. Slice and enjoy!
Bright Fruit Skewers
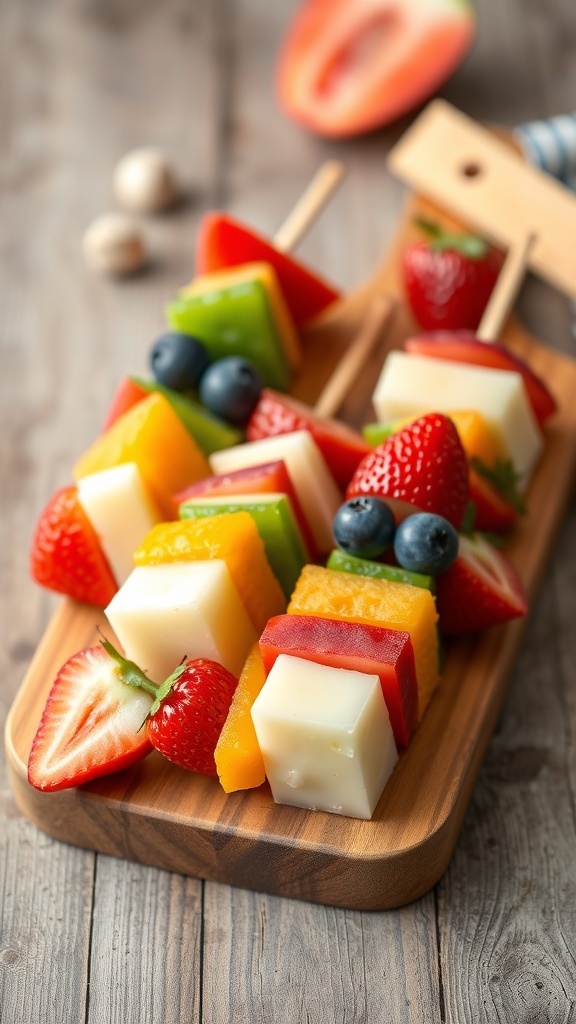
Bright fruit skewers are a fun and colorful addition to any party. These delightful treats are not only visually appealing but also packed with flavor and nutrition. Imagine a platter filled with vibrant pieces of fruit, all neatly arranged on skewers. They are perfect for guests of all ages and can be customized to suit any taste.
To create these skewers, you can use a variety of fruits like strawberries, blueberries, kiwi, pineapple, and watermelon. The combination of colors makes them eye-catching and inviting. Plus, they are easy to grab and enjoy, making them a great finger food option for parties.
For an extra touch, consider adding cubes of cheese between the fruit pieces. This adds a creamy texture that pairs wonderfully with the sweetness of the fruit. Drizzle a little honey or yogurt on top for a delicious dip that will have everyone coming back for more!
Ingredients
- 1 cup strawberries, hulled and halved
- 1 cup pineapple, cut into chunks
- 1 cup kiwi, peeled and sliced
- 1 cup watermelon, cut into cubes
- 1 cup blueberries
- 1 cup cheese, cut into cubes (optional)
- Honey or yogurt for drizzling (optional)
Instructions
- Prepare the Fruit: Wash and cut all the fruit into bite-sized pieces. If using cheese, cut it into cubes as well.
- Assemble the Skewers: Take a skewer and start threading the fruit pieces onto it. Alternate between different fruits and cheese cubes for a colorful display.
- Drizzle and Serve: Once all the skewers are assembled, drizzle with honey or serve with yogurt on the side for dipping.
- Enjoy: Serve immediately or refrigerate until ready to serve. These skewers are best enjoyed fresh!
Confetti Sugar Cookies
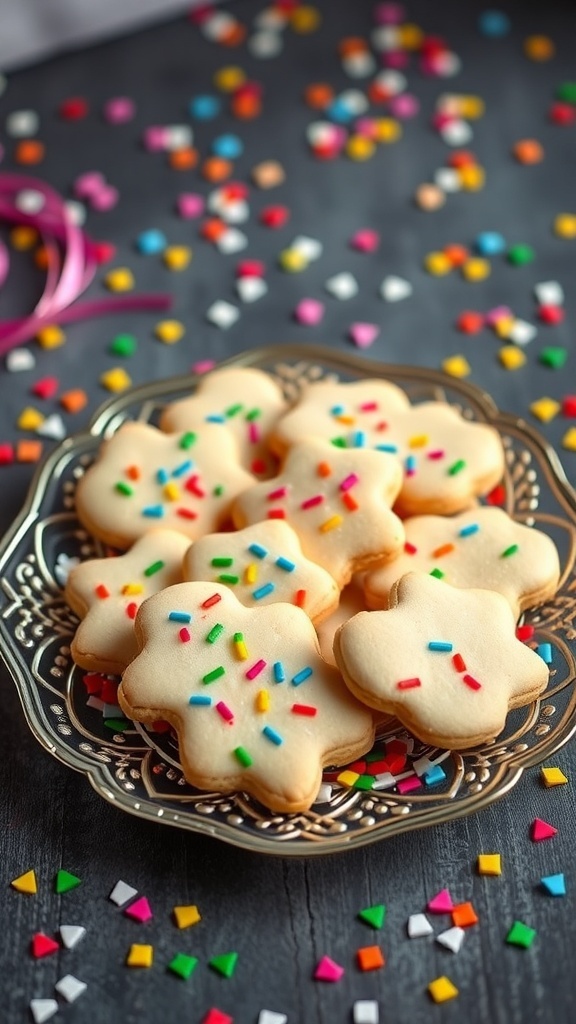
Confetti sugar cookies are a delightful treat that adds a splash of color to any party. These cookies are not just tasty; they are also visually appealing. The soft, buttery texture pairs perfectly with the fun, colorful sprinkles that adorn them. Each bite is a sweet reminder of celebrations and joy.
These cookies are easy to make and perfect for any occasion. Whether it’s a birthday party, a holiday gathering, or just a fun get-together, confetti sugar cookies will surely bring smiles. The vibrant sprinkles make them look festive, and they taste as good as they look!
Gather your friends or family and whip up a batch. Everyone can join in on the fun of decorating these cookies. It’s a great way to get creative and make each cookie unique. Plus, they make for a wonderful gift or party favor!
Ingredients
- 2 3/4 cups all-purpose flour
- 1 teaspoon baking soda
- 1/2 teaspoon baking powder
- 1 cup unsalted butter, softened
- 1 1/2 cups white sugar
- 1 egg
- 1 teaspoon vanilla extract
- 1/2 teaspoon almond extract
- 3/4 cup sprinkles
Instructions
- Preheat your oven to 375°F (190°C).
- In a bowl, mix together the flour, baking soda, and baking powder. Set aside.
- In a large bowl, cream together the butter and sugar until smooth. Beat in the egg, vanilla extract, and almond extract.
- Gradually blend in the dry ingredients. Stir in the sprinkles.
- Drop by rounded tablespoon onto ungreased cookie sheets.
- Bake for 8 to 10 minutes in the preheated oven, or until golden. Let cool on wire racks.
Rainbow Layer Cake
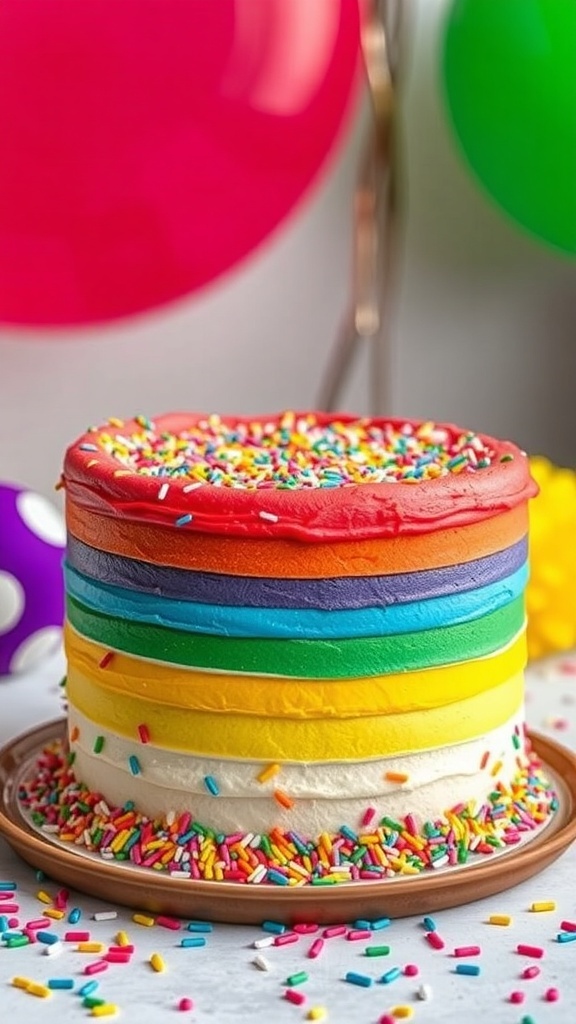
Rainbow Layer Cake is a showstopper that brings joy to any party. With its vibrant layers, this cake is as fun to make as it is to eat. Each slice reveals a burst of colors, making it perfect for celebrations. The cake is often topped with a fluffy frosting and sprinkled with colorful confetti, adding to its festive vibe.
Making this cake is a delightful experience. You can get creative with the colors and flavors, using different cake batters for each layer. The bright hues are sure to impress your guests and make your party unforgettable.
Ingredients
- 2 ½ cups all-purpose flour
- 2 ½ teaspoons baking powder
- ½ teaspoon salt
- 1 cup unsalted butter, softened
- 2 cups granulated sugar
- 4 large eggs
- 1 tablespoon vanilla extract
- 1 cup milk
- Food coloring (red, orange, yellow, green, blue, purple)
- Sprinkles for decoration
Instructions
- Preheat your oven to 350°F (175°C). Grease and flour six 8-inch round cake pans.
- In a bowl, mix flour, baking powder, and salt. Set aside.
- In another bowl, cream butter and sugar until light and fluffy. Add eggs one at a time, mixing well after each addition. Stir in vanilla.
- Gradually add the flour mixture and milk, alternating between the two, until combined.
- Divide the batter into six bowls. Color each bowl with a different food coloring.
- Pour each colored batter into the prepared pans, one color per pan.
- Bake for 25-30 minutes or until a toothpick comes out clean. Let the cakes cool completely.
- Once cooled, stack the layers with frosting in between each layer. Frost the top and sides of the cake, then add sprinkles.
- Slice and serve this colorful delight at your next party!
Chocolate Covered Strawberries

Chocolate covered strawberries are a classic treat that never fails to impress. Their shiny, chocolatey exterior and fresh, juicy interior make them a delightful addition to any dessert table. The vibrant colors of the strawberries paired with the rich chocolate create a feast for the eyes as well as the taste buds.
These treats are not only delicious but also easy to customize. You can use milk, dark, or white chocolate, and add fun toppings like sprinkles, crushed nuts, or coconut flakes. They are perfect for parties, celebrations, or just a sweet snack at home.
Making chocolate covered strawberries is simple and fun. Gather your friends or family and enjoy the process of dipping and decorating these delightful treats together!
Ingredients
- 1 pound fresh strawberries
- 8 ounces chocolate (milk, dark, or white)
- 1 tablespoon coconut oil (optional, for smooth melting)
- Sprinkles or toppings of your choice
Instructions
- Prepare the Strawberries: Wash and dry the strawberries thoroughly. Make sure they are completely dry to help the chocolate stick.
- Melt the Chocolate: In a microwave-safe bowl, combine the chocolate and coconut oil. Microwave in 30-second intervals, stirring in between, until smooth and fully melted.
- Dip the Strawberries: Hold each strawberry by the stem and dip it into the melted chocolate, ensuring it is fully coated. Let the excess chocolate drip off.
- Add Toppings: Before the chocolate sets, sprinkle your chosen toppings over the chocolate-covered strawberries.
- Set and Serve: Place the dipped strawberries on a parchment-lined tray. Refrigerate for about 30 minutes to let the chocolate harden. Enjoy your delicious creations!
Colorful Macarons
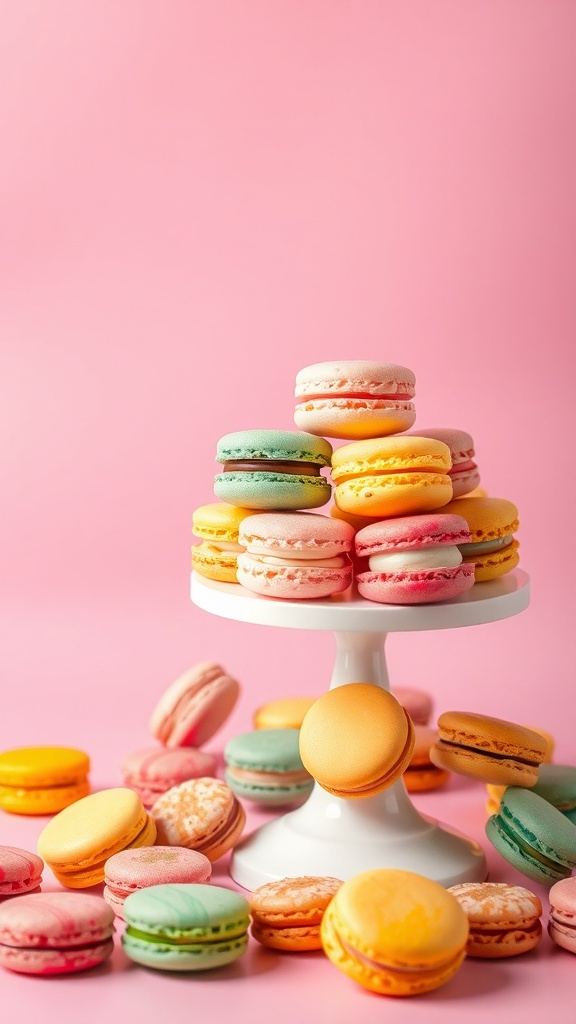
Macarons are a delightful treat that brings a splash of color and flavor to any party. These delicate cookies come in a variety of bright hues, making them a perfect choice for festive occasions. The soft, chewy texture combined with creamy fillings makes them irresistible.
In the image, you can see a beautiful display of macarons arranged on a charming stand. The pastel colors, including pink, yellow, and mint green, create a cheerful vibe. Surrounding the stand are even more macarons, inviting everyone to grab one and enjoy.
Making macarons at home can be a fun project. With a few simple ingredients, you can create these colorful delights. Here’s a recipe to get you started!
Ingredients
- 1 cup almond flour
- 1 3/4 cups powdered sugar
- 3 large egg whites
- 1/4 cup granulated sugar
- 1/2 teaspoon vanilla extract
- Food coloring (various colors)
- 1 cup butter, softened
- 2 cups powdered sugar (for filling)
- 1 teaspoon vanilla extract (for filling)
Instructions
- Prepare the Dry Ingredients: In a bowl, sift together almond flour and powdered sugar. Set aside.
- Whip the Egg Whites: In a clean bowl, beat egg whites until foamy. Gradually add granulated sugar and continue to beat until stiff peaks form. Add vanilla extract and food coloring to achieve your desired color.
- Combine Mixtures: Gently fold the dry ingredients into the egg whites. Mix until the batter flows like lava.
- Pipe the Macarons: Transfer the batter to a piping bag. Pipe small circles onto a baking sheet lined with parchment paper. Let them sit for 30 minutes to form a skin.
- Bake: Preheat the oven to 300°F (150°C). Bake for 15-20 minutes. Let them cool completely before removing from the sheet.
- Make the Filling: Beat together softened butter, powdered sugar, and vanilla extract until smooth. Fill half of the macarons with the filling and sandwich them together.
- Enjoy: Serve your colorful macarons at your next party!
Tie-Dye Cupcakes
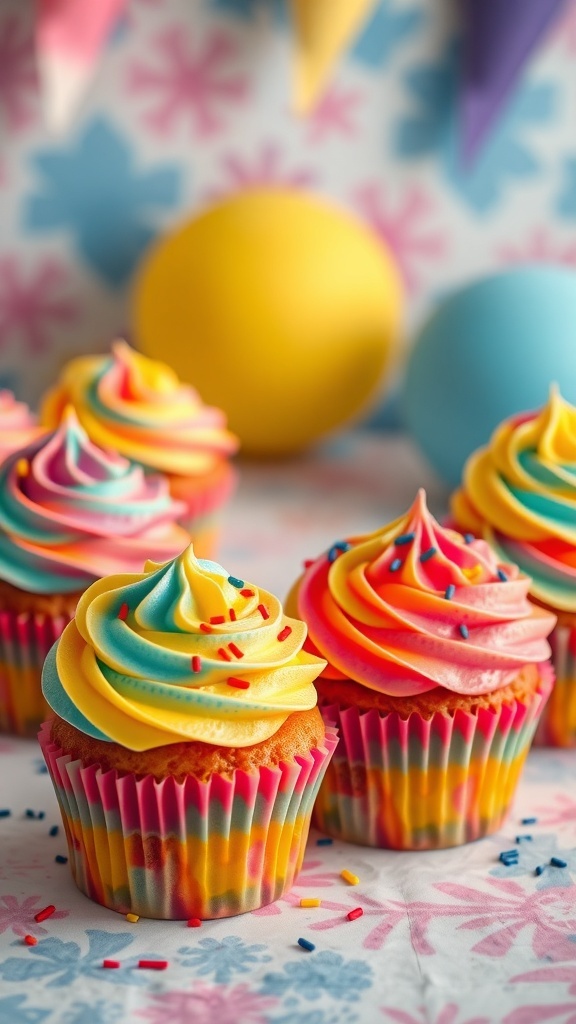
Tie-dye cupcakes are a fun and colorful treat that can brighten up any party. These delightful cupcakes feature vibrant swirls of color, making them visually appealing and tasty. The combination of bright frosting and a rainbow of cake layers makes them a hit with kids and adults alike.
To create these cupcakes, you’ll need a simple vanilla cupcake recipe and some food coloring. The key is to layer the colored batter in the cupcake liners, creating a tie-dye effect as they bake. Once they’re cool, top them with a fluffy frosting in multiple colors for that extra pop!
Ingredients
- 1 1/2 cups all-purpose flour
- 1 cup granulated sugar
- 1/2 cup unsalted butter, softened
- 2 large eggs
- 1/2 cup milk
- 2 teaspoons baking powder
- 1 teaspoon vanilla extract
- Food coloring (red, blue, yellow, green)
- Sprinkles for decoration
Instructions
- Preheat your oven to 350°F (175°C) and line a muffin tin with cupcake liners.
- In a large bowl, cream together the butter and sugar until light and fluffy. Add the eggs, milk, and vanilla, mixing until well combined.
- In another bowl, whisk together the flour and baking powder. Gradually add this to the wet mixture, stirring until just combined.
- Divide the batter into separate bowls based on how many colors you want to use. Add a few drops of food coloring to each bowl and mix until you achieve your desired colors.
- Using a spoon, drop spoonfuls of each colored batter into the cupcake liners, layering them to create a tie-dye effect.
- Bake for 18-20 minutes or until a toothpick inserted into the center comes out clean. Let them cool completely.
- While the cupcakes cool, prepare your frosting. You can use store-bought frosting or make your own by mixing butter, powdered sugar, and a splash of milk until fluffy.
- Divide the frosting into bowls and color them with food coloring. Use a piping bag to swirl the different colored frostings on top of the cupcakes. Finish with sprinkles for a fun touch!
Fruity Pavlova
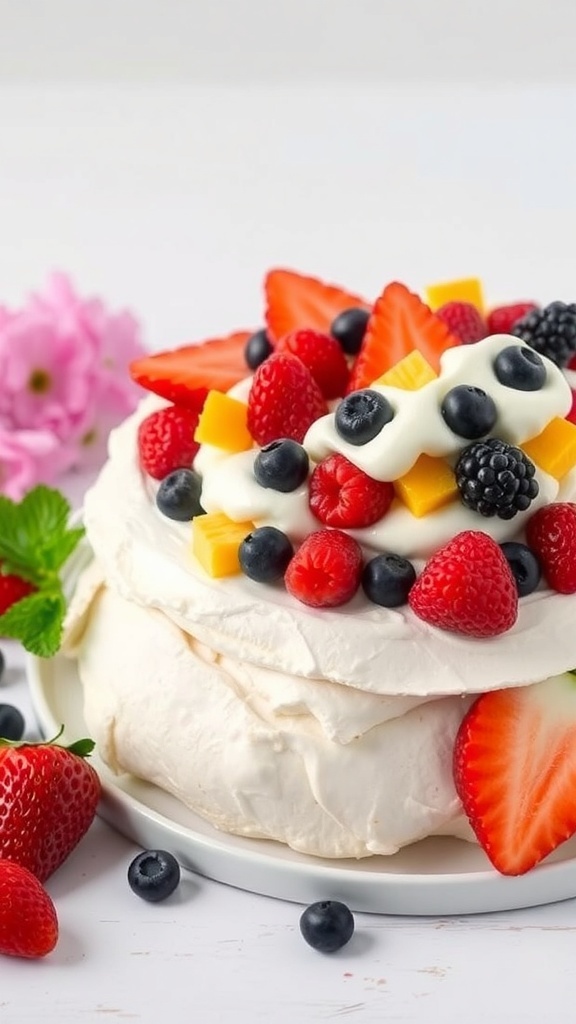
Pavlova is a stunning dessert that brings a burst of color and flavor to any party. This light and airy meringue base is topped with fresh fruits, making it a delightful treat. The combination of crispy edges and a soft, marshmallow-like center creates a unique texture that everyone loves.
The image showcases a beautifully layered pavlova, topped with vibrant strawberries, blueberries, raspberries, and mango chunks. The bright colors of the fruits contrast perfectly with the white meringue, making it not just delicious but also visually appealing.
To make this fruity pavlova, you’ll need simple ingredients and a little patience. It’s a great way to impress your guests without too much fuss. Let’s get into the recipe!
Pastel Meringue Kisses
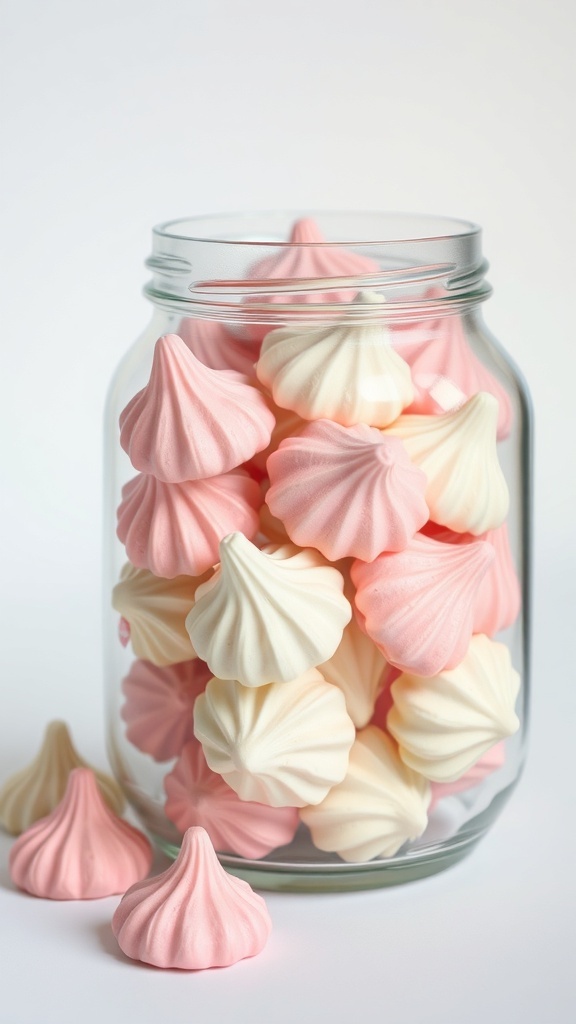
Pastel meringue kisses are a delightful treat that adds a pop of color to any dessert table. These little confections are light, airy, and melt in your mouth. Their charming pastel hues make them perfect for parties, especially when you want to impress your guests with something sweet and visually appealing.
Making meringue kisses is quite simple. You just need a few ingredients and some patience. The process involves whipping egg whites until they form stiff peaks, then gradually adding sugar until the mixture is glossy and smooth. You can divide the mixture into bowls and add food coloring to create those lovely pastel shades.
Once piped into cute little shapes, the meringues are baked at a low temperature until they are crisp on the outside and soft on the inside. They can be enjoyed on their own or used as a decorative topping for cakes and cupcakes. Either way, they are sure to be a hit!
Sponge Cake Pops
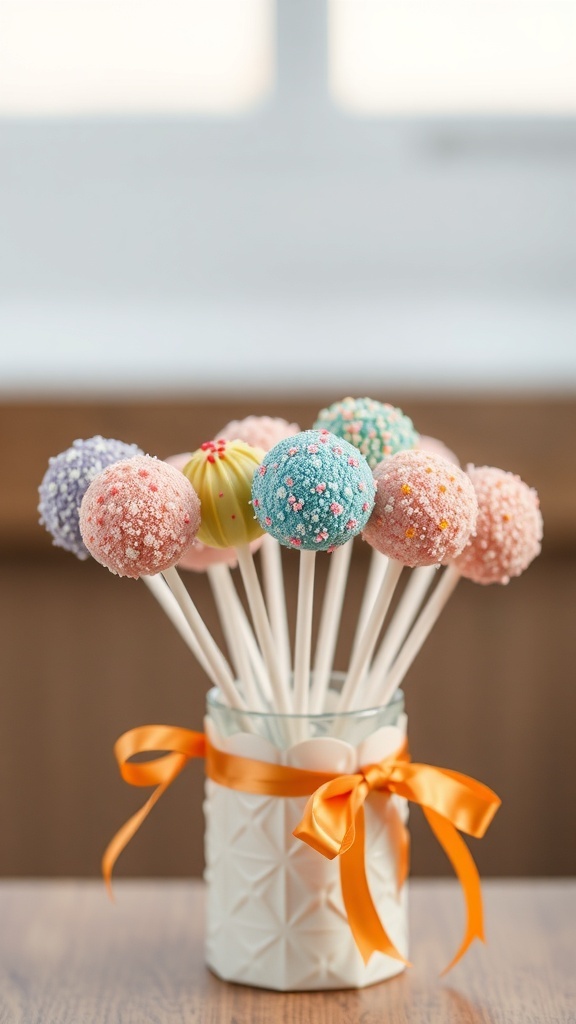
Sponge cake pops are a delightful treat that adds a splash of color to any party. These little bites of joy are not only fun to eat but also a joy to look at. Each pop is coated in vibrant icing and decorated with sprinkles, making them a perfect centerpiece for dessert tables.
The soft sponge cake inside is moist and fluffy, providing a lovely contrast to the crunchy outer layer. You can customize the flavors and colors to match your party theme, making them a versatile choice for any celebration.
Making sponge cake pops is easier than you might think. Start with your favorite sponge cake recipe, crumble it up, and mix it with frosting. Roll the mixture into balls, insert sticks, and dip them in melted chocolate or candy melts. Finish with colorful sprinkles for that extra pop!
Ingredients
- 1 cup sponge cake, crumbled
- 1/2 cup frosting (any flavor)
- 1 cup chocolate or candy melts
- Sprinkles for decoration
- Lollipop sticks
Instructions
- In a bowl, mix the crumbled sponge cake with frosting until well combined.
- Roll the mixture into small balls and place them on a baking sheet lined with parchment paper.
- Insert lollipop sticks into each ball and freeze for about 30 minutes.
- Melt the chocolate or candy melts in a microwave-safe bowl.
- Dip each cake pop into the melted chocolate, allowing excess to drip off.
- Sprinkle with decorations while the chocolate is still wet.
- Let them set on a stand or in a cup until the chocolate hardens.
Vibrant Cupcake Cones
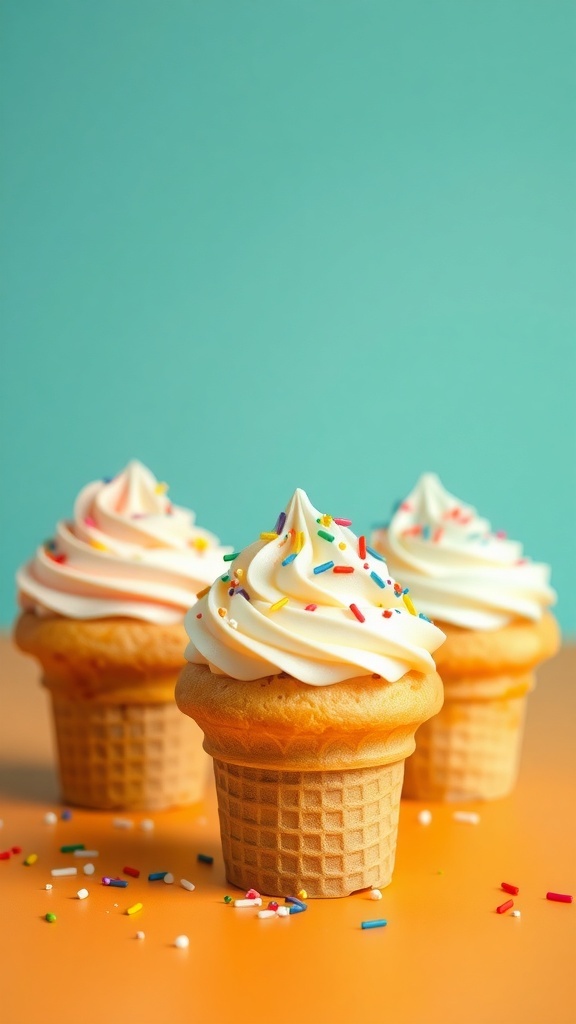
Cupcake cones are a fun twist on traditional cupcakes. They combine the joy of ice cream cones with the sweetness of cupcakes, making them perfect for any party. These delightful treats are easy to make and look fantastic on any dessert table.
The image showcases a trio of cupcake cones topped with fluffy frosting and colorful sprinkles. The bright colors and playful presentation make them a hit with both kids and adults. Each cone is a mini dessert that’s easy to grab and enjoy, adding a cheerful touch to your celebration.
To make these vibrant cupcake cones, you’ll need a few simple ingredients. They are not only visually appealing but also delicious!
Ingredients
- 1 box of cake mix (any flavor)
- 1 cup water
- 1/3 cup vegetable oil
- 3 large eggs
- 12 ice cream cones
- 1 cup butter, softened
- 4 cups powdered sugar
- 1 teaspoon vanilla extract
- 2-3 tablespoons milk
- Colorful sprinkles for decoration
Instructions
- Preheat your oven to 350°F (175°C). Prepare a cupcake pan by placing the ice cream cones upright in the pan.
- In a large bowl, mix the cake mix, water, vegetable oil, and eggs until well combined.
- Pour the batter into each ice cream cone, filling them about 2/3 full.
- Bake for 15-20 minutes or until a toothpick inserted into the center comes out clean. Allow them to cool completely.
- While the cones cool, prepare the frosting by beating the softened butter until creamy. Gradually add powdered sugar, vanilla extract, and milk until you reach your desired consistency.
- Once the cones are cool, pipe the frosting on top of each cone and sprinkle with colorful decorations.
- Serve and enjoy these delightful cupcake cones at your next party!
Bright Sorbet Trio
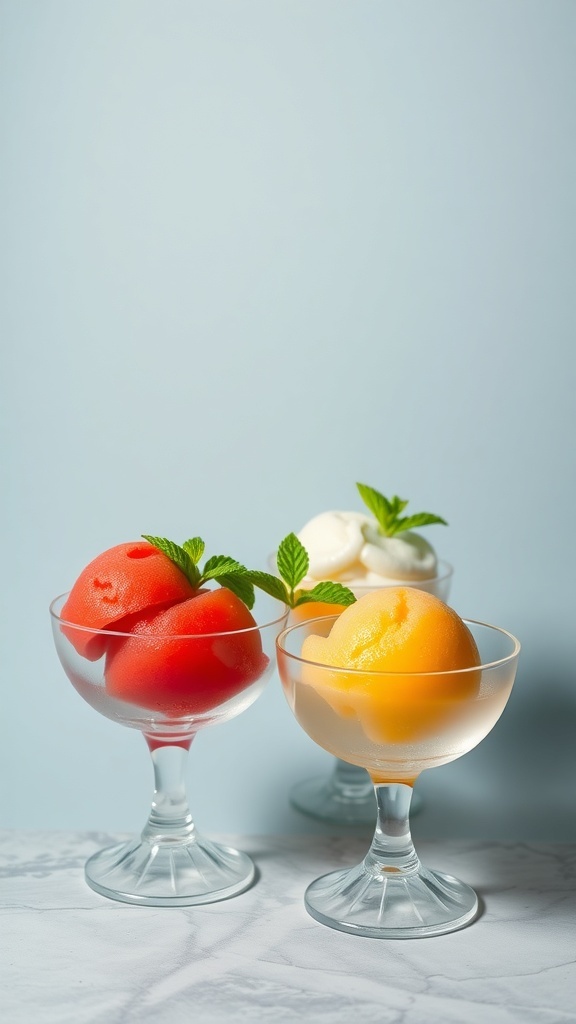
Bright sorbet trio is a delightful treat that adds a splash of color to any party. This vibrant dessert features three different flavors, each served in its own elegant glass. The red sorbet, likely made from juicy strawberries or raspberries, offers a refreshing burst of sweetness. The sunny orange sorbet could be a zesty orange or mango, bringing a tropical twist. Finally, the creamy white sorbet, possibly coconut or vanilla, rounds out the trio with a smooth finish.
These sorbets not only look stunning but are also a great way to cool down on a warm day. They can be enjoyed on their own or paired with fresh fruits for an extra touch. Plus, they are a fantastic option for guests who prefer dairy-free desserts.
Ingredients
- 2 cups fresh strawberries, hulled
- 1 cup granulated sugar
- 1 cup water
- 2 cups fresh orange juice
- 1 cup mango puree
- 1 cup coconut milk
- 1 tablespoon lemon juice
- Fresh mint leaves for garnish
Instructions
- Make the Strawberry Sorbet: In a blender, combine strawberries, 1/2 cup sugar, and 1/2 cup water. Blend until smooth. Pour the mixture into a shallow dish and freeze for about 4 hours, stirring every hour until it reaches a fluffy consistency.
- Prepare the Orange Sorbet: In a bowl, mix fresh orange juice, mango puree, and the remaining sugar. Stir until the sugar dissolves. Pour into a shallow dish and freeze, stirring occasionally, until firm.
- Whip up the Coconut Sorbet: In a bowl, combine coconut milk, lemon juice, and the remaining water. Mix well and freeze in a shallow dish, stirring every hour until fluffy.
- Serve: Once all sorbets are ready, scoop them into individual serving glasses. Garnish with fresh mint leaves for a pop of color and freshness.
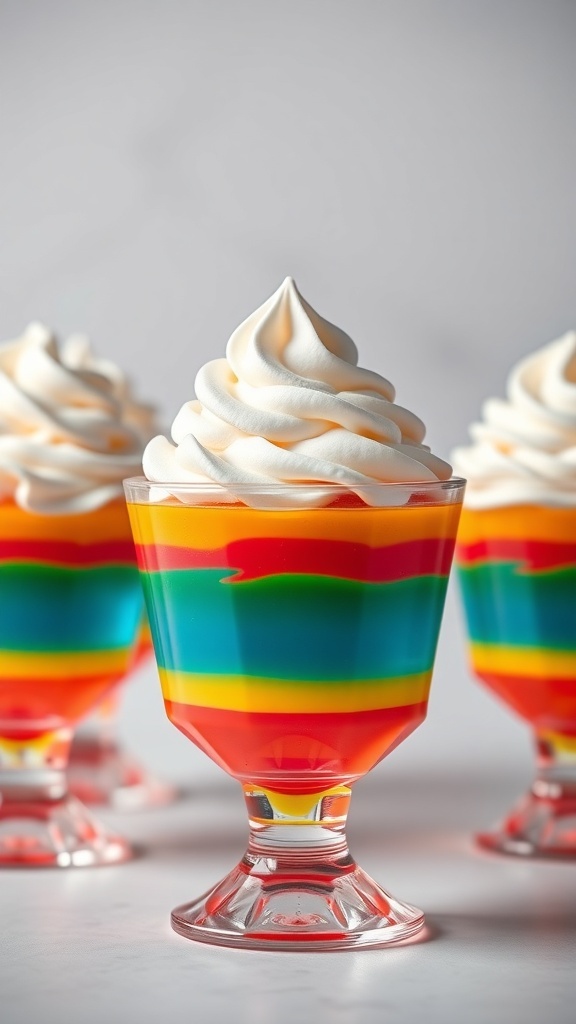
Rainbow Gelatin Dessert
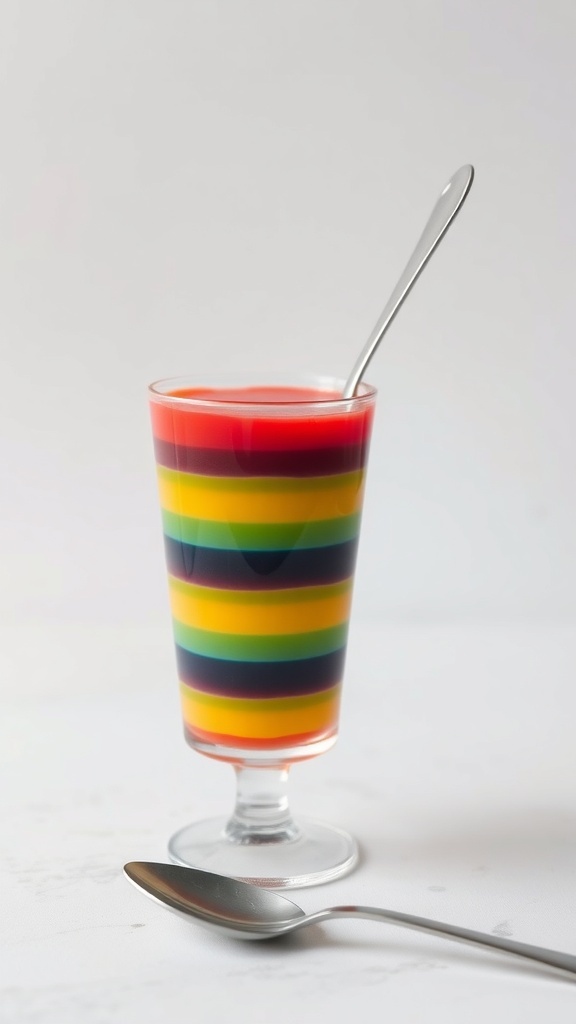
Rainbow Gelatin Dessert is a fun and colorful treat that brings joy to any party. This dessert features vibrant layers of gelatin, each in a different color, creating a stunning visual effect. It’s not just a feast for the eyes; it’s also a delightful burst of fruity flavors with every spoonful.
Making this dessert is a great way to get creative in the kitchen. You can choose your favorite flavors and colors, making it customizable for any occasion. The layers are easy to prepare and set, making it a perfect project for kids and adults alike.
To make your own Rainbow Gelatin Dessert, you’ll need a few simple ingredients and some patience while the layers set. The result is a beautiful, multi-colored dessert that will impress your guests and add a pop of color to your table.
Ingredients
- 1 box (3 oz) of red gelatin
- 1 box (3 oz) of orange gelatin
- 1 box (3 oz) of yellow gelatin
- 1 box (3 oz) of green gelatin
- 1 box (3 oz) of blue gelatin
- 1 box (3 oz) of purple gelatin
- 2 cups boiling water
- 2 cups cold water
- 1 cup whipped cream (optional, for topping)
Instructions
- Prepare the first layer: In a bowl, dissolve the red gelatin in 1 cup of boiling water. Stir until fully dissolved, then add 1 cup of cold water. Pour the mixture into a clear glass or dessert cup and refrigerate until set, about 1 hour.
- Repeat for each layer: After the red layer is set, repeat the process with the orange gelatin. Pour it gently over the red layer and refrigerate until set. Continue this process for the yellow, green, blue, and purple layers, allowing each layer to set before adding the next.
- Chill and serve: Once all layers are set, top with whipped cream if desired. Serve chilled and enjoy the colorful layers!
Swirled Frosted Brownies
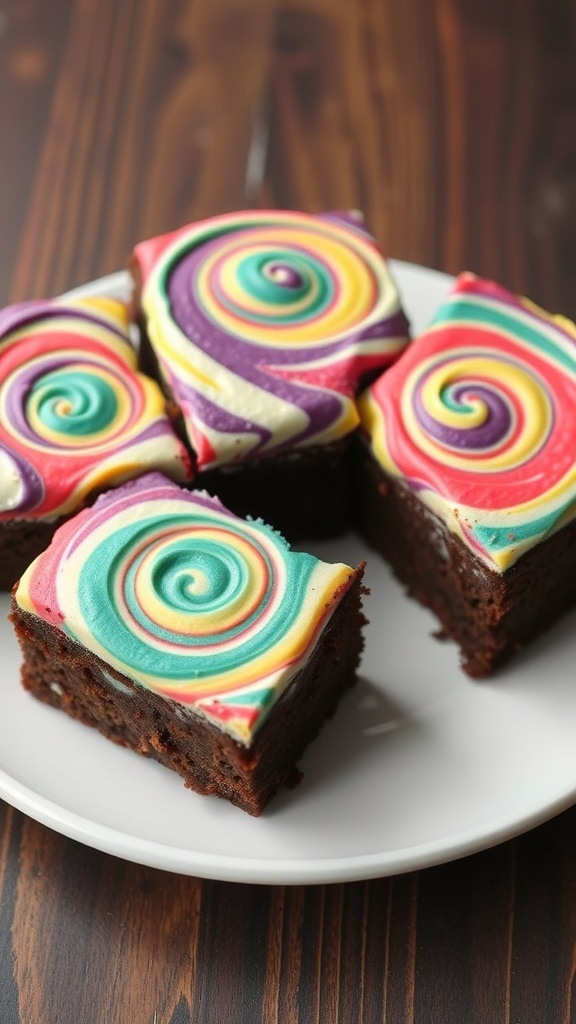
Swirled frosted brownies are a delightful treat that brings a burst of color to any party. These brownies are rich and fudgy, topped with a vibrant swirl of frosting that catches the eye. The combination of deep chocolate and bright colors makes them a fun addition to your dessert table.
The frosting is not just for looks; it adds a creamy sweetness that perfectly complements the brownies. Each bite is a mix of chocolatey goodness and colorful fun, making them a hit with both kids and adults.
Making these brownies is simple and enjoyable. You can even let the kids help with the swirling part, which adds to the fun. They’re perfect for birthdays, holidays, or any gathering where you want to impress your guests.
Ingredients
- 1 cup unsalted butter
- 2 cups granulated sugar
- 4 large eggs
- 1 teaspoon vanilla extract
- 1 cup all-purpose flour
- 1 cup unsweetened cocoa powder
- 1/2 teaspoon salt
- 1/2 teaspoon baking powder
- 1 cup powdered sugar
- 2 tablespoons milk
- 1/2 teaspoon vanilla extract (for frosting)
- Food coloring (various colors)
Instructions
- Preheat your oven to 350°F (175°C). Grease a 9×13 inch baking pan.
- In a large bowl, melt the butter. Stir in the granulated sugar, eggs, and vanilla until well combined.
- Add the flour, cocoa powder, salt, and baking powder. Mix until just combined.
- Pour the brownie batter into the prepared pan and spread evenly.
- In a separate bowl, mix the powdered sugar, milk, and vanilla extract to make the frosting. Divide the frosting into small bowls and add different food coloring to each.
- Drop spoonfuls of the colored frosting onto the brownie batter. Use a toothpick or knife to swirl the colors together gently.
- Bake for 25-30 minutes, or until a toothpick inserted in the center comes out clean.
- Let cool before cutting into squares and serving.
Colorful Cheesecake Bites
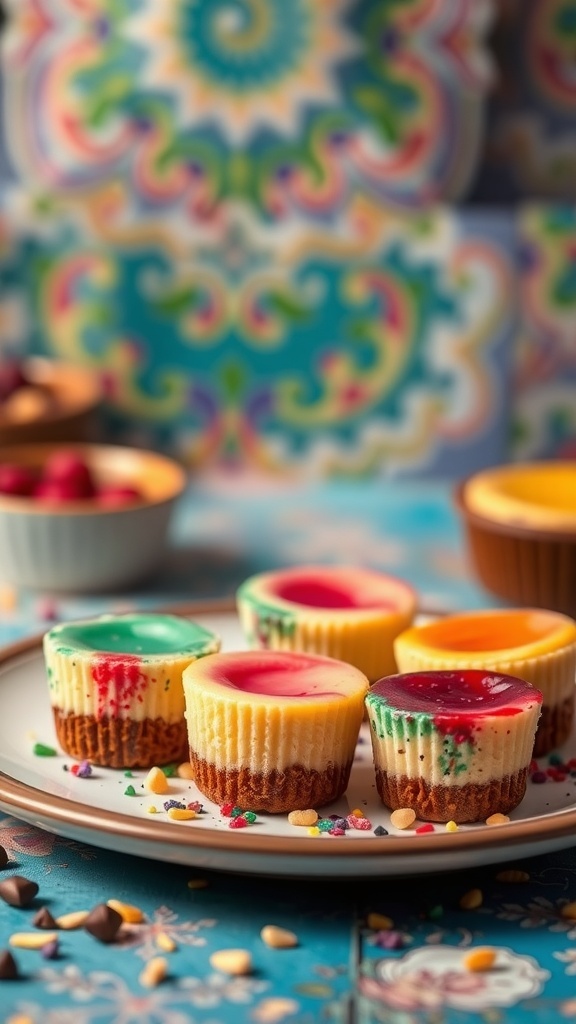
Colorful cheesecake bites are the perfect treat for any party. These little desserts are not only visually appealing but also packed with flavor. Each bite-sized cheesecake is topped with vibrant colors that make them stand out on any dessert table.
The base is a classic graham cracker crust, providing a crunchy contrast to the creamy cheesecake filling. The colorful toppings can include fruit purees, chocolate drizzles, or colorful sprinkles, making each bite a delightful surprise. These treats are easy to grab and enjoy, making them a hit among guests of all ages.
Here’s how you can make your own colorful cheesecake bites:
Ingredients
- 1 1/2 cups graham cracker crumbs
- 1/4 cup granulated sugar
- 1/2 cup unsalted butter, melted
- 16 oz cream cheese, softened
- 1 cup powdered sugar
- 1 teaspoon vanilla extract
- 2 large eggs
- Food coloring (various colors)
- Fruit purees or chocolate for topping
- Sprinkles for decoration
Instructions
- Preheat your oven to 325°F (160°C). Line a muffin tin with cupcake liners.
- In a bowl, mix graham cracker crumbs, sugar, and melted butter until combined. Press this mixture into the bottom of each cupcake liner to form the crust.
- In another bowl, beat cream cheese until smooth. Add powdered sugar and vanilla extract, mixing until well combined.
- Add eggs one at a time, mixing well after each addition. Divide the batter into separate bowls and add different food coloring to each bowl to create a variety of colors.
- Spoon the colored cheesecake batter into the crusts, filling each about 2/3 full. Use a toothpick to swirl the colors together for a marbled effect if desired.
- Bake for 18-20 minutes or until the centers are set. Let them cool completely before removing from the muffin tin.
- Top with fruit purees, chocolate, or sprinkles before serving. Enjoy your colorful cheesecake bites!
Vivid Chocolate Bark
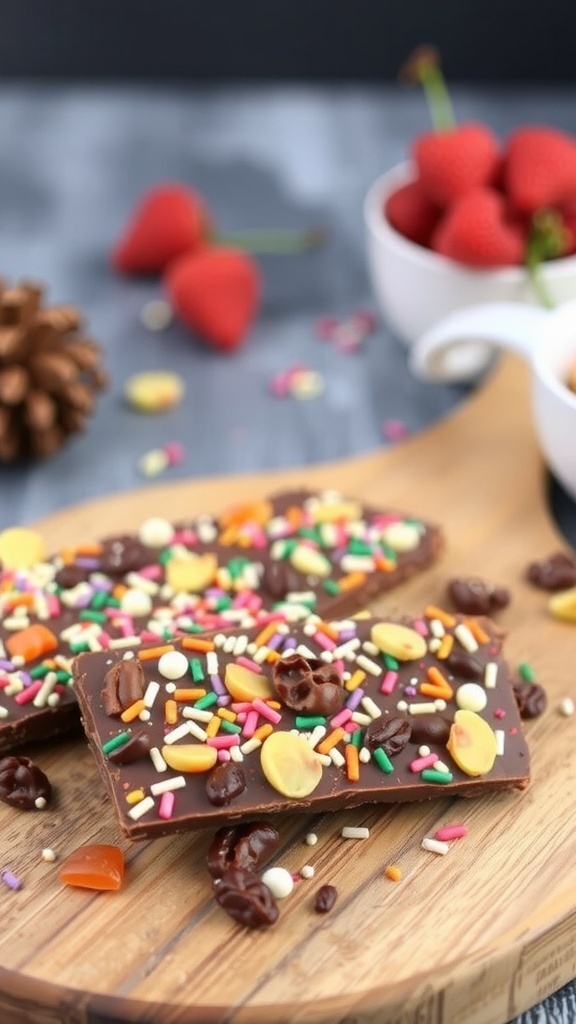
Vivid chocolate bark is a fun and colorful treat that brings joy to any party. This dessert is not only visually appealing but also incredibly easy to make. Imagine a base of rich chocolate topped with a rainbow of sprinkles, nuts, and dried fruits. It’s a simple way to add a splash of color to your dessert table.
The image showcases beautiful pieces of chocolate bark adorned with vibrant sprinkles and various toppings. The combination of textures and colors makes it a perfect choice for celebrations. You can customize it to fit any theme by changing the toppings. Whether it’s a birthday party or a festive gathering, this treat is sure to impress.
Creating vivid chocolate bark is a breeze. Just melt your chocolate, pour it onto a baking sheet, and let your creativity shine with the toppings. Once it sets, break it into pieces, and you have a delightful dessert ready to serve!
Fruit Sorbet Float
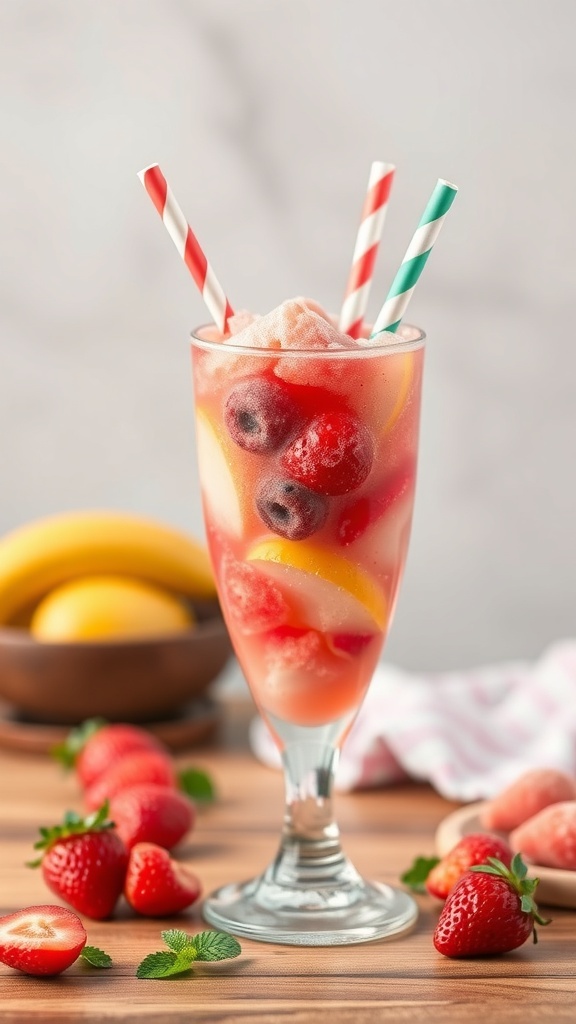
Fruit sorbet float is a delightful treat that brings together refreshing sorbet and fizzy soda. This dessert is perfect for parties, adding a splash of color and fun to any gathering. The vibrant layers of fruit sorbet topped with sparkling soda create a visually appealing drink that tastes as good as it looks.
In the image, you can see a tall glass filled with a mix of colorful sorbet and fresh fruits. The bright reds of strawberries and the deep blues of blueberries contrast beautifully with the creamy sorbet. Striped straws add a playful touch, making it an inviting drink for guests of all ages.
This float is not only tasty but also easy to make. You can customize it with your favorite fruits and flavors. It’s a great way to cool down on a warm day or to celebrate a special occasion with friends and family.
Ingredients
- 2 cups fruit sorbet (strawberry, raspberry, or lemon)
- 1 cup sparkling water or lemon-lime soda
- Fresh fruit for garnish (strawberries, blueberries, lemon slices)
- Mint leaves for garnish
- Striped straws
Instructions
- Start by scooping the fruit sorbet into a tall glass, filling it about halfway.
- Slowly pour the sparkling water or soda over the sorbet until the glass is nearly full.
- Add fresh fruit on top for decoration.
- Garnish with mint leaves and insert the striped straws.
- Serve immediately and enjoy the refreshing flavors!
Colorful Donut Wall
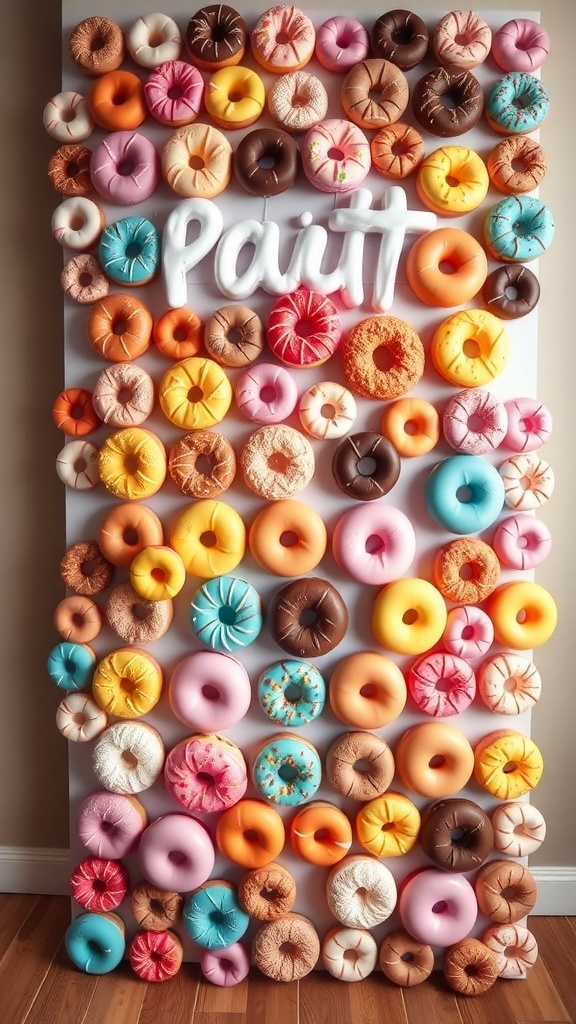
A colorful donut wall is a fun and eye-catching addition to any party. Imagine a vibrant display filled with donuts in various shades and flavors, creating a feast for the eyes. This setup not only serves as a dessert station but also doubles as a fantastic backdrop for photos. Guests will love picking their favorite donuts while enjoying the lively atmosphere.
The wall features an array of donuts, from classic chocolate and vanilla to bright pink and turquoise options. Each donut is uniquely decorated, making it hard to choose just one! This display encourages mingling and adds a playful touch to your event.
Ingredients
- 2 cups all-purpose flour
- 1/2 cup granulated sugar
- 1 tablespoon baking powder
- 1/2 teaspoon salt
- 1/2 teaspoon ground cinnamon
- 1/2 cup milk
- 2 large eggs
- 1/4 cup unsalted butter, melted
- 1 teaspoon vanilla extract
- Assorted toppings (sprinkles, chocolate glaze, fruit, etc.)
Instructions
- Preheat your oven to 375°F (190°C) and grease a donut pan.
- In a large bowl, whisk together flour, sugar, baking powder, salt, and cinnamon.
- In another bowl, mix milk, eggs, melted butter, and vanilla until well combined.
- Pour the wet ingredients into the dry ingredients and stir until just combined.
- Spoon the batter into the donut pan, filling each cavity about halfway.
- Bake for 10-12 minutes or until golden brown. Let cool for a few minutes before transferring to a wire rack.
- Once cooled, decorate with your favorite toppings and arrange them on your colorful donut wall!
Colorful Rice Crispy Treats
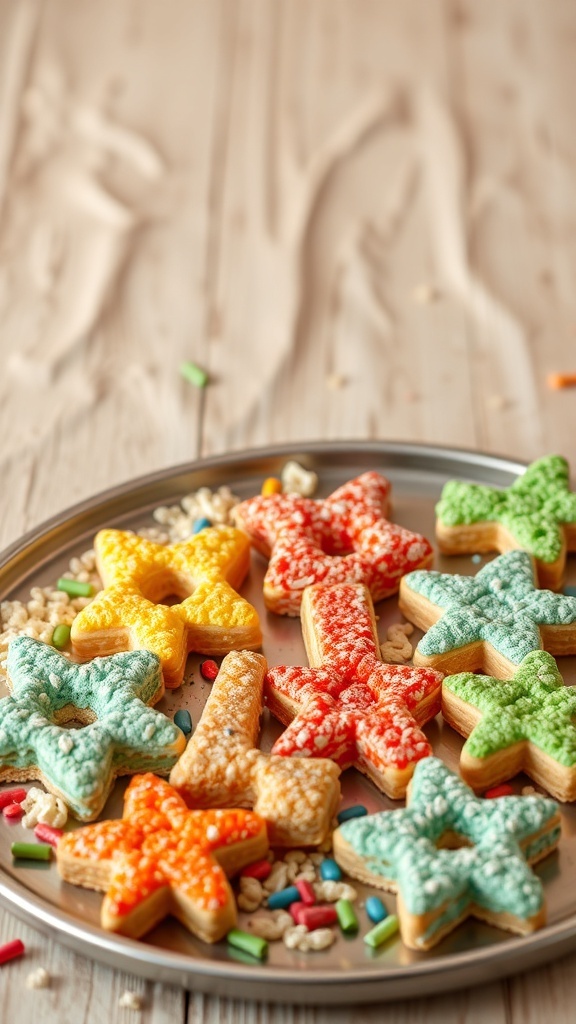
Colorful rice crispy treats are a fun and tasty addition to any party. These treats are not only easy to make but also visually appealing. The vibrant colors and playful shapes make them a hit with both kids and adults. Imagine a platter filled with star-shaped and flower-shaped treats, each one coated in bright icing and sprinkled with colorful candy. They bring a cheerful vibe to any gathering!
Making these treats is simple. Start by melting marshmallows and butter together, then mix in rice cereal. Once combined, you can add food coloring to create different shades. Use cookie cutters to shape them into fun designs. Top them off with icing and sprinkles for that extra pop!
Ingredients
- 3 tablespoons unsalted butter
- 1 package (10 oz) mini marshmallows
- 6 cups rice cereal
- Food coloring (various colors)
- 1 cup icing (store-bought or homemade)
- Sprinkles for decoration
Instructions
- Prepare the Pan: Grease a 9×13 inch baking dish with butter or cooking spray.
- Melt Butter and Marshmallows: In a large pot over low heat, melt the butter. Add the mini marshmallows and stir until completely melted and smooth.
- Add Rice Cereal: Remove from heat and stir in the rice cereal until well coated.
- Color the Mixture: Divide the mixture into separate bowls and add food coloring to each bowl. Mix until the colors are evenly distributed.
- Shape the Treats: Press the colored mixtures into the prepared baking dish. Use cookie cutters to cut out fun shapes.
- Decorate: Once cooled, decorate with icing and sprinkles. Let them set before serving.
Brightly Colored Trifle

Trifles are a fantastic way to showcase vibrant colors and flavors, making them perfect for any party. This brightly colored trifle features layers of fresh fruits, creamy filling, and cake, all beautifully arranged in a glass dish. The combination of strawberries, blueberries, and mango adds a refreshing touch, while the whipped cream brings a light and airy texture.
Creating a trifle is simple and fun. You can customize it with your favorite fruits and cake types. The visual appeal of the layers makes it a showstopper on any dessert table. Plus, it’s easy to serve, allowing guests to scoop out their portions without any fuss.
Ingredients
- 2 cups strawberries, sliced
- 1 cup blueberries
- 1 cup mango, diced
- 1 pound pound cake, cut into cubes
- 2 cups whipped cream
- 1 cup vanilla pudding
Instructions
- Start by layering half of the pound cake cubes at the bottom of a large glass trifle dish.
- Add a layer of vanilla pudding over the cake, spreading it evenly.
- Next, add a layer of whipped cream, smoothing it out.
- Layer half of the sliced strawberries, blueberries, and mango on top of the whipped cream.
- Repeat the layers with the remaining cake, pudding, whipped cream, and fruits.
- Finish with a dollop of whipped cream and a few extra fruit pieces on top for decoration.
- Chill the trifle in the refrigerator for at least an hour before serving to let the flavors meld.
Rainbow Fruit Pizza
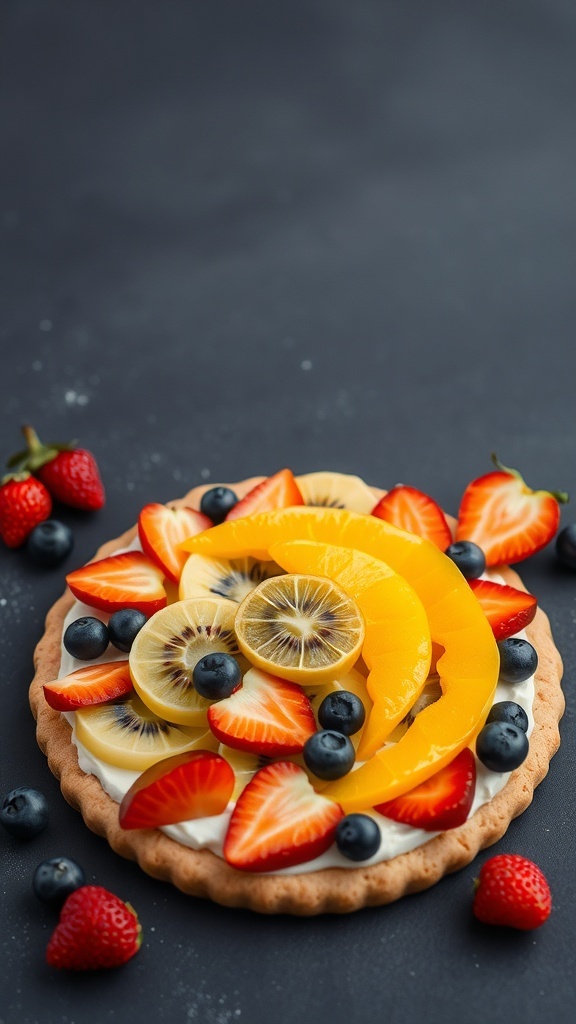
Rainbow Fruit Pizza is a delightful treat that brings a splash of color to any party. This dessert features a crisp cookie crust topped with a creamy layer and an array of fresh fruits. The vibrant colors of strawberries, blueberries, and citrus fruits create a stunning visual that is sure to impress your guests.
The combination of flavors is refreshing and light, making it a perfect choice for warm weather gatherings. Plus, it’s easy to customize with your favorite fruits or whatever is in season. This dessert not only looks good but tastes amazing too!
Ingredients
- 1 pre-made sugar cookie dough
- 8 oz cream cheese, softened
- 1/4 cup powdered sugar
- 1 teaspoon vanilla extract
- 1 cup strawberries, sliced
- 1 cup blueberries
- 1 cup kiwi, sliced
- 1 cup mandarin oranges, drained
- 1 lemon, sliced (for garnish)
Instructions
- Preheat your oven to 350°F (175°C). Roll out the sugar cookie dough on a baking sheet to form a large circle. Bake for 10-12 minutes until golden brown. Let it cool completely.
- In a bowl, mix the softened cream cheese, powdered sugar, and vanilla extract until smooth. Spread this mixture evenly over the cooled cookie crust.
- Arrange the sliced strawberries, blueberries, kiwi, and mandarin oranges on top of the cream cheese layer in a colorful pattern.
- Garnish with lemon slices for an extra pop of color and flavor.
- Slice into wedges and serve immediately, or chill in the refrigerator until ready to serve.
Floral Cupcakes

Floral cupcakes are a delightful treat that brings a splash of color and charm to any party. These cupcakes are topped with beautiful, edible flowers that not only look stunning but also add a unique flavor twist. Imagine a table filled with these vibrant delights, each one a mini work of art. They are perfect for celebrations, whether it’s a birthday, wedding, or a casual get-together.
The base of these cupcakes is typically a light and fluffy vanilla or lemon cake, which pairs wonderfully with the sweet, creamy frosting. The flowers can be made from fondant or buttercream, allowing for creativity in both design and flavor. Guests will be impressed by the attention to detail and the beauty of these treats.
Ingredients
- 1 1/2 cups all-purpose flour
- 1 cup granulated sugar
- 1/2 cup unsalted butter, softened
- 2 large eggs
- 1/2 cup milk
- 2 teaspoons baking powder
- 1 teaspoon vanilla extract
- 1/4 teaspoon salt
- Buttercream frosting (store-bought or homemade)
- Edible flowers (like pansies, violets, or roses)
Instructions
- Preheat your oven to 350°F (175°C) and line a cupcake pan with liners.
- In a large bowl, cream together the softened butter and sugar until light and fluffy. Add the eggs one at a time, mixing well after each addition.
- Stir in the milk and vanilla extract.
- In another bowl, whisk together the flour, baking powder, and salt. Gradually add the dry ingredients to the wet mixture, mixing until just combined.
- Fill each cupcake liner about two-thirds full with the batter. Bake for 18-20 minutes or until a toothpick inserted in the center comes out clean.
- Let the cupcakes cool completely before frosting them with buttercream.
- Decorate with edible flowers for a stunning finish!
Rainbow Spritz Cookies
Rainbow spritz cookies are a delightful treat that brings a splash of color to any party. These cookies are not just visually appealing; they are also soft and buttery, making them a favorite among guests of all ages. The bright icing and fun shapes make them perfect for celebrations, and they are sure to be a hit on any dessert table.
To make these cookies, you’ll need a few simple ingredients. The dough is easy to prepare and can be piped into various shapes using a cookie press. Once baked, the cookies are decorated with colorful icing, often featuring cheerful designs like rainbows and clouds.
These cookies are not only fun to make, but they also offer a great opportunity for creativity. You can mix and match colors for the icing and even try different shapes to match your party theme. Whether it’s a birthday, holiday, or just a fun get-together, rainbow spritz cookies will brighten up the occasion!
Ingredients
- 1 cup unsalted butter, softened
- 1 cup granulated sugar
- 1 large egg
- 1 teaspoon vanilla extract
- 2 1/2 cups all-purpose flour
- 1 teaspoon baking powder
- 1/4 teaspoon salt
- Food coloring (various colors)
- Royal icing for decoration
Instructions
- Preheat the oven to 350°F (175°C) and line baking sheets with parchment paper.
- In a large bowl, cream together the softened butter and sugar until light and fluffy. Add the egg and vanilla extract, mixing until well combined.
- In another bowl, whisk together the flour, baking powder, and salt. Gradually add the dry ingredients to the wet mixture, mixing until a soft dough forms.
- Divide the dough into portions and add food coloring to each portion as desired. Mix until the colors are well incorporated.
- Using a cookie press, pipe the dough onto the prepared baking sheets in your desired shapes.
- Bake for 10-12 minutes, or until the edges are lightly golden. Remove from the oven and let cool completely.
- Once cooled, decorate the cookies with royal icing and let them set before serving.
Whimsical Fairy Bread
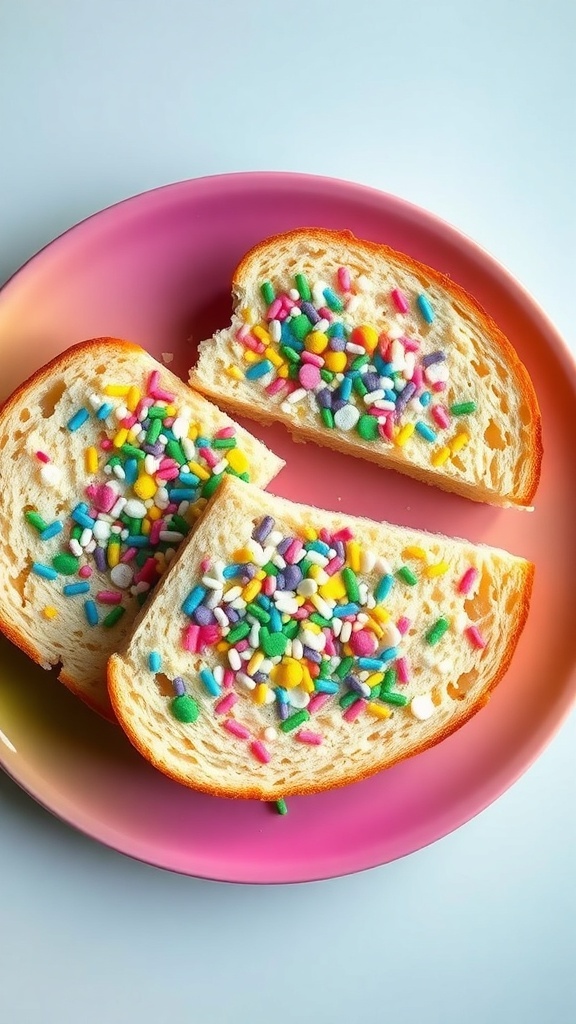
Fairy bread is a delightful treat that brings a splash of color to any party. Imagine soft white bread topped with a generous sprinkle of colorful jimmies. It’s simple yet fun, making it a favorite among kids and adults alike. The bright colors of the sprinkles create a cheerful vibe, perfect for celebrations.
This treat is not just about looks; it’s also about nostalgia. Many remember enjoying fairy bread at birthday parties or playdates. It’s a classic that never goes out of style. Plus, it’s incredibly easy to make, so you can whip it up in no time!
To make your own whimsical fairy bread, you’ll need just a few ingredients. Gather some fresh white bread, butter, and a mix of colorful sprinkles. The process is straightforward: spread butter on the slices of bread, sprinkle generously with jimmies, and slice into triangles or fun shapes. Serve it on a bright plate to enhance its playful appearance.
Ingredients
- 4 slices of white bread
- 2 tablespoons unsalted butter, softened
- 1/2 cup colorful sprinkles (jimmies)
Instructions
- Spread the softened butter evenly over one side of each slice of bread.
- Sprinkle the colorful jimmies generously on top of the buttered side.
- Cut the slices into triangles or fun shapes using a cookie cutter.
- Arrange on a plate and serve immediately for the best experience!
Layered Fruit Cups
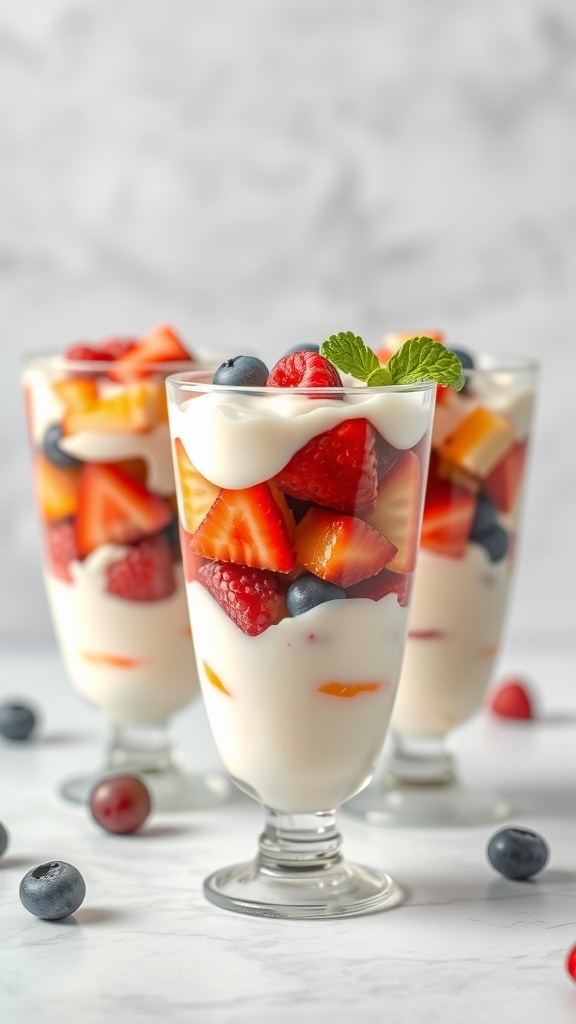
Layered fruit cups are a delightful treat that adds a splash of color to any party. These cups are filled with vibrant fruits like strawberries, blueberries, and raspberries, all beautifully arranged to catch the eye. The creamy layer of yogurt or whipped cream adds a smooth texture that balances the freshness of the fruit. They are not just tasty but also healthy, making them a perfect dessert option for guests of all ages.
Making layered fruit cups is simple and fun. You can customize them with your favorite fruits and even add granola for a crunchy twist. They are great for gatherings, picnics, or just a sweet snack at home. Plus, the individual servings make them easy to serve and enjoy.
Ingredients
- 2 cups strawberries, hulled and sliced
- 1 cup blueberries
- 1 cup raspberries
- 2 cups vanilla yogurt
- 1 cup granola (optional)
- Fresh mint leaves for garnish
Instructions
- Prepare the Fruit: Wash and slice the strawberries. Rinse the blueberries and raspberries under cold water.
- Layer the Ingredients: In clear cups or glasses, start by adding a layer of yogurt at the bottom. Follow with a layer of strawberries, then blueberries, and raspberries.
- Add Granola: If using, sprinkle a layer of granola on top of the fruit.
- Repeat Layers: Continue layering until the cups are filled, finishing with a layer of yogurt and a few pieces of fruit on top.
- Garnish: Top each cup with a mint leaf for a fresh touch.
- Serve: Chill the cups in the refrigerator for about 30 minutes before serving to let the flavors meld.
Bright Lemon Bars
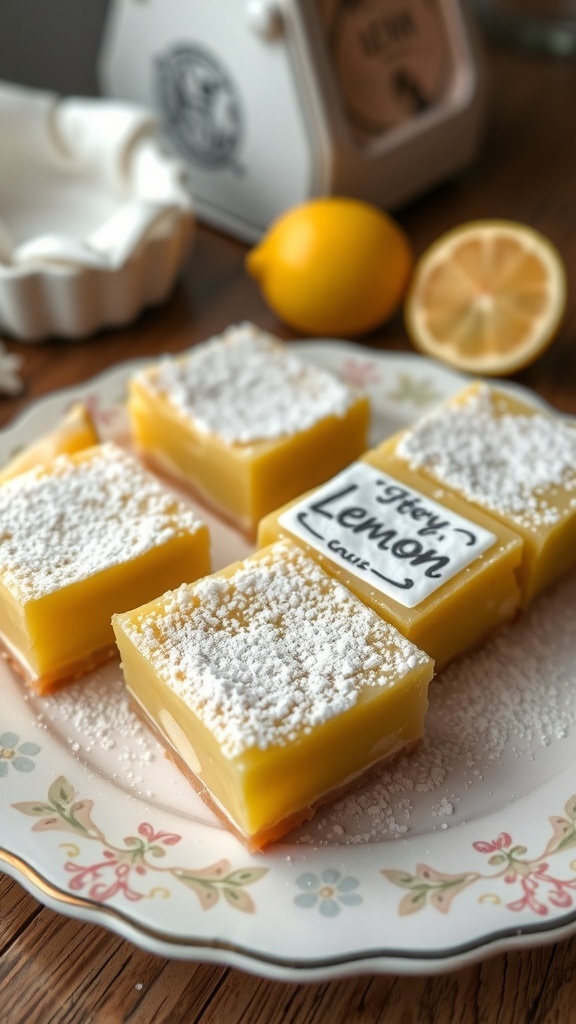
Bright lemon bars are a delightful treat that brings a burst of sunshine to any gathering. Their vibrant yellow color is inviting, making them a perfect addition to your dessert table. Each bar features a zesty lemon filling on a buttery crust, topped with a light dusting of powdered sugar. The combination of sweet and tart flavors makes them irresistible!
These lemon bars are easy to make and can be prepared ahead of time, allowing you to enjoy your party without stress. The fresh lemon juice gives them a refreshing taste, perfect for warm weather or any festive occasion. Serve them chilled for the best experience, and watch as they disappear from the platter!
Ingredients
- 1 cup all-purpose flour
- 1/4 cup powdered sugar
- 1/2 cup unsalted butter, softened
- 2 large eggs
- 1 cup granulated sugar
- 1/4 cup fresh lemon juice
- 1 teaspoon lemon zest
- 1/2 teaspoon baking powder
- Powdered sugar for dusting
Instructions
- Preheat your oven to 350°F (175°C). Grease an 8×8 inch baking dish.
- Make the crust: In a bowl, mix flour and powdered sugar. Cut in the butter until the mixture resembles coarse crumbs. Press this mixture into the bottom of the prepared baking dish.
- Bake the crust for 15 minutes, or until lightly golden.
- While the crust is baking, prepare the filling: In a bowl, whisk together the eggs, granulated sugar, lemon juice, lemon zest, and baking powder until well combined.
- Pour the lemon filling over the hot crust and return to the oven. Bake for an additional 20 minutes, or until the filling is set.
- Let the bars cool completely in the pan. Dust with powdered sugar before cutting into squares.
Bright Chocolate Mousse
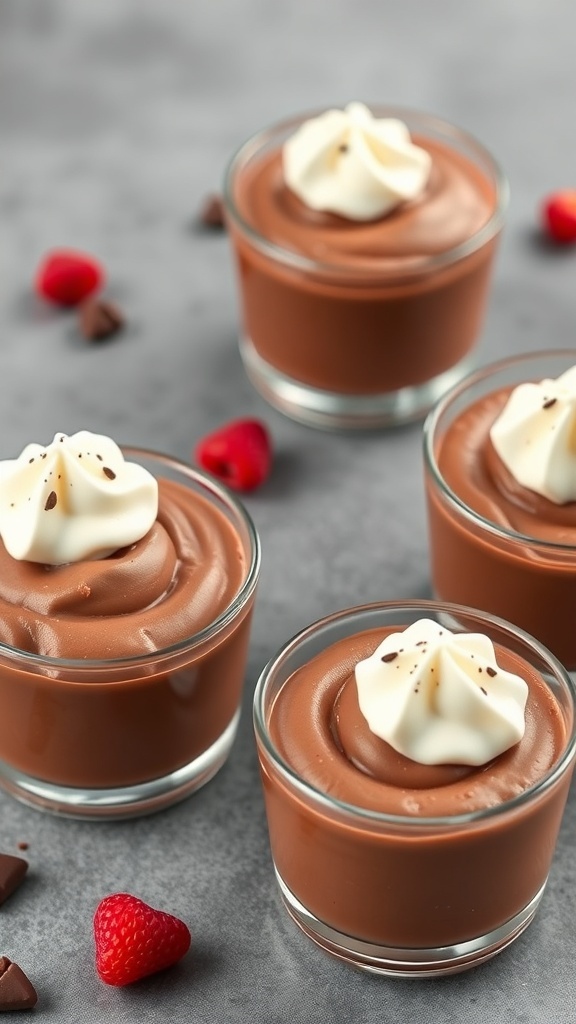
Chocolate mousse is a classic dessert that brings joy to any gathering. Its rich, creamy texture and deep chocolate flavor make it a favorite among dessert lovers. The bright presentation, topped with a swirl of whipped cream and fresh berries, adds a pop of color that is sure to impress your guests.
These individual servings of chocolate mousse are perfect for parties. They are easy to prepare and can be made ahead of time, allowing you to enjoy the festivities without stress. The combination of smooth chocolate and light cream creates a delightful contrast that everyone will love.
To make this dessert, you’ll need simple ingredients like dark chocolate, eggs, sugar, and cream. The process is straightforward, making it accessible for both novice and experienced bakers. Serve these in small cups or glasses for an elegant touch.
Ingredients
- 6 oz dark chocolate, chopped
- 3 tablespoons unsalted butter
- 3 large eggs, separated
- 1/4 cup granulated sugar
- 1 cup heavy cream
- 1 teaspoon vanilla extract
- Whipped cream and berries for topping
Instructions
- Melt the chocolate and butter together in a heatproof bowl over simmering water. Stir until smooth and let it cool slightly.
- In a separate bowl, beat the egg yolks and sugar until pale and thick. Gradually mix in the melted chocolate.
- In another bowl, whip the heavy cream until soft peaks form. Gently fold the whipped cream into the chocolate mixture.
- In a clean bowl, beat the egg whites until stiff peaks form. Carefully fold the egg whites into the chocolate mixture until no white streaks remain.
- Divide the mousse into serving cups and refrigerate for at least 2 hours.
- Before serving, top with whipped cream and fresh berries for a colorful finish.
Brightly Colored Flan
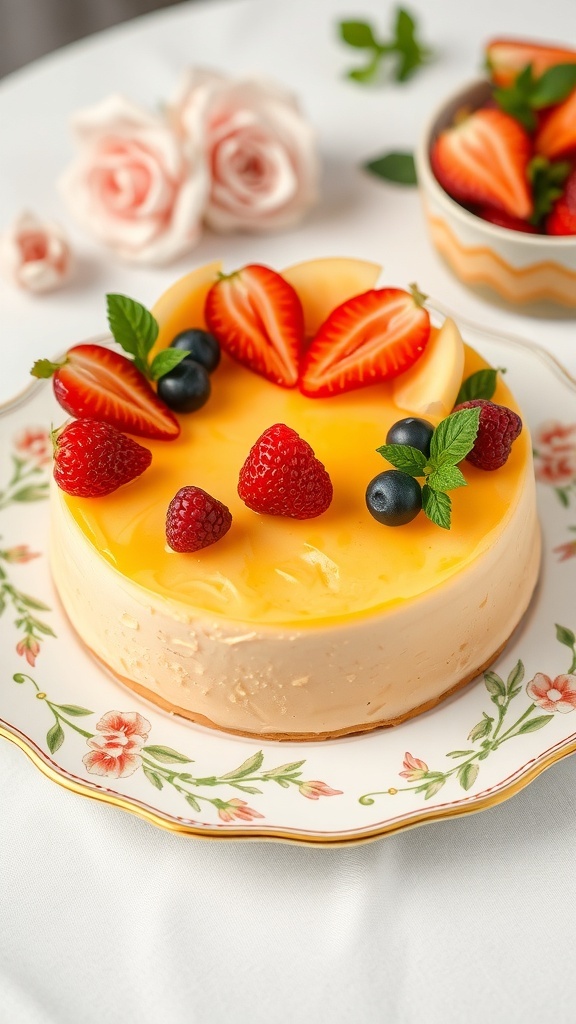
Brightly colored flan is a showstopper at any party. This dessert is not just about taste; it’s a feast for the eyes too! With its smooth texture and vibrant hues, it captures attention and makes everyone eager to dig in. The flan is topped with fresh fruits like strawberries, blueberries, and raspberries, adding a burst of color and flavor. The glossy layer on top glistens under the light, making it even more inviting.
This dessert is perfect for celebrations. Its creamy, rich taste pairs wonderfully with the tartness of the fruits. Plus, it’s easy to slice and serve, making it a great choice for gatherings. Whether it’s a birthday party or a festive get-together, brightly colored flan will surely impress your guests.
Ingredients
- 1 cup sugar
- 6 large eggs
- 1 can (14 ounces) sweetened condensed milk
- 1 can (12 ounces) evaporated milk
- 1 tablespoon vanilla extract
- 1 cup fresh strawberries, sliced
- 1 cup fresh blueberries
- 1 cup fresh raspberries
- Mint leaves for garnish
Instructions
- Preheat your oven to 350°F (175°C).
- In a saucepan, melt the sugar over medium heat until it turns golden brown. Quickly pour the caramel into a round baking dish, tilting to coat the bottom.
- In a blender, combine eggs, sweetened condensed milk, evaporated milk, and vanilla extract. Blend until smooth.
- Pour the mixture over the caramel in the baking dish.
- Place the baking dish in a larger pan filled with hot water (water bath). Bake for about 50-60 minutes, or until set.
- Let it cool, then refrigerate for at least 4 hours or overnight.
- To serve, carefully invert the flan onto a serving plate. Top with fresh fruits and mint leaves for garnish.
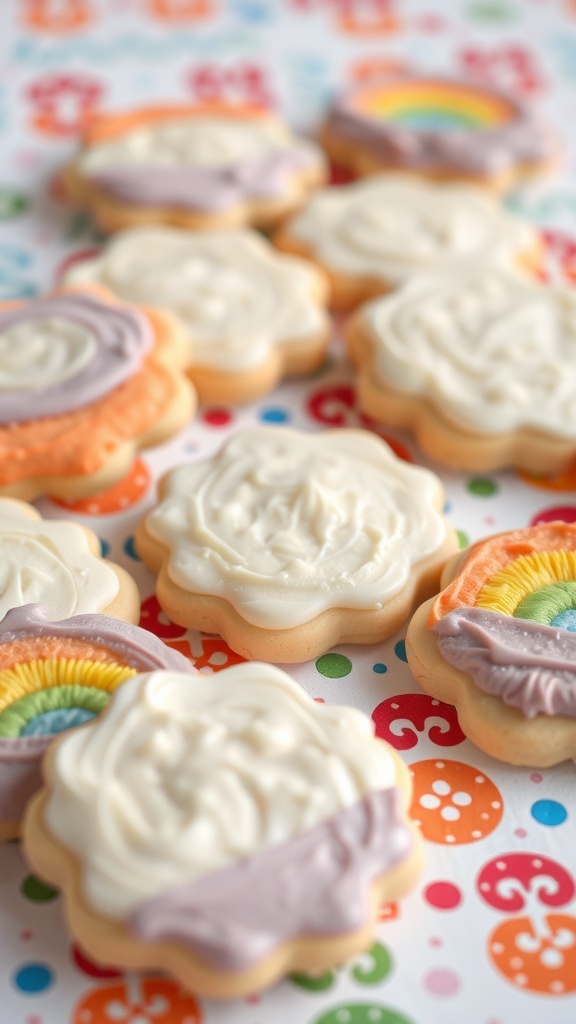
Colorful Cookie Sandwiches
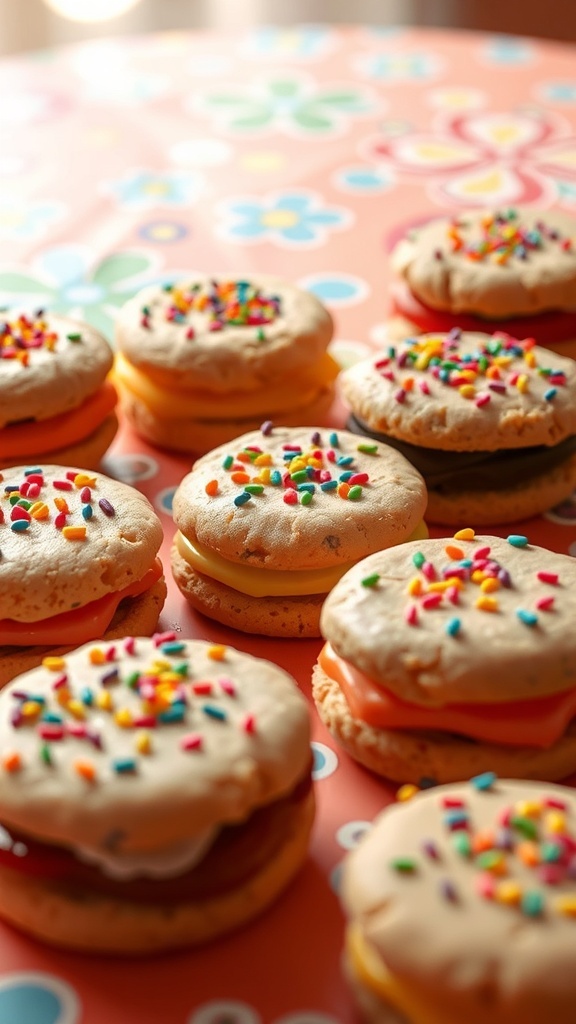
Colorful cookie sandwiches are a fun and vibrant treat perfect for any party. These delightful desserts feature two soft cookies filled with creamy frosting or jam, all topped with a sprinkle of colorful confetti. The combination of flavors and textures makes them irresistible!
Imagine a table filled with these cheerful cookies, each one a burst of color. They can be made in various flavors, from classic vanilla to rich chocolate, allowing you to mix and match to suit your guests’ tastes. Plus, they are easy to make and can be decorated in countless ways, making them a hit at any gathering.
Ingredients
- 2 cups all-purpose flour
- 1 teaspoon baking powder
- 1/2 teaspoon baking soda
- 1/4 teaspoon salt
- 1 cup unsalted butter, softened
- 1 cup granulated sugar
- 1/2 cup brown sugar, packed
- 2 large eggs
- 1 teaspoon vanilla extract
- 1 cup frosting (store-bought or homemade)
- 1/2 cup colorful sprinkles
Instructions
- Preheat your oven to 350°F (175°C). Line a baking sheet with parchment paper.
- In a bowl, whisk together flour, baking powder, baking soda, and salt. Set aside.
- In another bowl, cream together the softened butter, granulated sugar, and brown sugar until light and fluffy. Beat in the eggs and vanilla extract.
- Gradually add the dry ingredients to the wet mixture, mixing until just combined.
- Drop spoonfuls of dough onto the prepared baking sheet, spacing them about 2 inches apart.
- Bake for 10-12 minutes or until the edges are lightly golden. Let them cool completely on a wire rack.
- Once cooled, spread frosting on the flat side of one cookie and sandwich it with another cookie. Roll the edges in colorful sprinkles for a festive touch.
- Serve and enjoy your colorful cookie sandwiches!
Cheerful Chocolate Fondue
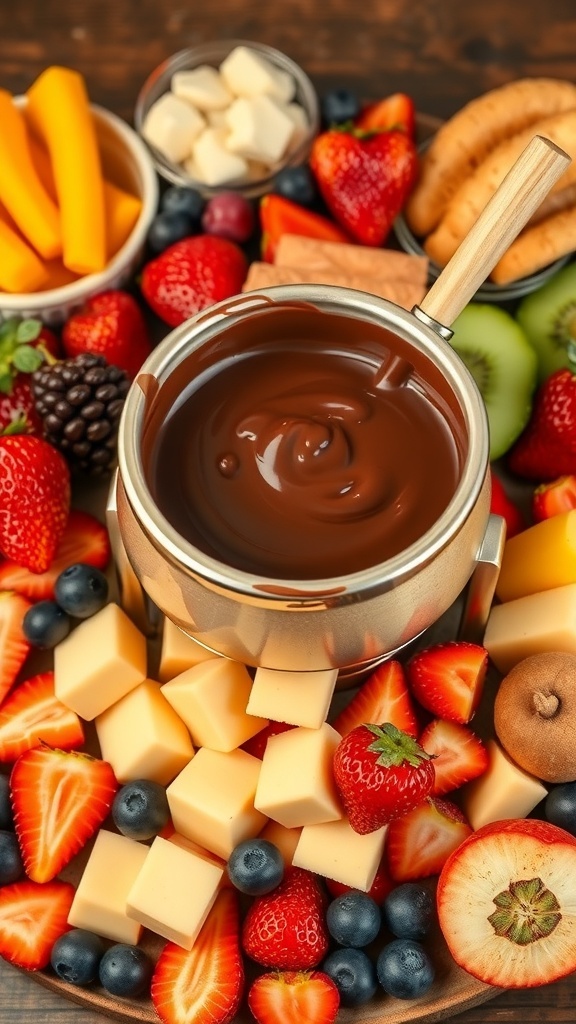
Chocolate fondue is a fun and interactive dessert that brings joy to any gathering. Imagine a pot of warm, melted chocolate surrounded by a colorful array of fruits, cheeses, and cookies. It’s a feast for the eyes and the taste buds!
The image showcases a delightful spread perfect for dipping. You can see strawberries, blueberries, and slices of kiwi, all ready to be dipped into that rich chocolate. There are also cubes of cheese and crunchy cookies, adding a savory twist to the sweet experience.
This dessert is not just about taste; it’s about the experience. Guests can choose their favorite dippers and enjoy the process of creating their own sweet treats. It’s a great way to spark conversations and laughter at any party!
Now, let’s get into how you can create this cheerful chocolate fondue at home. It’s simple and requires just a few ingredients. Gather your friends and get ready for a delicious time!
Colorful Pudding Parfaits
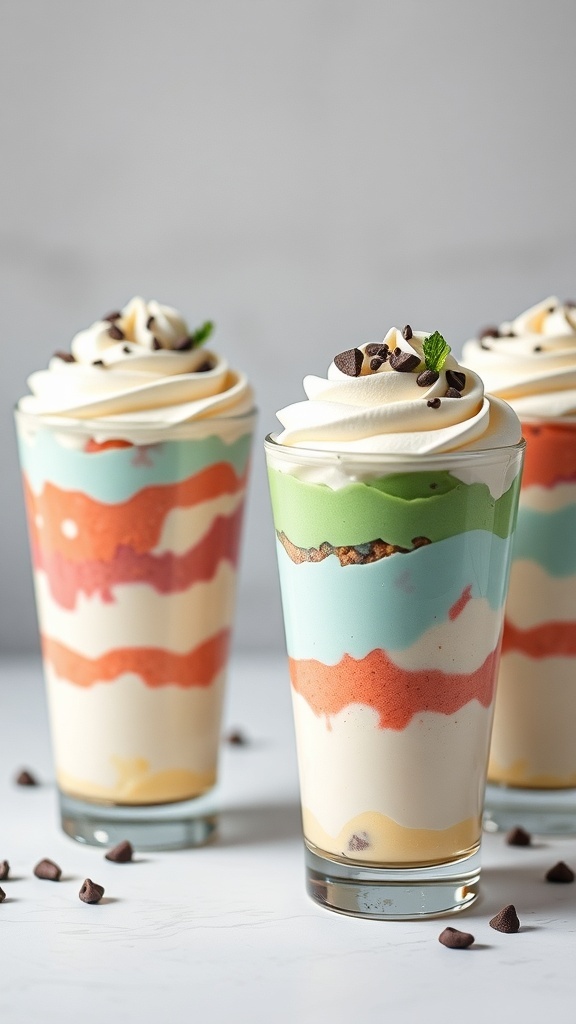
Colorful pudding parfaits are a fun and vibrant addition to any party. These layered desserts are not just a treat for the taste buds but also a feast for the eyes. Each layer brings a different flavor and color, making them perfect for celebrations.
In the image, you can see beautifully arranged parfaits in clear glasses. The layers of pudding alternate between bright colors like orange, green, and blue, topped with fluffy whipped cream and a sprinkle of chocolate chips. The contrast of colors makes these desserts stand out, inviting everyone to dig in.
Creating these parfaits is simple and allows for creativity. You can use different flavors of pudding, fruits, and toppings to make them your own. They are perfect for kids and adults alike, making them a hit at any gathering.
Ingredients
- 1 box (3.4 oz) instant vanilla pudding mix
- 2 cups milk
- 1 box (3.4 oz) instant chocolate pudding mix
- 2 cups milk
- Food coloring (various colors)
- 1 cup whipped cream
- Chocolate chips for topping
- Crushed cookies or graham crackers (optional)
Instructions
- Prepare the Vanilla Pudding: In a bowl, mix the vanilla pudding mix with 2 cups of milk. Whisk until smooth and let it sit for a few minutes to thicken.
- Color the Vanilla Pudding: Divide the vanilla pudding into separate bowls. Add food coloring to each bowl to create different colors. Mix until you achieve your desired shades.
- Prepare the Chocolate Pudding: In another bowl, mix the chocolate pudding mix with 2 cups of milk. Whisk until smooth and let it thicken.
- Layer the Parfaits: In clear glasses, start layering the puddings. Begin with a layer of one color, followed by a layer of chocolate pudding, then another color. Repeat until the glasses are filled.
- Top with Whipped Cream: Once the glasses are filled, add a generous dollop of whipped cream on top. Sprinkle with chocolate chips and crushed cookies if desired.
- Chill and Serve: Place the parfaits in the refrigerator for at least 30 minutes before serving. Enjoy your colorful pudding parfaits!


