
Not every recipe is a hit, and some might even have your guests secretly cringing. From dishes that just never seem to please to trendy meals that didn’t quite land, this list uncovers the 30 recipes that people pretend to love but secretly wish you’d stop making. Dive in, and let’s save your kitchen from the culinary cringe!
Here’s the First Most Don’t Like: Mushy Mashed Potatoes
Mushy mashed potatoes often find their way to the dinner table, but let’s be honest: they’re not everyone’s favorite. The image of sad-looking mashed potatoes says it all. They can be bland, overly creamy, or just plain unappealing. When you think of comfort food, you want something that excites your taste buds, not something that makes you feel like you’re eating baby food.
Many people have memories of mushy mashed potatoes that were either too watery or lacked flavor. It’s easy to see why they might not be a hit at gatherings. Instead of serving up this sad side dish, consider alternatives that pack a punch. Think about adding garlic, herbs, or even cheese to elevate the dish.
So, if you’re still making mushy mashed potatoes, it might be time to rethink your approach. There are so many ways to make this classic dish more enjoyable.
Let’s keep going with the terrible dishes most people really don’t like.
Jell-O Salad with Suspicious Add-ins
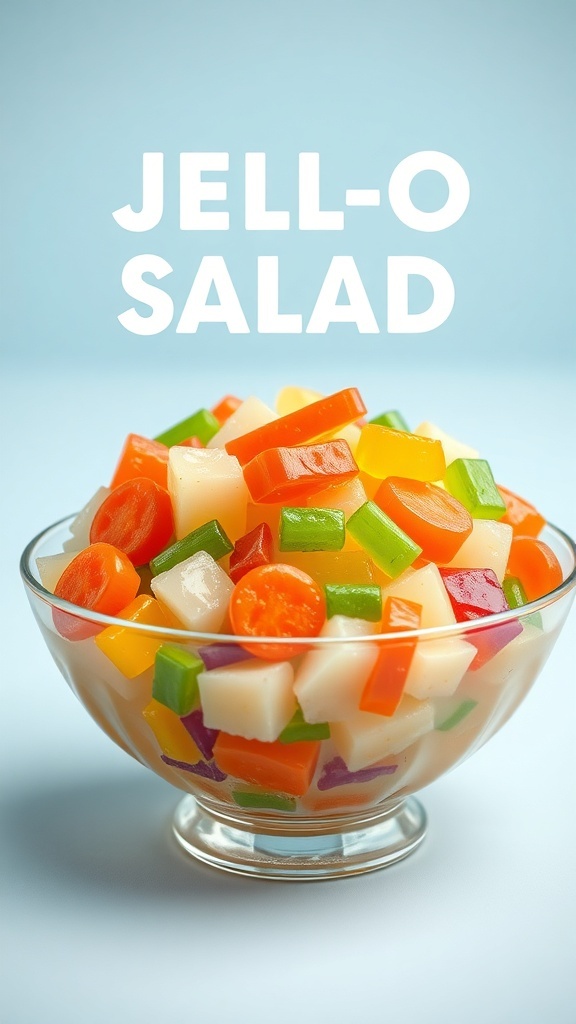
Jell-O salad is one of those dishes that can spark a lively debate at any gathering. It looks colorful and fun, but many secretly dread its presence on the table. The image shows a vibrant bowl of Jell-O salad, filled with an assortment of jiggly cubes and suspicious add-ins. From fruit to marshmallows, this dish often leaves guests wondering what exactly they are eating.
What makes Jell-O salad so controversial? For some, it’s the unexpected ingredients that can make or break the dish. Pineapple, cottage cheese, or even shredded carrots can find their way into this gelatinous mix, leading to a mix of flavors that not everyone appreciates. The bright colors may attract attention, but the taste can be a different story.
So, if you’re thinking about making Jell-O salad for your next potluck, consider the crowd. You might want to skip the unusual add-ins and stick to a classic recipe that everyone can enjoy. Here’s a simple and straightforward recipe for a traditional Jell-O salad that keeps things simple and tasty.
Overcooked Brussels Sprouts
Brussels sprouts can be a hit or miss at the dinner table. When cooked just right, they offer a delightful crunch and a slightly nutty flavor. However, overcooked Brussels sprouts turn mushy and lose their vibrant green color, making them less appealing.
Many people secretly dislike overcooked Brussels sprouts, often due to their strong, sulfurous smell and unappetizing texture. If you want to keep your guests happy, it’s best to avoid the boiling method and opt for roasting or sautéing instead. These methods enhance their natural sweetness and keep them crisp.
Here’s a simple recipe to make delicious roasted Brussels sprouts that everyone will love!
Ingredients
- 1 pound Brussels sprouts, trimmed and halved
- 3 tablespoons olive oil
- 1 teaspoon salt
- 1/2 teaspoon black pepper
- 1 tablespoon balsamic vinegar (optional)
- 1/4 cup grated Parmesan cheese (optional)
Instructions
- Preheat your oven to 400°F (200°C).
- In a large bowl, toss the halved Brussels sprouts with olive oil, salt, and pepper until evenly coated.
- Spread the Brussels sprouts in a single layer on a baking sheet.
- Roast in the oven for 20-25 minutes, stirring halfway through, until they are golden brown and crispy on the edges.
- If using, drizzle with balsamic vinegar and sprinkle with Parmesan cheese before serving.
Overly Sweet Potato Casserole
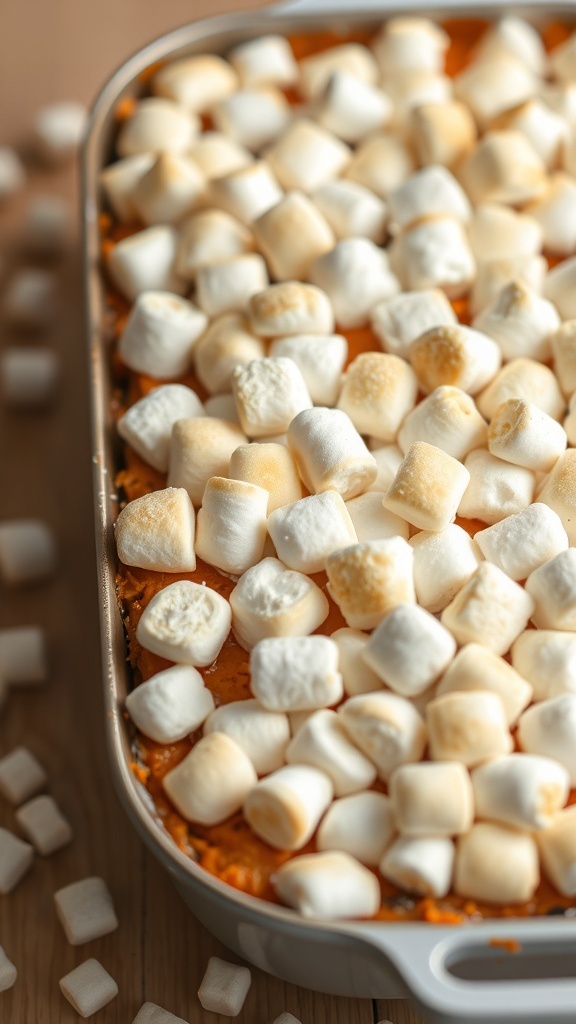
Sweet potato casserole is a classic dish that often shows up at holiday gatherings. While it looks appealing, many people secretly dread it. The reason? It tends to be overly sweet, drowning out the natural flavor of the sweet potatoes. Topped with a mountain of marshmallows, this dish can feel more like dessert than a side. If you’ve ever been at a potluck and seen this casserole, you know the mixed feelings it brings.
When making sweet potato casserole, it’s easy to go overboard with sugar and toppings. The combination of brown sugar, marshmallows, and sometimes even pecans can create a sugary overload. Instead of enhancing the sweet potatoes, these ingredients often mask their earthy goodness. It’s no wonder that many people would prefer a simple baked sweet potato instead.
So, if you’re thinking about bringing this dish to your next gathering, consider a lighter version. A savory sweet potato dish with herbs and spices might be a better choice. That way, you can still enjoy the comfort of sweet potatoes without the overwhelming sweetness.
Ingredients
- 4 cups mashed sweet potatoes
- 1/2 cup brown sugar
- 1/4 cup milk
- 1/4 cup unsalted butter, melted
- 1 teaspoon vanilla extract
- 1/2 teaspoon cinnamon
- 1/4 teaspoon nutmeg
- 2 cups mini marshmallows
Instructions
- Preheat your oven to 350°F (175°C).
- In a large bowl, combine the mashed sweet potatoes, brown sugar, milk, melted butter, vanilla extract, cinnamon, and nutmeg. Mix until smooth.
- Transfer the sweet potato mixture to a greased baking dish.
- Spread the mini marshmallows evenly over the top.
- Bake for 25-30 minutes, or until the marshmallows are golden brown.
- Remove from the oven and let it cool slightly before serving.
Canned Green Bean Casserole
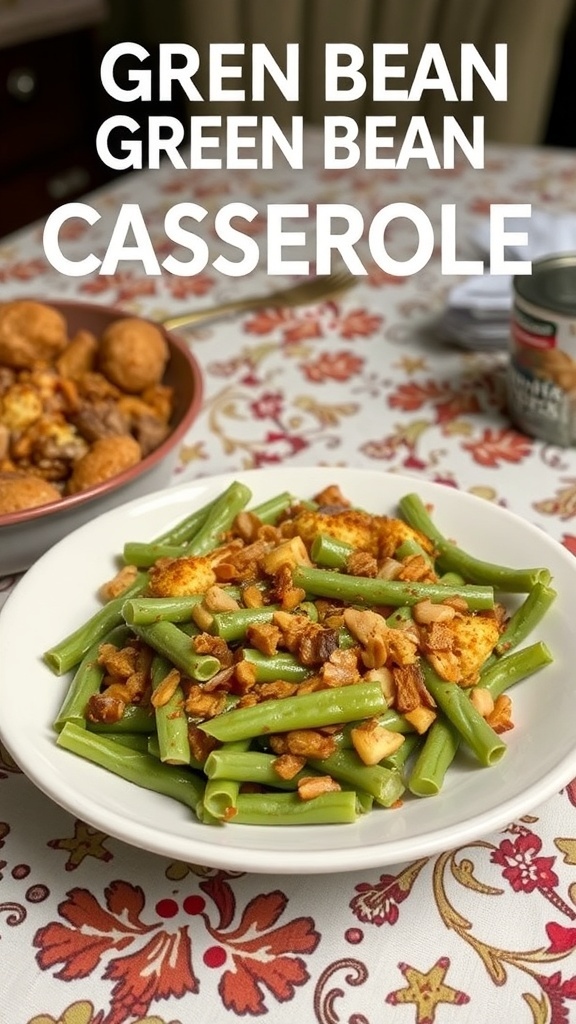
Canned green bean casserole is a dish that often shows up at family gatherings and holiday dinners. It’s a mix of green beans, cream of mushroom soup, and crispy fried onions. While it might seem like a classic, many people secretly dread seeing it on the table. The combination of flavors and textures just doesn’t sit well with everyone.The dish usually features canned green beans, which can lack the freshness that many prefer. The creamy soup can be overly rich, and the fried onions, while crunchy, can feel out of place. It’s a recipe that seems easy to make, but it often ends up being a point of contention among guests.
If you’re looking to spice things up or avoid the eye rolls, consider trying something different. There are plenty of other veggie dishes that can steal the spotlight without the canned ingredients. But if you still want to give this casserole a shot, here’s a simple recipe to follow.
Ingredients
- 2 cans (14.5 oz each) green beans, drained
- 1 can (10.5 oz) cream of mushroom soup
- 1 cup milk
- 1 cup crispy fried onions
- 1/2 teaspoon soy sauce
- Salt and pepper to taste
Instructions
- Preheat your oven to 350°F (175°C).
- In a large bowl, mix the drained green beans, cream of mushroom soup, milk, soy sauce, salt, and pepper.
- Pour the mixture into a baking dish and spread it evenly.
- Bake for 25 minutes, then remove from the oven.
- Sprinkle the crispy fried onions on top and return to the oven for an additional 10 minutes until the onions are golden brown.
- Let it cool slightly before serving. Enjoy!
Dry Turkey with No Flavor
Ah, the infamous dry turkey. It’s the dish that often steals the show for all the wrong reasons. Gathered around the table, family and friends stare at the centerpiece, a turkey that looks good but promises nothing in terms of flavor. The dry meat can leave everyone feeling disappointed, and it’s a common complaint during holiday meals.
Many cooks try to impress with a grand turkey, but without the right techniques, it can end up being a flavorless disaster. The key to a juicy turkey is all in the preparation and cooking method. If you find yourself dreading the turkey every year, it might be time to rethink your approach.
Instead of serving up a turkey that no one wants to eat, consider a recipe that guarantees moist, flavorful meat. With the right ingredients and steps, you can create a turkey that everyone will love.
Ingredients
- 1 whole turkey (12-14 pounds)
- 1/2 cup unsalted butter, softened
- 2 tablespoons salt
- 1 tablespoon black pepper
- 1 tablespoon garlic powder
- 1 tablespoon onion powder
- 1 tablespoon dried thyme
- 1 tablespoon dried rosemary
- 4 cups chicken broth
- 1 lemon, halved
- 1 onion, quartered
- Fresh herbs (like rosemary and thyme) for stuffing
Instructions
- Preheat your oven to 325°F (165°C).
- In a bowl, mix the softened butter with salt, pepper, garlic powder, onion powder, thyme, and rosemary.
- Pat the turkey dry with paper towels. Carefully loosen the skin over the breast and thighs, then spread half of the butter mixture under the skin. Rub the remaining butter all over the outside of the turkey.
- Stuff the cavity with lemon halves, onion quarters, and fresh herbs.
- Place the turkey in a roasting pan and pour chicken broth into the bottom of the pan.
- Cover the turkey loosely with foil and roast for about 2 to 2.5 hours. Remove the foil for the last 30-45 minutes to allow the skin to brown.
- Check the internal temperature in the thickest part of the thigh; it should reach 165°F (75°C).
- Let the turkey rest for at least 20 minutes before carving. This helps retain the juices.
Fruitcake with Unidentifiable Ingredients
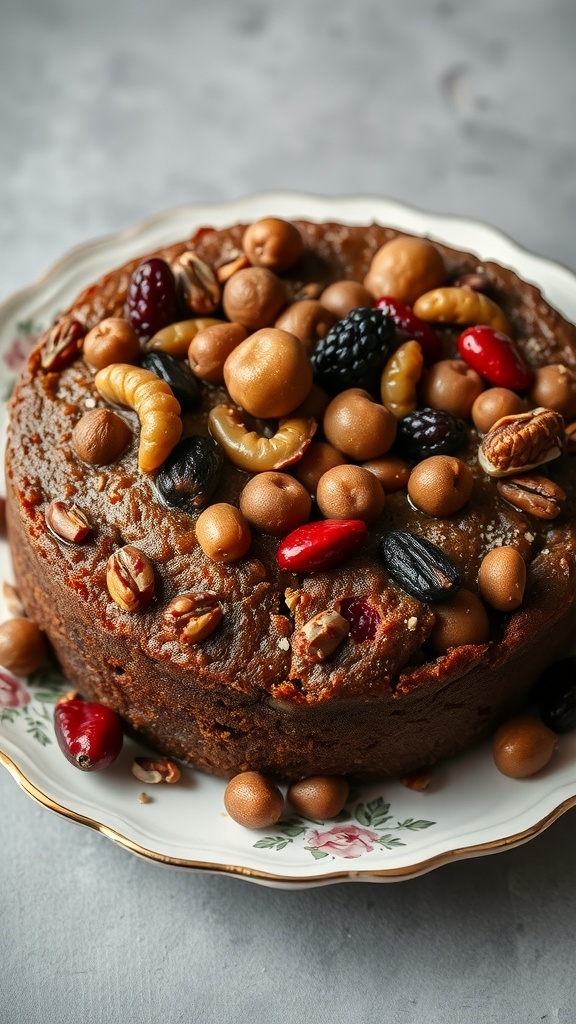
Fruitcake often gets a bad rap, and for good reason. This dense dessert is packed with a mix of fruits and nuts that can leave many scratching their heads. The image shows a fruitcake topped with an assortment of colorful, unidentifiable ingredients. It’s a sight that can be both intriguing and off-putting. The shiny, mysterious toppings might make you wonder what exactly is in this cake.
Fruitcake is traditionally made with candied fruits, nuts, and spices, all mixed into a rich batter. However, the combination of flavors can be overwhelming. Some people love it, while others would rather pass. If you’ve ever been at a holiday gathering and seen a fruitcake, you know the hesitation it brings. It’s a dessert that often ends up being the last one picked.
So, if you’re thinking about making fruitcake for your next event, you might want to reconsider. Instead, let’s focus on a recipe that’s sure to please everyone. Here’s a simple and delicious alternative that keeps the spirit of fruitcake without the mystery!
Ingredients
- 2 cups mixed dried fruits (like raisins, apricots, and cranberries)
- 1 cup chopped nuts (walnuts or pecans work well)
- 1/2 cup unsalted butter, softened
- 1 cup brown sugar
- 2 large eggs
- 1 teaspoon vanilla extract
- 1 1/2 cups all-purpose flour
- 1 teaspoon baking powder
- 1 teaspoon ground cinnamon
- 1/2 teaspoon salt
Instructions
- Preheat your oven to 350°F (175°C). Grease a 9-inch round cake pan.
- In a bowl, mix the dried fruits and nuts. Set aside.
- In another bowl, cream together the softened butter and brown sugar until light and fluffy. Beat in the eggs and vanilla extract.
- In a separate bowl, whisk together the flour, baking powder, cinnamon, and salt.
- Gradually add the dry ingredients to the wet mixture, mixing until just combined. Fold in the fruit and nut mixture.
- Pour the batter into the prepared cake pan and smooth the top. Bake for 30-35 minutes, or until a toothpick inserted in the center comes out clean.
- Let the cake cool in the pan for 10 minutes before transferring it to a wire rack to cool completely.
Chewy Meatloaf with Ketchup Glaze
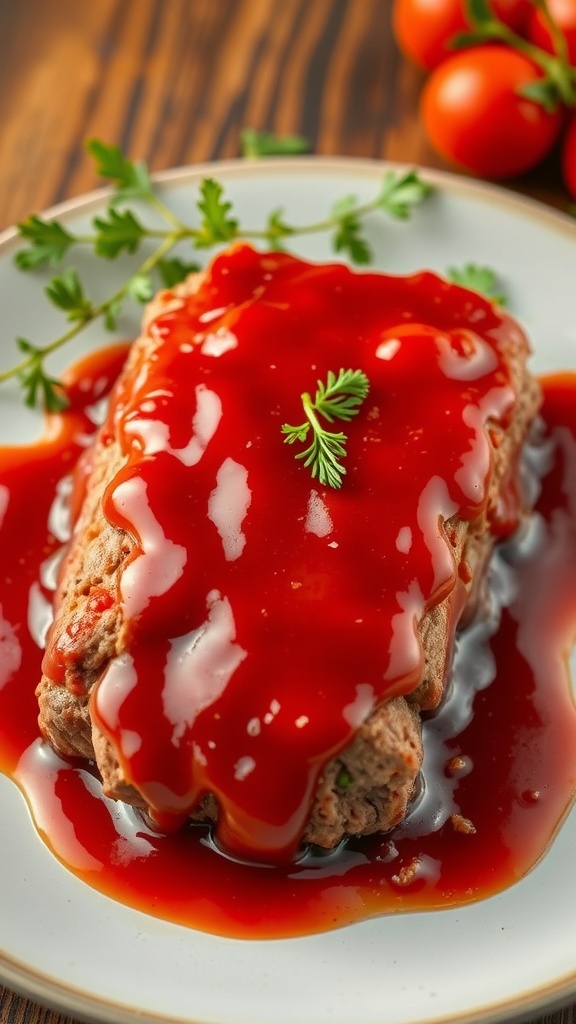
Meatloaf often brings back memories of family dinners and comfort food. However, it seems that many people secretly cringe at the thought of this classic dish. The chewy texture and the sweet ketchup glaze can be polarizing. Some love it, while others would rather skip it altogether.
This meatloaf, topped with a shiny layer of ketchup, looks inviting but might not be the star of the dinner table. The combination of ground meat, breadcrumbs, and seasonings is simple, yet it often misses the mark for many. It’s easy to see why some might wish for a different main course.
For those who still want to give meatloaf a shot, here’s a recipe that might just change your mind. It’s straightforward and can be customized to your taste. Let’s see if this chewy meatloaf can win over some skeptics!
Ingredients
- 1 1/2 pounds ground beef
- 1 cup breadcrumbs
- 1/2 cup onion, finely chopped
- 1/2 cup milk
- 2 large eggs
- 1/4 cup ketchup
- 1 tablespoon Worcestershire sauce
- 1 teaspoon garlic powder
- 1 teaspoon salt
- 1/2 teaspoon black pepper
- 1/2 cup ketchup (for topping)
Instructions
- Preheat the oven to 350°F (175°C).
- In a large bowl, combine ground beef, breadcrumbs, onion, milk, eggs, 1/4 cup ketchup, Worcestershire sauce, garlic powder, salt, and pepper. Mix until well combined.
- Transfer the mixture to a loaf pan and shape it into a loaf.
- Spread the remaining 1/2 cup ketchup over the top of the meatloaf.
- Bake for 1 hour or until the internal temperature reaches 160°F (70°C).
- Let it rest for 10 minutes before slicing. Serve warm.
Mushy Risotto with No Flavor
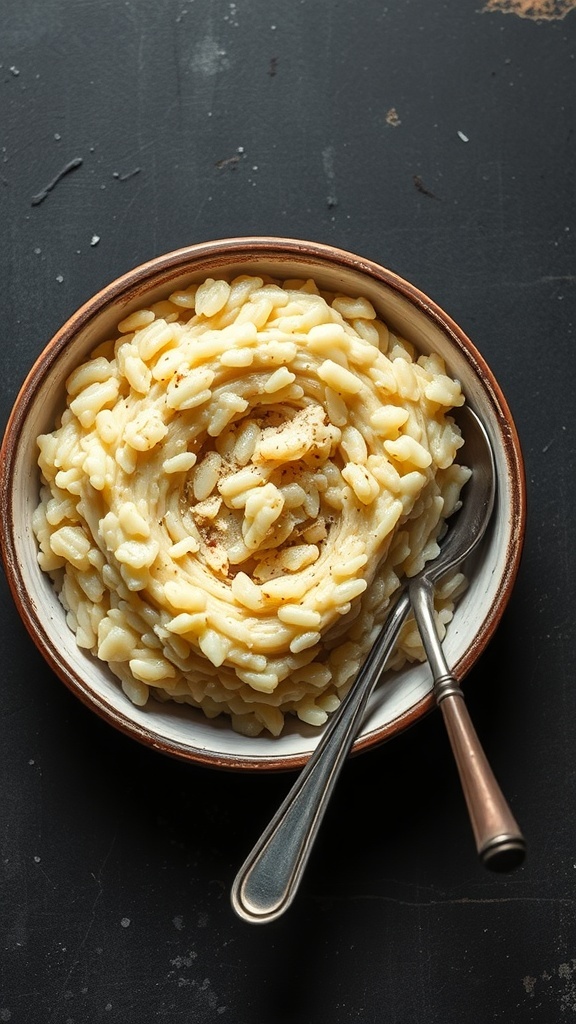
Risotto is often seen as a comforting dish, but when it turns out mushy and bland, it can be a real letdown. The creamy texture might seem appealing at first, but if there’s no flavor to back it up, it falls flat. No one wants to sit down to a bowl of rice that tastes like it’s missing something essential.
Picture a bowl of risotto that looks inviting but lacks seasoning or depth. It’s easy to make, but the key is in the details. The right amount of broth, the perfect timing, and a sprinkle of cheese can elevate this dish from boring to brilliant. When risotto is overcooked, it loses its character and becomes a gloppy mess.
So, what can you do to avoid this culinary pitfall? Start with quality ingredients. Fresh herbs, a good stock, and a splash of wine can make a world of difference. Stirring in some sautéed mushrooms or roasted vegetables can add texture and flavor. Don’t be afraid to experiment with spices, too!
Here’s a simple risotto recipe that’s sure to impress, avoiding the mushy fate:
Insipid Pasta Salad
Pasta salad is often a go-to for gatherings, but let’s be honest, many people secretly dislike it. The image shows a bowl of pasta salad that looks appealing but lacks excitement. It’s typically made with plain pasta, some cherry tomatoes, and a sprinkle of herbs. While it may seem easy to whip up, it often ends up being bland and forgettable.
The problem with insipid pasta salad is that it rarely brings bold flavors to the table. People often find themselves picking at it, wishing for something more. If you’re planning a meal, consider skipping this dish. Instead, opt for something with a bit more zest that will leave a lasting impression.
Now, if you still want to make a pasta salad that people will actually enjoy, here’s a recipe that packs a punch!
Ingredients
- 8 ounces rotini pasta
- 1 cup cherry tomatoes, halved
- 1/2 cup cucumber, diced
- 1/4 cup red onion, finely chopped
- 1/2 cup black olives, sliced
- 1/2 cup feta cheese, crumbled
- 1/4 cup olive oil
- 2 tablespoons red wine vinegar
- 1 teaspoon dried oregano
- Salt and pepper to taste
Instructions
- Cook the Pasta: In a large pot, bring salted water to a boil. Add the rotini pasta and cook according to package instructions until al dente. Drain and rinse under cold water to cool.
- Mix the Veggies: In a large bowl, combine the cherry tomatoes, cucumber, red onion, black olives, and feta cheese.
- Add the Pasta: Once the pasta is cool, add it to the bowl with the veggies.
- Make the Dressing: In a small bowl, whisk together the olive oil, red wine vinegar, oregano, salt, and pepper.
- Toss and Serve: Pour the dressing over the pasta salad and toss everything together until well combined. Chill in the fridge for at least 30 minutes before serving.
Overly Spicy Chili

Chili is a classic dish that many people love, but when it gets too spicy, it can turn into a culinary nightmare. The image shows a steaming bowl of chili, vibrant with colors and topped with a sprig of parsley. It looks inviting, but that warning sign in the background hints at the trouble that lies ahead. Overly spicy chili can leave your guests reaching for water instead of enjoying the meal.
When making chili, the balance of spices is key. Too much heat can overshadow the other flavors. It’s important to remember that not everyone has the same tolerance for spice. What might be a mild kick for you could be a fiery inferno for someone else. So, if you want to avoid the dreaded ‘too spicy’ complaint, keep the heat in check!
Ingredients
- 2 tablespoons olive oil
- 1 pound ground beef or turkey
- 1 onion, chopped
- 2 cloves garlic, minced
- 1 bell pepper, chopped
- 2 cans (15 oz each) kidney beans, drained and rinsed
- 1 can (28 oz) crushed tomatoes
- 2 tablespoons chili powder
- 1 teaspoon cumin
- 1 teaspoon paprika
- 1/2 teaspoon cayenne pepper (adjust to taste)
- Salt and pepper to taste
- Fresh cilantro for garnish
Instructions
- Heat olive oil in a large pot over medium heat. Add the ground meat and cook until browned.
- Add the chopped onion, garlic, and bell pepper. Sauté until the vegetables are soft.
- Stir in the kidney beans, crushed tomatoes, chili powder, cumin, paprika, cayenne pepper, salt, and pepper.
- Bring the mixture to a simmer. Reduce heat and let it cook for about 30 minutes, stirring occasionally.
- Taste and adjust the seasoning if needed. Serve hot, garnished with fresh cilantro.
Overly Sweet Glazed Ham
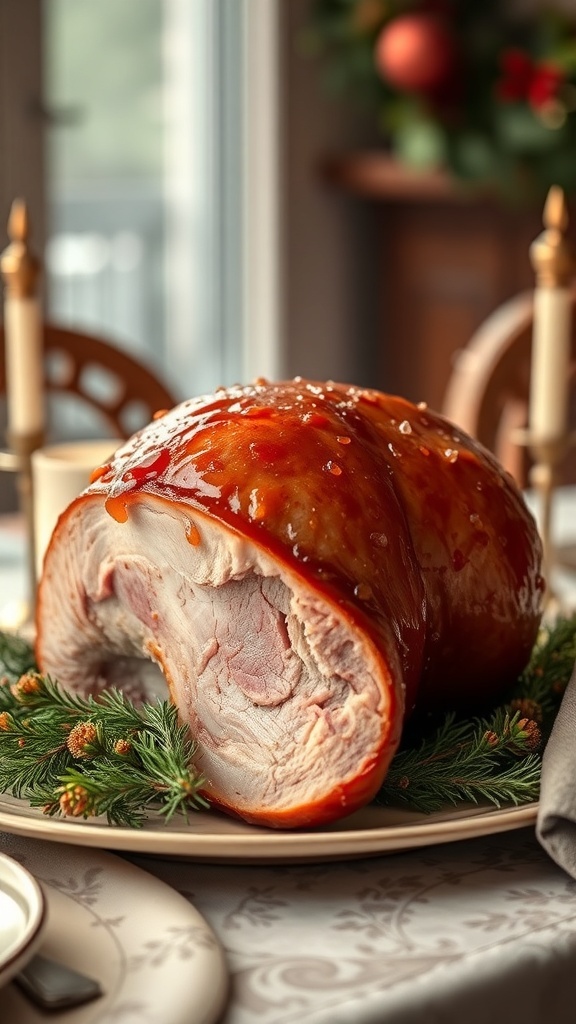
Glazed ham can look tempting, especially when it shines with that sticky, sweet glaze. But let’s be honest—many people secretly dread this dish. The overly sweet flavor can overwhelm the natural taste of the ham, turning what should be a savory centerpiece into a sugary mess. It’s often the dish that gets left behind on the table, while everyone reaches for the sides instead.
When you think of a holiday feast, you might picture a beautifully glazed ham, but that glaze can be a double-edged sword. The sweetness can clash with the saltiness of the meat, creating an unbalanced flavor profile. Plus, the sticky glaze can make it hard to slice and serve, leading to messy portions that don’t look appealing on the plate.
If you’re looking to impress your guests, it might be time to rethink that overly sweet glazed ham. Instead, consider a more balanced approach with herbs and spices that enhance the ham’s natural flavors without drowning them in sugar. Your guests will thank you!
Ingredients
- 1 fully cooked ham (about 8-10 pounds)
- 1 cup brown sugar
- 1/2 cup honey
- 1/4 cup Dijon mustard
- 1/4 cup apple cider vinegar
- 1 teaspoon ground cinnamon
- 1/2 teaspoon ground cloves
- 1/2 teaspoon black pepper
- 1/4 teaspoon salt
Instructions
- Preheat your oven to 325°F (165°C).
- Place the ham in a roasting pan, cut side down.
- In a bowl, mix together brown sugar, honey, Dijon mustard, apple cider vinegar, cinnamon, cloves, black pepper, and salt.
- Brush the glaze all over the ham, making sure to get it into the scored sections.
- Cover the ham loosely with aluminum foil and bake for about 1.5 to 2 hours, basting every 30 minutes with the glaze.
- Remove the foil for the last 30 minutes to allow the glaze to caramelize.
- Once done, let the ham rest for 15 minutes before slicing and serving.
Unseasoned Quinoa Salad
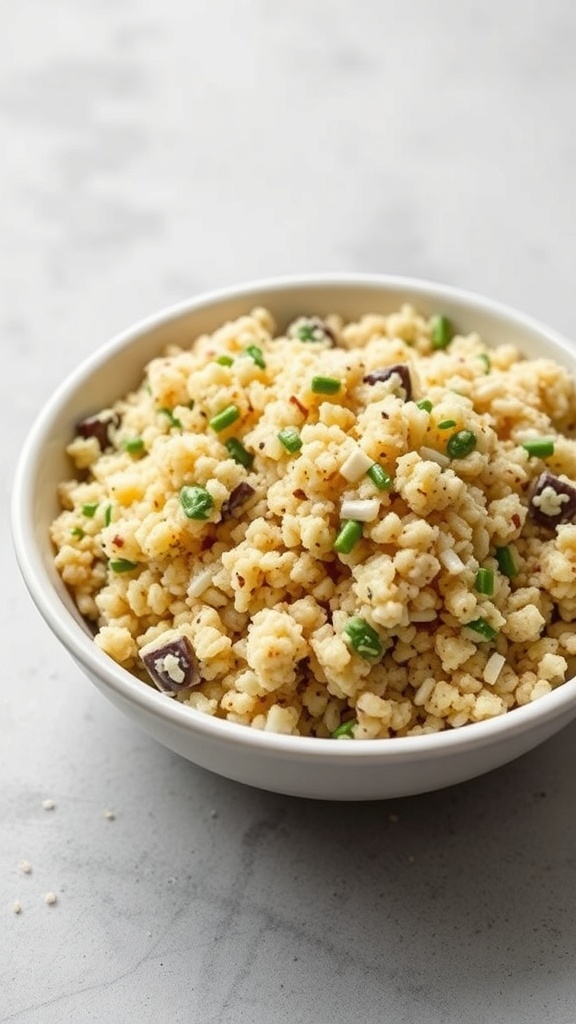
Quinoa salad is often seen as a healthy option, but let’s be honest: unseasoned quinoa salad can be a tough sell. The image shows a bowl of quinoa that looks fluffy but lacks that zing that makes you want to dive in. People want flavor, and without it, this dish can feel bland and uninspired.
Quinoa is packed with protein and nutrients, making it a great base for a salad. However, if you don’t add some seasoning or vibrant ingredients, it can end up being a sad side dish. Think about it: would you choose a plain bowl of quinoa over a colorful, flavorful salad? Probably not!
To elevate your quinoa salad, consider adding fresh herbs, a splash of lemon juice, or some diced veggies. A little seasoning goes a long way in turning this dish from a forgotten recipe into a crowd-pleaser.
Ingredients
- 1 cup quinoa
- 2 cups water or vegetable broth
- 1/2 cup diced cucumber
- 1/2 cup cherry tomatoes, halved
- 1/4 cup red onion, finely chopped
- 1/4 cup fresh parsley, chopped
- 1/4 cup olive oil
- Juice of 1 lemon
- Salt and pepper to taste
Instructions
- Rinse the quinoa under cold water to remove any bitterness.
- In a pot, combine quinoa and water (or broth). Bring to a boil, then reduce heat, cover, and simmer for about 15 minutes until the quinoa is fluffy and the liquid is absorbed.
- In a large bowl, combine cooked quinoa, cucumber, cherry tomatoes, red onion, and parsley.
- In a small bowl, whisk together olive oil, lemon juice, salt, and pepper.
- Pour the dressing over the salad and toss gently to combine.
- Serve chilled or at room temperature. Enjoy your flavorful quinoa salad!
Rubbery Shrimp Scampi
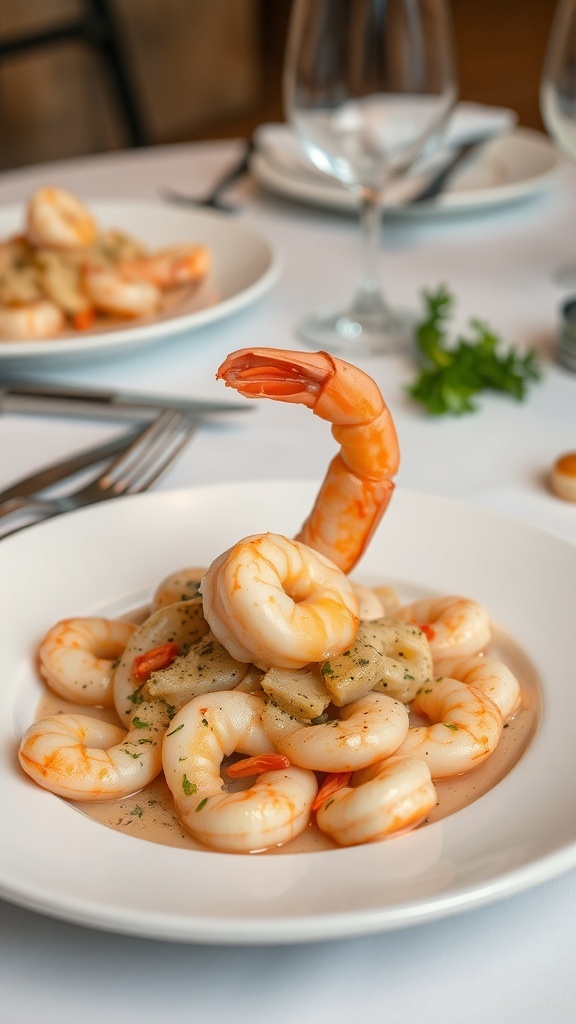
Shrimp scampi is often seen as a fancy dish, but when it’s rubbery, it loses all its charm. The image shows a plate of shrimp scampi that looks appealing at first glance. However, if the shrimp are overcooked, they turn into chewy little pieces that no one enjoys. The key to a great shrimp scampi is cooking the shrimp just right—tender and juicy, not tough and rubbery.
Many home cooks make the mistake of cooking shrimp too long, thinking they need to be firm to be safe. In reality, shrimp cook quickly. A few minutes on the heat is all they need. If you’re serving shrimp scampi, remember to keep an eye on them. Nobody wants to bite into a dish that feels like chewing on a rubber band!
So, if you’re planning to make shrimp scampi, take your time and pay attention to the cooking process. Your guests will appreciate the effort, and you’ll avoid the dreaded rubbery texture.
Ingredients
- 1 pound large shrimp, peeled and deveined
- 4 tablespoons unsalted butter
- 3 cloves garlic, minced
- 1/4 teaspoon red pepper flakes
- 1/2 cup white wine
- 1 lemon, juiced
- Salt and pepper to taste
- 1/4 cup fresh parsley, chopped
- 8 ounces linguine or spaghetti
Instructions
- Cook the Pasta: In a large pot, boil salted water and cook the pasta according to package instructions. Drain and set aside.
- Sauté the Shrimp: In a large skillet, melt the butter over medium heat. Add the minced garlic and red pepper flakes, cooking for about 1 minute until fragrant. Add the shrimp, cooking for 2-3 minutes until they turn pink.
- Add Wine and Lemon: Pour in the white wine and lemon juice. Let it simmer for another 2 minutes, allowing the flavors to meld.
- Combine: Toss in the cooked pasta, mixing everything well. Season with salt, pepper, and fresh parsley before serving.
Bland Tofu Stir-Fry
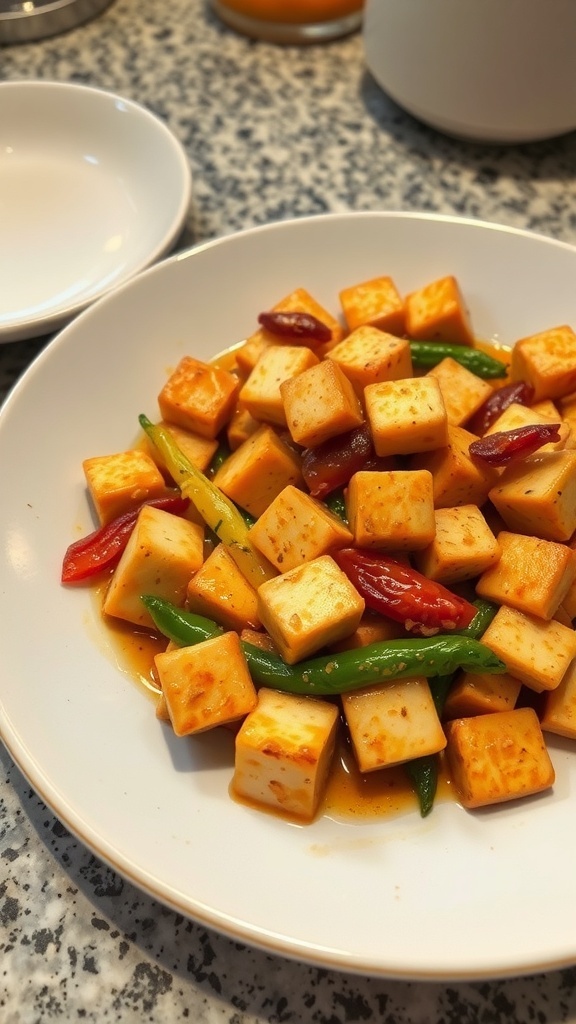
Tofu stir-fry is often seen as a healthy option, but let’s be honest: many find it bland and unexciting. The image shows a plate of tofu cubes tossed with colorful vegetables, but without the right seasoning, it can fall flat. Tofu has a unique texture and absorbs flavors well, yet it often ends up tasting like nothing at all. This dish can be a missed opportunity for flavor and excitement.
When making tofu stir-fry, the key is to add bold ingredients. Think garlic, ginger, and a splash of soy sauce or sesame oil. Fresh veggies like bell peppers and snap peas can add color and crunch, making the dish more appealing. If you’re going to serve tofu, make sure it’s packed with flavor!
So, if you’re thinking of whipping up a tofu stir-fry, consider this a friendly reminder to amp up the taste. No one wants to eat a bland meal, right? Let’s make it vibrant and delicious!
Ingredients
- 1 block firm tofu, drained and pressed
- 2 tablespoons soy sauce
- 1 tablespoon sesame oil
- 1 tablespoon vegetable oil
- 2 cloves garlic, minced
- 1 teaspoon ginger, minced
- 1 bell pepper, sliced
- 1 cup snap peas
- 1 tablespoon cornstarch (optional, for crispiness)
- Salt and pepper to taste
Instructions
- Prepare the Tofu: Cut the tofu into cubes. If you want it crispy, toss the cubes in cornstarch.
- Heat the Oil: In a large skillet or wok, heat vegetable oil over medium-high heat.
- Cook the Tofu: Add the tofu cubes and cook until golden brown on all sides. Remove and set aside.
- Add Aromatics: In the same skillet, add garlic and ginger. Sauté for about 30 seconds until fragrant.
- Add Veggies: Toss in the bell pepper and snap peas. Stir-fry for 3-4 minutes until tender-crisp.
- Combine: Return the tofu to the skillet. Add soy sauce and sesame oil. Stir well to combine and heat through.
- Season: Taste and adjust with salt and pepper as needed. Serve hot!
Soggy Garlic Bread
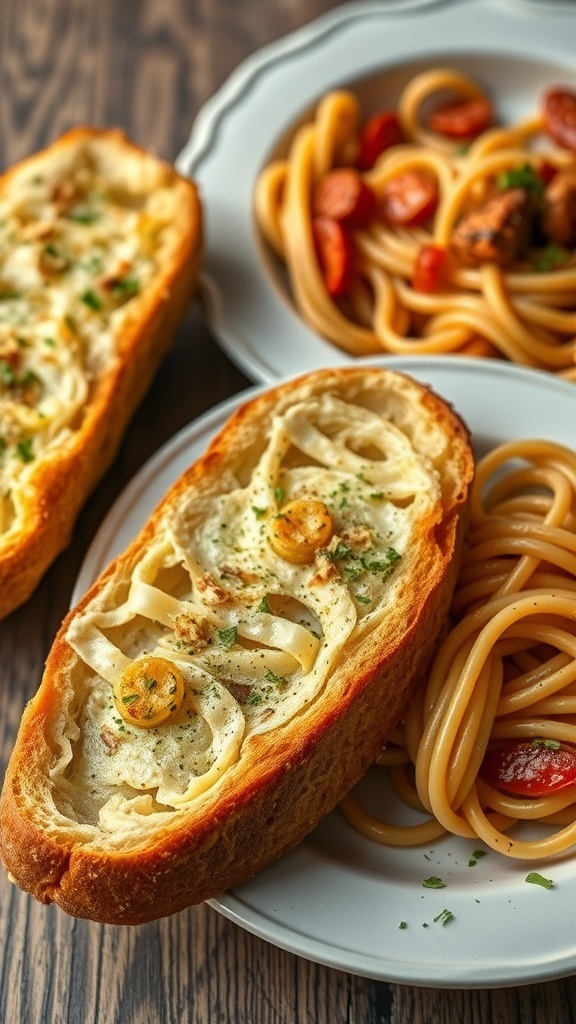
Garlic bread is a classic side that many love, but soggy garlic bread? Not so much. Picture this: you’ve just made a delicious pasta dish, and you want to serve it with some warm, crispy garlic bread. Instead, you pull out a loaf that’s limp and soggy. It’s a letdown, right?
The problem often lies in how it’s prepared. Overloading it with butter or not baking it long enough can turn a once-great dish into a soggy mess. Nobody wants to dip a floppy slice into their marinara sauce. It’s just not appealing!
So, how do you avoid this culinary disaster? The key is to balance the butter and ensure you bake it until it’s golden. A little crunch goes a long way in making garlic bread enjoyable.
Ingredients
- 1 loaf of French bread
- 1/2 cup unsalted butter, softened
- 4 cloves garlic, minced
- 1 tablespoon fresh parsley, chopped
- 1/2 teaspoon salt
- 1/4 teaspoon black pepper
- 1/4 cup grated Parmesan cheese (optional)
Instructions
- Preheat your oven to 375°F (190°C).
- In a bowl, mix the softened butter, minced garlic, parsley, salt, and pepper until well combined.
- Slice the French bread in half lengthwise and spread the garlic butter mixture evenly over both halves.
- If using, sprinkle the grated Parmesan cheese on top.
- Place the bread on a baking sheet and bake for about 10-12 minutes, or until the edges are golden and crispy.
- For extra crispiness, broil for an additional 1-2 minutes, watching closely to avoid burning.
- Remove from the oven, slice, and serve warm with your favorite pasta dish!
Bland Chicken Alfredo
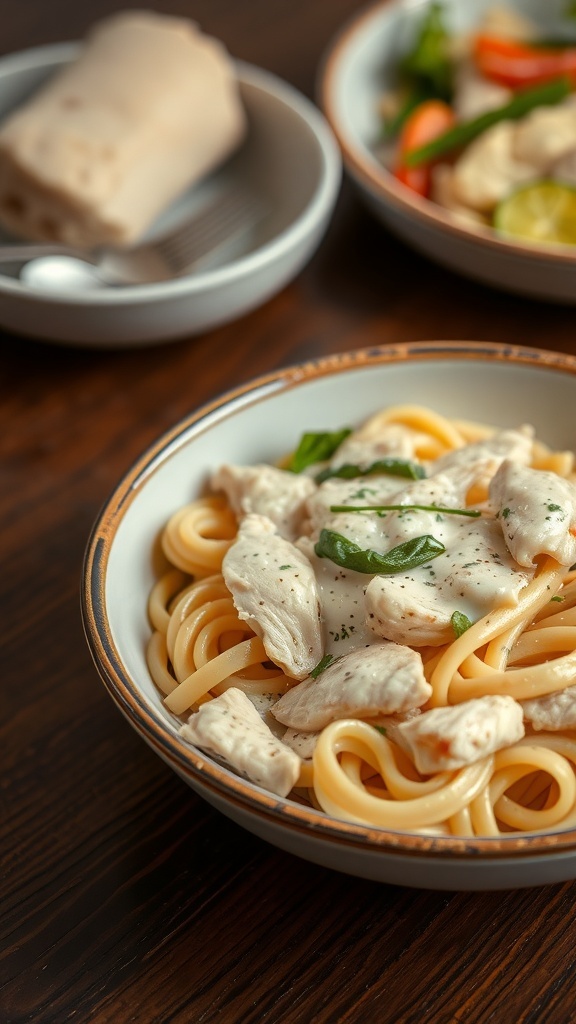
Chicken Alfredo is a classic dish that many people think they love. However, it often ends up being bland and unexciting. The image shows a bowl of Chicken Alfredo, featuring creamy sauce, tender chicken pieces, and pasta. While it looks appealing, the taste can leave much to be desired.
One reason Chicken Alfredo might fall flat is the lack of seasoning. Many recipes skip the important step of adding enough spices or herbs. This can make the dish feel one-dimensional. Instead of being a comforting favorite, it can become a meal that everyone secretly dreads.
Another issue is the sauce. A heavy, overly creamy sauce can overwhelm the dish. Instead of enhancing the flavors, it can mask them. A little balance with some garlic or a hint of lemon can make a world of difference.
So, if you’re thinking of making Chicken Alfredo, consider spicing it up. A few tweaks can turn this bland dish into something everyone will enjoy.
Ingredients
- 8 oz fettuccine pasta
- 2 cups cooked chicken, diced
- 1 cup heavy cream
- 1/2 cup grated Parmesan cheese
- 2 tablespoons butter
- 2 cloves garlic, minced
- Salt and pepper to taste
- Fresh parsley, chopped (for garnish)
Instructions
- Cook the Pasta: In a large pot, boil water and cook the fettuccine according to package instructions. Drain and set aside.
- Make the Sauce: In a skillet, melt the butter over medium heat. Add minced garlic and sauté for about 1 minute until fragrant.
- Add Cream: Pour in the heavy cream and bring to a simmer. Stir in the Parmesan cheese until melted and smooth.
- Add Chicken: Mix in the cooked chicken and season with salt and pepper. Let it heat through for a few minutes.
- Combine: Toss the cooked fettuccine in the sauce until well coated. Serve hot, garnished with fresh parsley.
Dried Out Corn on the Cob

When you think of summer barbecues, corn on the cob often comes to mind. However, dried out corn can ruin the experience. The image shows three ears of corn, perfectly golden but sadly overcooked. No one wants to bite into a piece of corn that feels more like chewing on a piece of wood.
Many people secretly dread this dish, especially when it’s served at gatherings. The flavor is often lost when corn is overcooked, leaving it tough and chewy. Instead of being a sweet, juicy treat, it becomes a chore to eat.
So, how can you avoid this culinary pitfall? The key is to cook corn just right. Aim for a tender bite without losing that fresh, sweet flavor. If you’re unsure, a quick taste test while cooking can save the day.
Here’s a simple recipe for perfectly grilled corn on the cob that will keep your guests coming back for more!
Overly Cheesy Mac and Cheese
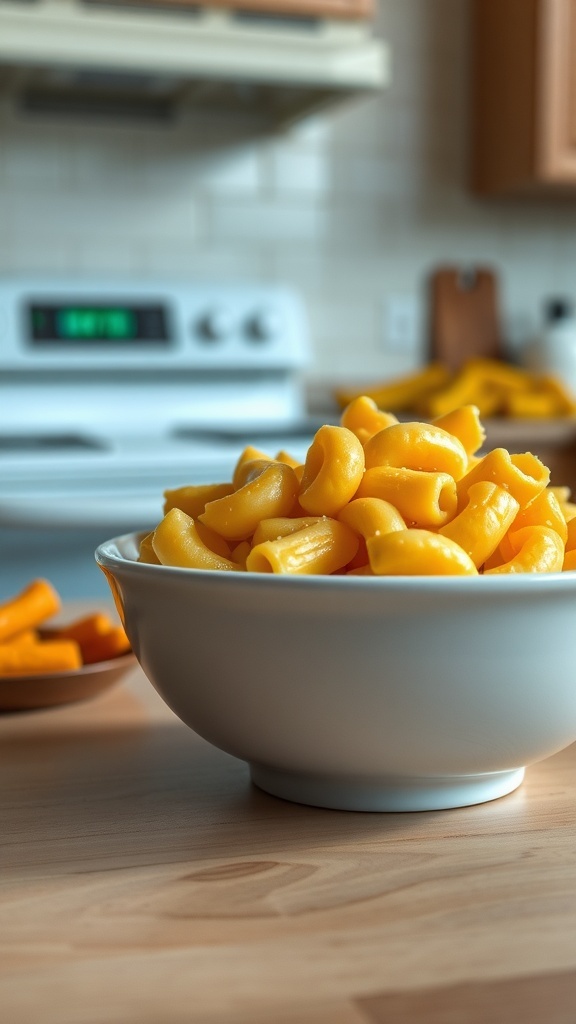
Mac and cheese is a classic comfort food. It’s creamy, cheesy, and oh-so-delicious. But sometimes, it can be taken too far. Overly cheesy mac and cheese can leave you feeling heavy and a bit overwhelmed. The image shows a bowl filled with perfectly cooked macaroni, coated in a bright yellow cheese sauce. While it may look tempting, many people secretly wish for a more balanced dish.
The problem often lies in the amount of cheese used. A sprinkle of cheese can enhance the flavor, but when it becomes the main event, it can overshadow the pasta. Instead of a harmonious blend, you end up with a gooey mess that’s hard to enjoy. So, if you’re making mac and cheese, consider dialing back the cheese a bit.
Here’s a simple recipe for a more balanced mac and cheese that still satisfies without overwhelming your taste buds.
Ingredients
- 8 ounces elbow macaroni
- 2 tablespoons unsalted butter
- 2 tablespoons all-purpose flour
- 2 cups milk
- 1 cup shredded sharp cheddar cheese
- 1/2 cup grated Parmesan cheese
- 1/2 teaspoon garlic powder
- 1/2 teaspoon onion powder
- Salt and pepper to taste
- 1/4 cup breadcrumbs (optional)
Instructions
- Cook the Pasta: Boil a large pot of salted water. Add the macaroni and cook according to package instructions until al dente. Drain and set aside.
- Make the Cheese Sauce: In a saucepan, melt the butter over medium heat. Stir in the flour and cook for about 1 minute. Gradually whisk in the milk, stirring constantly until the mixture thickens.
- Add the Cheese: Remove the saucepan from heat and stir in the cheddar and Parmesan cheese until melted. Add garlic powder, onion powder, salt, and pepper.
- Combine: Add the cooked macaroni to the cheese sauce and stir until well coated. If desired, transfer to a baking dish, sprinkle breadcrumbs on top, and broil for a few minutes until golden.
- Serve: Enjoy your mac and cheese warm, with a perfect balance of flavors!
Soggy Taco Salad
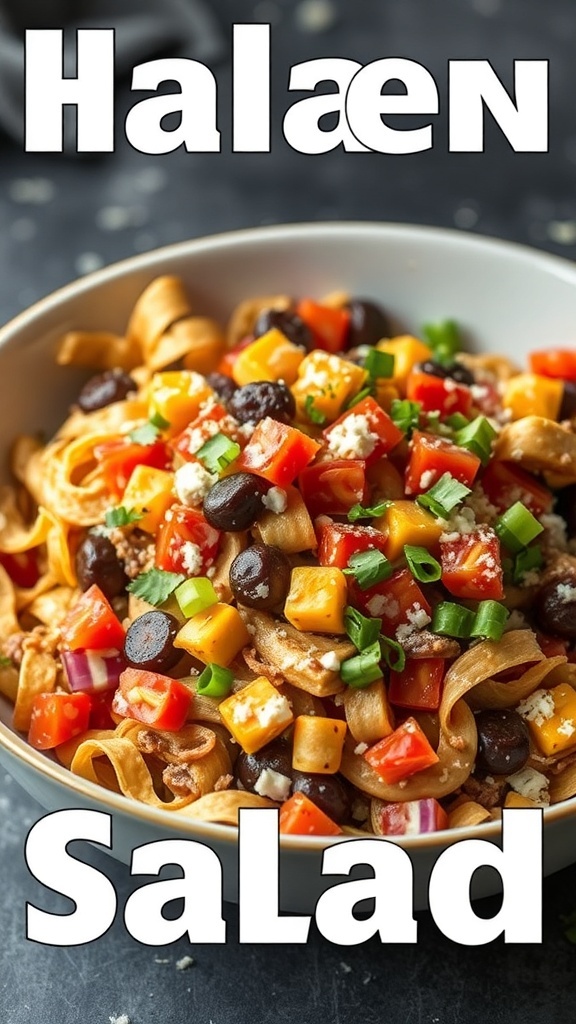
Soggy taco salad is a dish that often ends up being a disappointment. You think you’re getting a crunchy, fresh meal, but instead, you bite into a soggy mess. The combination of wet ingredients like salsa and dressing mixed with lettuce can quickly turn this salad into a sad pile of mush. It’s a classic example of how a few missteps can ruin a meal.
Many people secretly dislike soggy taco salad. It’s not just about the flavor; it’s about the texture. When you expect a crisp bite and get something limp instead, it can be pretty off-putting. Plus, who wants to serve a dish that looks unappetizing? If you want to avoid the eye rolls at your next gathering, it might be time to rethink this recipe.
So, what can you do instead? Consider a taco salad that keeps its crunch! Layer your ingredients wisely and serve the dressing on the side. This way, everyone can customize their salad without the risk of it turning into a soggy situation.
Ingredients
- 1 head of romaine lettuce, chopped
- 1 cup cherry tomatoes, halved
- 1 can black beans, rinsed and drained
- 1 cup corn, canned or frozen
- 1 cup shredded cheese (cheddar or Mexican blend)
- 1 avocado, diced
- 1/2 cup red onion, diced
- 1 cup tortilla chips, crushed
- 1/2 cup salsa
- 1/4 cup ranch dressing (optional)
Instructions
- Prepare the Base: In a large bowl, combine the chopped romaine lettuce, cherry tomatoes, black beans, corn, and red onion.
- Add Cheese and Avocado: Gently fold in the shredded cheese and diced avocado.
- Layer the Chips: Just before serving, sprinkle the crushed tortilla chips on top to maintain their crunch.
- Dress It Up: Serve with salsa and ranch dressing on the side, allowing everyone to add their preferred amount.
- Enjoy: Toss together just before eating for a fresh and crunchy taco salad experience!
Overcooked Veggie Burgers

Veggie burgers can be a great alternative for those looking to cut down on meat. However, overcooking them can turn a delicious meal into a dry, unappetizing experience. The image shows some veggie burgers that have seen better days, with a charred exterior that might make anyone think twice before taking a bite.
When making veggie burgers, it’s important to find the right balance. Cooking them too long can lead to a tough texture and burnt flavor, which is not what anyone wants. Instead, aim for a nice golden-brown color and a juicy interior. Remember, the goal is to highlight the flavors of the vegetables and spices, not mask them with overcooking.
So, if you’re planning to whip up some veggie burgers, keep an eye on the cooking time. A little attention goes a long way in ensuring a tasty meal that everyone will enjoy.
Ingredients
- 1 can (15 oz) black beans, drained and rinsed
- 1 cup cooked quinoa
- 1/2 cup breadcrumbs
- 1/4 cup chopped onion
- 1/4 cup chopped bell pepper
- 2 cloves garlic, minced
- 1 teaspoon cumin
- 1 teaspoon smoked paprika
- Salt and pepper to taste
- Olive oil for cooking
Instructions
- Prepare the Mixture: In a large bowl, mash the black beans with a fork. Stir in the cooked quinoa, breadcrumbs, onion, bell pepper, garlic, cumin, smoked paprika, salt, and pepper until well combined.
- Form the Patties: Shape the mixture into burger patties. You should get about 4-6 patties, depending on the size you prefer.
- Cook the Burgers: Heat a skillet over medium heat and add a little olive oil. Cook the patties for about 4-5 minutes on each side, or until they are golden brown. Avoid cooking them too long to keep them moist.
- Serve: Enjoy your veggie burgers on a bun with your favorite toppings, or serve them on their own with a side salad.
Fishy Tuna Casserole
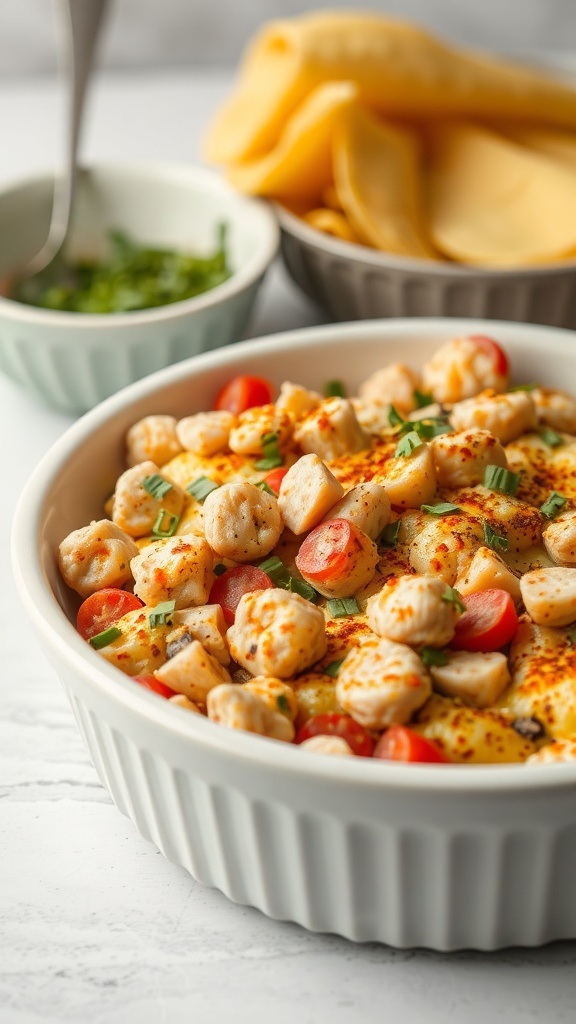
Tuna casserole is one of those dishes that often brings mixed feelings. It’s a classic comfort food, but let’s be honest—many people secretly dread it. The combination of tuna, creamy sauce, and noodles can be a hard sell, especially when it’s served with a side of nostalgia. If you’ve ever been at a potluck and seen that casserole dish, you know what I mean.
The image shows a bubbling tuna casserole, topped with fresh tomatoes and herbs. It looks inviting, but the fishy smell can be a dealbreaker for some. The texture is creamy, but it can also be mushy if not made right. And let’s not forget the surprise of those little peas that seem to pop up in every recipe!
So, if you’re thinking of making tuna casserole for dinner, consider your audience. It might be a hit with some, but others might be wishing for something else. If you want to give it a try, here’s a simple recipe that might just change some minds.
Ingredients
- 2 cans (5 oz each) tuna, drained
- 1 can (10.5 oz) cream of mushroom soup
- 1 cup milk
- 2 cups cooked egg noodles
- 1 cup frozen peas
- 1 cup shredded cheddar cheese
- 1/2 cup breadcrumbs
- 1/2 teaspoon garlic powder
- Salt and pepper to taste
Instructions
- Preheat your oven to 350°F (175°C).
- In a large bowl, mix together the drained tuna, cream of mushroom soup, milk, cooked egg noodles, frozen peas, garlic powder, salt, and pepper.
- Transfer the mixture into a greased baking dish. Spread it evenly.
- Top with shredded cheddar cheese and then sprinkle breadcrumbs over the cheese.
- Bake for 25-30 minutes, or until the top is golden brown and bubbly.
- Let it cool for a few minutes before serving.
Bland Vegetable Medley
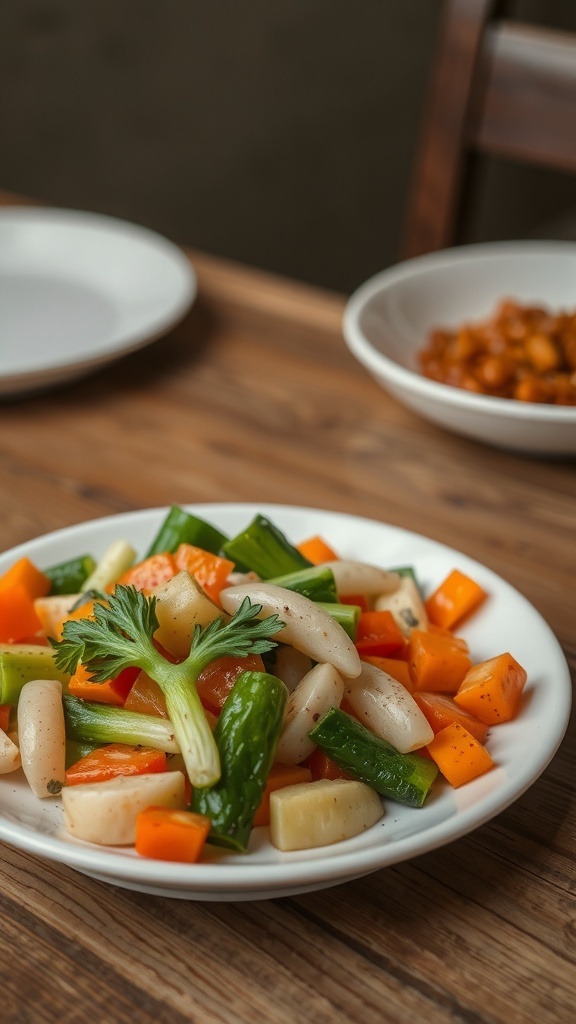
When you think of a vegetable medley, you might picture a colorful assortment of fresh veggies. However, many of us have encountered the dreaded bland vegetable medley. It often features overcooked carrots, limp celery, and a few sad green beans, all tossed together with little thought. This dish can be a real letdown at dinner parties or family gatherings.
People often make this medley thinking it’s a healthy option. But let’s be honest: if it lacks flavor, it’s not going to win any hearts. The truth is, we want our veggies to shine, not fade into the background. A little seasoning and creativity can go a long way in transforming this dish from dull to delightful.
Next time you’re tempted to whip up a bland vegetable medley, consider adding some spices, herbs, or even a splash of lemon juice for that extra zing. Your guests will thank you!
Ingredients
- 2 cups broccoli florets
- 1 cup diced carrots
- 1 cup bell peppers, diced
- 1 cup snap peas
- 2 tablespoons olive oil
- 2 cloves garlic, minced
- 1 teaspoon salt
- 1/2 teaspoon black pepper
- 1 teaspoon Italian seasoning
- Juice of 1 lemon
Instructions
- Prep the Veggies: Wash and chop all the vegetables into bite-sized pieces.
- Heat the Oil: In a large skillet, heat the olive oil over medium heat. Add the minced garlic and sauté for about 30 seconds until fragrant.
- Add the Vegetables: Toss in the broccoli, carrots, bell peppers, and snap peas. Stir well to coat with the oil and garlic.
- Season: Sprinkle in the salt, black pepper, and Italian seasoning. Stir everything together and cook for about 5-7 minutes, or until the veggies are tender but still crisp.
- Finish with Lemon: Remove from heat and squeeze fresh lemon juice over the medley. Toss to combine and serve warm.
Soggy Pizza with Unappetizing Toppings

Let’s face it: soggy pizza is a culinary crime. When you open a pizza box, you expect a crispy crust and mouthwatering toppings. Instead, you might find a sad, floppy slice that looks more like a wet blanket than a delicious meal. The toppings can make or break a pizza, and when they’re unappetizing, it’s a total letdown.
Think about it. A pizza topped with soggy vegetables or overly greasy meats can ruin the experience. No one wants to bite into a slice and find a pool of grease or mushy mushrooms. It’s a recipe for disappointment. So, if you’re still making soggy pizza with questionable toppings, it’s time to rethink your choices.
Instead of serving up soggy slices, why not try making a homemade pizza? You can control the ingredients and ensure a crispy crust. Plus, you can choose toppings that everyone will love. Here’s a simple recipe for a classic homemade pizza that’s sure to please.
Ingredients
- 2 cups all-purpose flour
- 1 packet (2 1/4 teaspoons) active dry yeast
- 1 teaspoon sugar
- 1 teaspoon salt
- 3/4 cup warm water
- 1 tablespoon olive oil
- 1 cup pizza sauce
- 2 cups shredded mozzarella cheese
- Your choice of toppings (pepperoni, bell peppers, onions, etc.)
Instructions
- Make the Dough: In a bowl, combine warm water, sugar, and yeast. Let it sit for about 5 minutes until frothy. Add flour, salt, and olive oil. Mix until a dough forms.
- Knead the Dough: Turn the dough onto a floured surface and knead for about 5-7 minutes until smooth. Place in a greased bowl, cover, and let rise for 1 hour.
- Preheat the Oven: Preheat your oven to 475°F (245°C).
- Shape the Pizza: Roll out the dough on a floured surface to your desired thickness. Transfer to a pizza stone or baking sheet.
- Add Sauce and Toppings: Spread pizza sauce over the dough, sprinkle with cheese, and add your favorite toppings.
- Bake: Bake for 12-15 minutes until the crust is golden and the cheese is bubbly.
- Enjoy: Slice and serve hot. Say goodbye to soggy pizza!
Uninspired Egg Salad Sandwiches
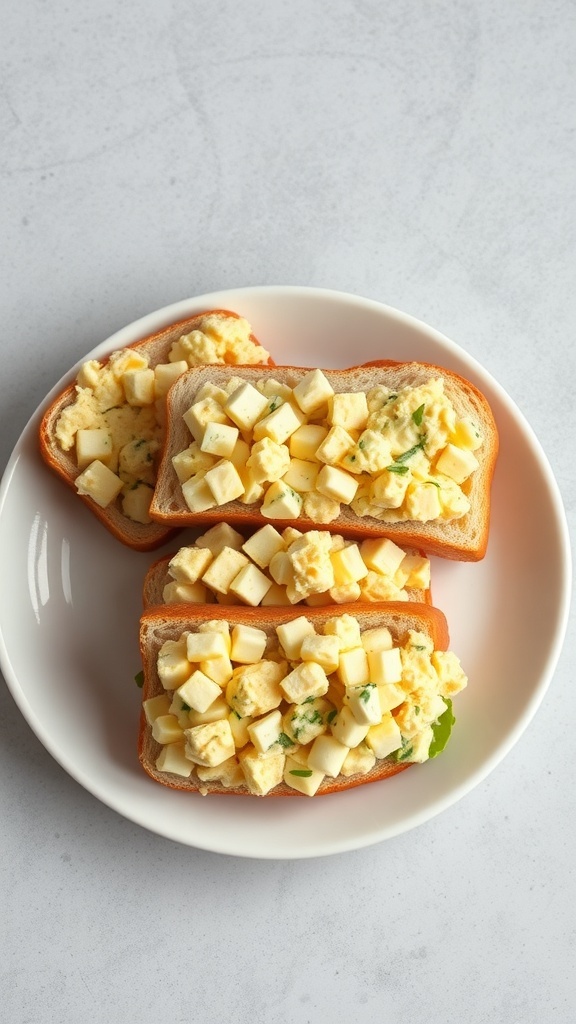
Egg salad sandwiches are a classic lunch option, but let’s be honest: they often fall flat. The image shows a few sandwiches piled high with a bland egg salad mixture, lacking any excitement. The usual ingredients—hard-boiled eggs, mayonnaise, and maybe a sprinkle of salt—just don’t cut it anymore.
Many people secretly dread the sight of these uninspired sandwiches. They’re often served at picnics or potlucks, and while they might look appealing at first, the taste usually disappoints. A little creativity can go a long way in transforming this dish from drab to fab.
Instead of sticking to the same old recipe, why not spice things up? Adding fresh herbs, crunchy vegetables, or even a bit of mustard can elevate the flavor. You can also experiment with different types of bread or wraps to make it more interesting.
Here’s a simple yet tasty recipe to revamp your egg salad sandwiches:
Dry Pancakes with No Syrup

Pancakes are a breakfast classic, but dry pancakes can ruin the whole experience. Imagine biting into a stack of pancakes that are crumbly and flavorless. Without syrup or any toppings, they can feel like a chore to eat. Many people secretly dread these dry discs of disappointment.
When pancakes lack moisture, they become bland and uninviting. The fluffy texture we all love turns into a sad, flat experience. No one wants to start their day with a mouthful of dry, tasteless pancakes. It’s no wonder they often end up pushed aside on the plate.
If you want to avoid this breakfast blunder, let’s talk about how to make pancakes that are moist and delicious. A few simple tweaks can make all the difference.
Ingredients
- 1 cup all-purpose flour
- 2 tablespoons sugar
- 1 tablespoon baking powder
- 1/2 teaspoon salt
- 1 cup milk
- 1 large egg
- 2 tablespoons melted butter
- 1 teaspoon vanilla extract
Instructions
- Mix Dry Ingredients: In a bowl, combine flour, sugar, baking powder, and salt.
- Combine Wet Ingredients: In another bowl, whisk together milk, egg, melted butter, and vanilla.
- Combine Mixtures: Pour the wet ingredients into the dry ingredients. Stir until just combined; it’s okay if there are a few lumps.
- Cook Pancakes: Heat a skillet over medium heat. Pour 1/4 cup of batter for each pancake. Cook until bubbles form on the surface, then flip and cook until golden brown.
- Serve Warm: Enjoy your pancakes warm, and don’t forget to add your favorite toppings!
Soggy Fruit Salad

Fruit salad is often seen as a healthy choice, but let’s be real: soggy fruit salad is a culinary nightmare. When you mix juicy fruits and let them sit too long, you end up with a mushy mess. The vibrant colors fade, and the textures become unappealing. Nobody wants to dig into a bowl of slush when they could have fresh, crisp fruit instead.
Imagine a bowl filled with bright berries, sweet melon, and crunchy apples. Now, picture that same bowl after sitting in the fridge for hours. The juices blend together, and the once-fresh fruit becomes a soggy disappointment. It’s no wonder people secretly hate this dish!
To keep your fruit salad fresh and enjoyable, consider serving it immediately after preparation. If you must make it ahead of time, keep the fruits separate and mix them just before serving. This way, everyone can enjoy the natural flavors and textures of the fruits without the sogginess.
Ingredients
- 2 cups strawberries, hulled and quartered
- 2 cups blueberries
- 2 cups pineapple, diced
- 2 cups watermelon, diced
- 1 cup green grapes, halved
- 1 tablespoon honey (optional)
- 1 tablespoon fresh lime juice
Instructions
- Prepare the Fruit: Wash and cut all the fruits into bite-sized pieces. Make sure to remove any excess moisture.
- Mix the Dressing: In a small bowl, whisk together honey and lime juice.
- Toss the Salad: In a large bowl, combine all the fruits. Drizzle the honey-lime dressing over the top and gently toss to coat.
- Serve Immediately: Enjoy the salad right away for the best texture and flavor. If you need to store it, keep the fruits separate until serving time.
Overly Sweetened Iced Tea

When it comes to iced tea, many people have a love-hate relationship with it. Some enjoy a refreshing glass on a hot day, while others cringe at the thought of overly sweetened versions. The image shows a glass of iced tea, likely loaded with sugar, which is a common mistake in many kitchens.
Sweet tea can be a delightful drink, but when it’s so sweet that it masks the tea’s natural flavors, it becomes a problem. Many guests may smile and sip, but secretly, they might be wishing for a more balanced flavor. This is why it’s important to find that sweet spot—pun intended—where the tea shines through without being overpowered by sugar.
Instead of drowning your iced tea in sugar, consider using fresh fruits or herbs for a natural sweetness. This not only enhances the flavor but also makes for a healthier option. Remember, iced tea should be refreshing, not a sugar bomb!
Ingredients
- 4 cups water
- 4 tea bags (black or green tea)
- 1/4 cup granulated sugar (adjust to taste)
- Ice cubes
- Lemon slices (optional)
- Fresh mint leaves (optional)
Instructions
- Boil the Water: In a pot, bring 4 cups of water to a boil.
- Steep the Tea: Remove the pot from heat and add the tea bags. Let them steep for about 5-7 minutes, depending on how strong you like your tea.
- Add Sugar: While the tea is still warm, stir in the granulated sugar until fully dissolved. You can adjust the amount of sugar to your liking.
- Cool Down: Remove the tea bags and let the tea cool to room temperature. Once cooled, refrigerate until chilled.
- Serve: Fill a glass with ice cubes, pour the chilled tea over the ice, and garnish with lemon slices or fresh mint if desired.
Flavorless Potato Salad

Potato salad is often a staple at picnics and barbecues, but let’s be honest—some versions just fall flat. The image shows a bowl of potato salad that looks fresh but lacks that zing we all crave. It’s a classic dish that can easily become boring if not prepared with care.
Many people find themselves stuck with bland potato salad, often made with just potatoes, mayonnaise, and maybe a sprinkle of salt. This combination can lead to a dish that’s more of a chore to eat than a delight. The key to a great potato salad is flavor and texture. Without these, it’s just a bowl of sad potatoes.
To elevate your potato salad, think about adding ingredients that bring life to the dish. Fresh herbs, crunchy vegetables, and a tangy dressing can make all the difference. It’s time to stop making the flavorless version that everyone secretly dreads!
Ingredients
- 2 pounds of potatoes, peeled and diced
- 1 cup mayonnaise
- 2 tablespoons Dijon mustard
- 1 tablespoon apple cider vinegar
- 1/2 cup celery, finely chopped
- 1/2 cup red onion, finely chopped
- 1/4 cup dill pickles, chopped
- Salt and pepper to taste
- Fresh parsley for garnish
Instructions
- Boil the Potatoes: In a large pot, cover the diced potatoes with water and bring to a boil. Cook until tender, about 10-15 minutes. Drain and let cool.
- Make the Dressing: In a bowl, mix together the mayonnaise, Dijon mustard, apple cider vinegar, salt, and pepper.
- Combine Ingredients: In a large mixing bowl, combine the cooled potatoes, celery, red onion, and dill pickles. Pour the dressing over the top and mix gently until everything is coated.
- Chill: Cover the salad and refrigerate for at least 1 hour before serving. This allows the flavors to meld together.
- Serve: Garnish with fresh parsley before serving. Enjoy your flavorful potato salad!
Bland Chocolate Cake

Chocolate cake is a classic dessert that many people love. However, not all chocolate cakes are created equal. Some end up being bland and unexciting, leaving everyone wishing for something more. This particular cake, with its dry texture and lack of rich flavor, often gets pushed aside at parties and gatherings.
When you think of chocolate cake, you want a moist, decadent treat that melts in your mouth. Instead, a bland chocolate cake can feel like a missed opportunity. It’s often made with minimal ingredients, leading to a lack of depth in flavor. No one wants to be that person who brings a cake that no one wants to eat!
So, if you’re looking to impress your friends and family, it might be time to rethink your chocolate cake recipe. Instead of sticking to the basics, consider adding a pinch of salt, a splash of vanilla, or even some coffee to enhance the chocolate flavor. These small tweaks can make a world of difference.
Ingredients
- 1 3/4 cups all-purpose flour
- 3/4 cup unsweetened cocoa powder
- 2 cups granulated sugar
- 1 1/2 teaspoons baking powder
- 1 1/2 teaspoons baking soda
- 1 teaspoon salt
- 2 large eggs
- 1 cup whole milk
- 1/2 cup vegetable oil
- 2 teaspoons vanilla extract
- 1 cup boiling water
Instructions
- Preheat your oven to 350°F (175°C). Grease and flour two 9-inch round cake pans.
- In a large bowl, combine flour, cocoa powder, sugar, baking powder, baking soda, and salt. Mix well.
- Add eggs, milk, oil, and vanilla to the dry ingredients. Beat on medium speed for 2 minutes until well combined.
- Stir in boiling water until the batter is smooth. It will be thin.
- Pour the batter evenly into the prepared pans.
- Bake for 30-35 minutes or until a toothpick inserted in the center comes out clean.
- Cool in the pans for 10 minutes, then remove from pans to cool completely on a wire rack.
Bland Stuffed Peppers
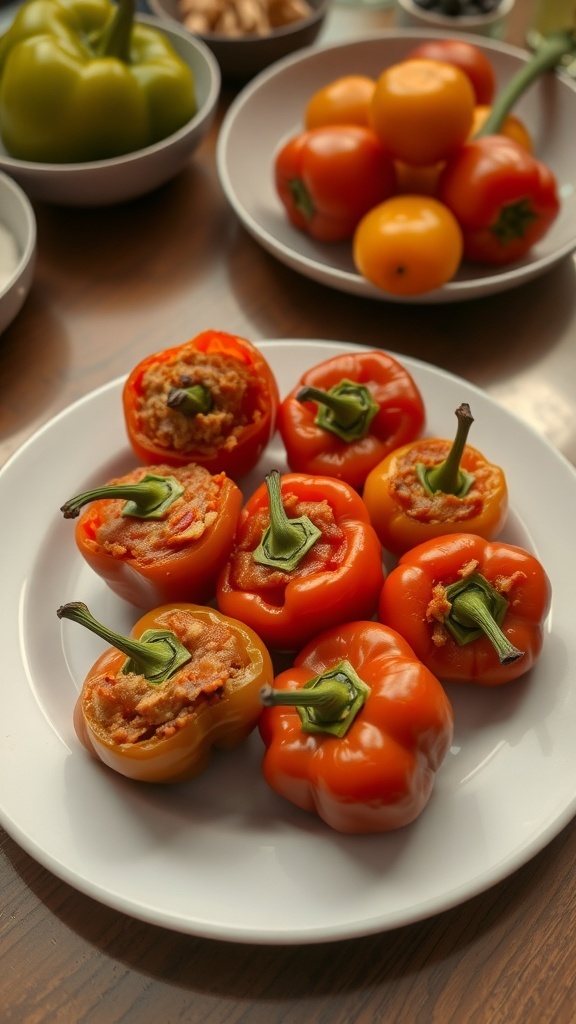
Stuffed peppers often seem like a healthy choice, but they can end up being a bland disappointment. The vibrant colors of the peppers might catch your eye, but when it comes to flavor, many of these dishes fall flat. The image shows a plate of stuffed peppers, filled with a mixture that looks appealing but lacks the punch that makes a meal memorable.
Typically, these peppers are filled with rice, ground meat, and maybe some veggies. Yet, without the right spices or seasoning, they can taste more like cardboard than a culinary delight. Many people secretly dread being served stuffed peppers at dinner parties or family gatherings.
So, if you want to keep your guests happy, it might be time to rethink this dish. Instead of serving bland stuffed peppers, consider adding bold flavors or trying a different recipe altogether.
Ingredients
- 4 large bell peppers (any color)
- 1 cup cooked rice
- 1 pound ground beef or turkey
- 1 can diced tomatoes (14.5 oz)
- 1 teaspoon garlic powder
- 1 teaspoon onion powder
- 1 teaspoon Italian seasoning
- Salt and pepper to taste
- 1 cup shredded cheese (optional)
Instructions
- Preheat your oven to 375°F (190°C).
- Cut the tops off the bell peppers and remove the seeds and membranes.
- In a skillet, cook the ground meat over medium heat until browned. Drain any excess fat.
- Add the cooked rice, diced tomatoes, garlic powder, onion powder, Italian seasoning, salt, and pepper to the skillet. Mix well.
- Stuff each bell pepper with the meat and rice mixture. If desired, sprinkle cheese on top.
- Place the stuffed peppers upright in a baking dish and cover with foil.
- Bake for 25-30 minutes. Remove the foil for the last 10 minutes to melt the cheese.
- Let cool for a few minutes before serving.


