
Ever found yourself nibbling on a side dish that just doesn’t hit the spot, all in the name of politeness? You’re not alone! This list explores those not-so-desirable sides that often grace our plates during family gatherings or dinner parties simply because we want to keep the peace. From bland potato salads to unexciting veggies, let’s take a lighthearted look at what we eat to stay courteous.
Overcooked Green Beans

Overcooked green beans often find their way onto our plates at family gatherings or holiday dinners. They sit there, bright green but limp, a reminder of what could have been. Most people eat them out of politeness, pushing them around the plate while waiting for the main course.
These beans can be a classic side dish, but when they’re overcooked, they lose their crunch and vibrant flavor. Instead of being a delightful addition, they become a chore to chew through. Yet, we still feel the need to take a bite or two, nodding along as if we truly enjoy them.
So, how can we elevate this side dish? With a little care, green beans can be transformed into a crunchy, flavorful delight that everyone will actually want to eat. Here’s a simple recipe to bring them back to life!
Soggy Salad with Uninspired Dressing

When it comes to side dishes, the soggy salad often tops the list of things we eat just to be polite. You know the one: limp greens, a few sad veggies, and a dressing that barely adds any flavor. It’s the dish that sits on the table, and you feel obligated to take a scoop, even if you’d rather skip it altogether.
This particular salad, with its wilted lettuce and uninspired dressing, is a classic example. It’s not that salad is inherently bad; it’s just that this version lacks excitement. The dressing, perhaps a bland ranch or a watery vinaigrette, does little to enhance the greens. Instead, it leaves you wishing for something more vibrant and fresh.
So why do we keep eating these salads? Often, it’s about being polite. At gatherings, we want to fit in and not offend the host. But let’s be honest: there are far better side dishes out there that deserve our attention.
If you’re tired of soggy salads, why not whip up something more appealing? Here’s a quick and easy recipe for a refreshing salad that will make you excited to eat your greens.
Canned Cranberry Sauce
Canned cranberry sauce often finds its way to the holiday table, sitting next to the turkey and stuffing. It’s that bright red can that many people recognize, but not everyone loves. Some folks eat it just to be polite, even if they’d rather skip it altogether.
The texture is a bit jarring for some. It’s smooth and gelatinous, often sliding right out of the can in one piece. But it does add a pop of color to the plate. Plus, it’s sweet and tart, which can balance out the savory flavors of the turkey and gravy.
Many families have their own traditions around this dish. Some might even whip up homemade versions, but for others, the convenience of opening a can is hard to beat. It’s quick, easy, and requires no cooking at all. Just pop the lid and slice it up!
Despite its mixed reviews, canned cranberry sauce is a staple for many during the holidays. It’s a reminder of family gatherings and shared meals, even if it’s not the star of the show.
Ingredients
- 1 can (14 oz) cranberry sauce
- 1/2 cup orange juice
- 1/4 cup sugar
- 1/2 teaspoon cinnamon
- 1/4 teaspoon nutmeg
- 1/4 cup chopped walnuts (optional)
Instructions
- In a saucepan, combine the cranberry sauce, orange juice, sugar, cinnamon, and nutmeg.
- Cook over medium heat, stirring occasionally until the mixture is heated through and the sugar is dissolved.
- If using, stir in the chopped walnuts and cook for another 2-3 minutes.
- Remove from heat and let it cool slightly before serving.
- Transfer to a serving dish and enjoy with your holiday meal!
Store-Bought Coleslaw
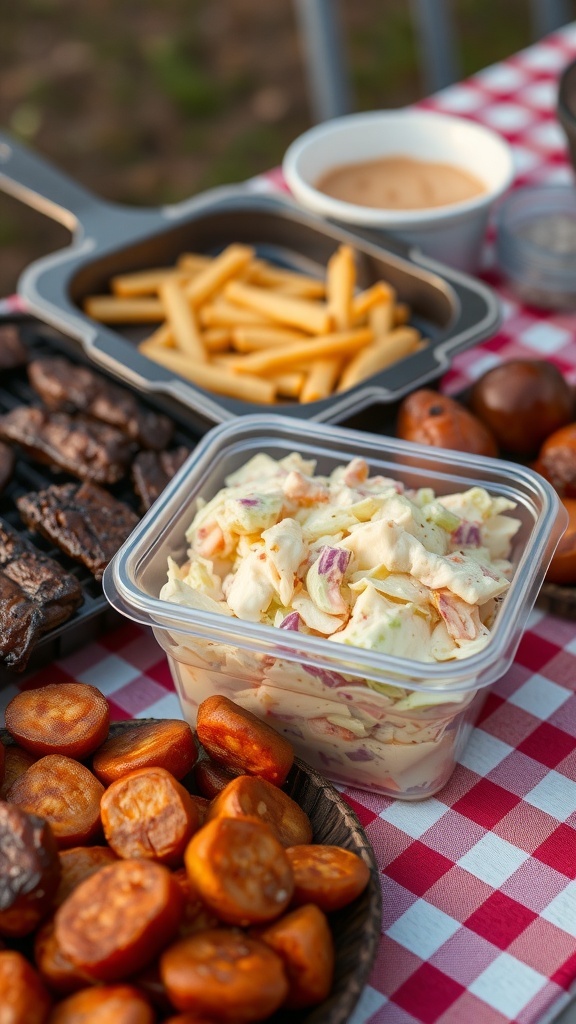
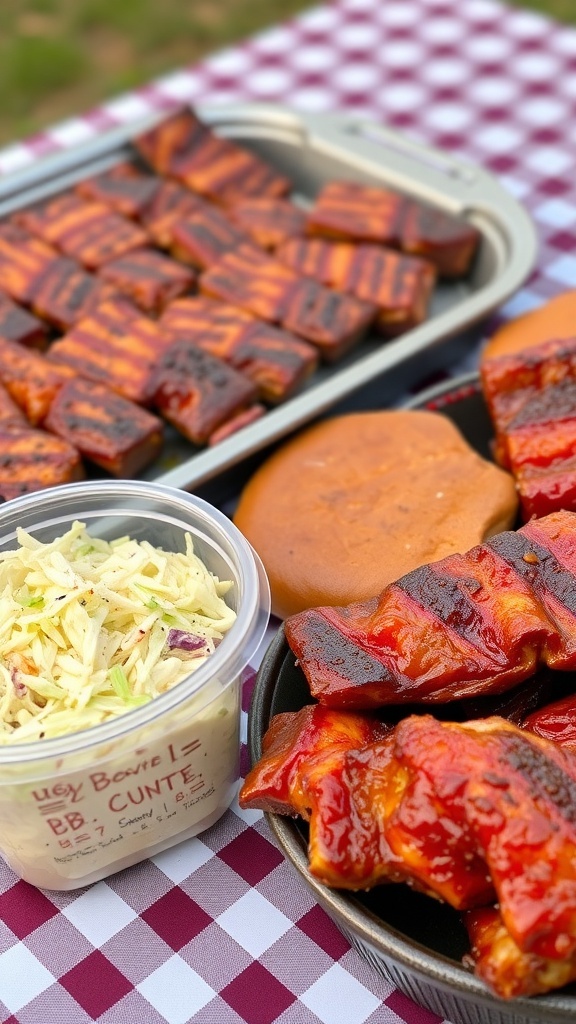
Store-bought coleslaw often finds its way onto picnic tables and potluck spreads. It’s that side dish people grab to fill their plates, even if they’re not super excited about it. The image shows a container of coleslaw, sitting next to a plate of BBQ food. The colorful mix of shredded cabbage and carrots looks fresh, but let’s be honest, it’s usually not the star of the show.
Many of us eat coleslaw just to be polite. It’s that classic side that seems to accompany every BBQ, but how many of us actually crave it? The crunch is nice, but it often gets overshadowed by the main dishes. Still, it’s a staple that brings a bit of color and texture to the meal.
If you’re looking to make your own coleslaw, here’s a simple recipe that can elevate your next gathering. Homemade coleslaw can be a game-changer, and it’s easy to whip up!
Ingredients
- 1 small head of green cabbage, shredded
- 1 small head of purple cabbage, shredded
- 2 large carrots, grated
- 1 cup mayonnaise
- 2 tablespoons apple cider vinegar
- 2 tablespoons sugar
- Salt and pepper to taste
Instructions
- Prepare the Vegetables: In a large bowl, combine the shredded green and purple cabbage along with the grated carrots.
- Make the Dressing: In a separate bowl, whisk together the mayonnaise, apple cider vinegar, sugar, salt, and pepper until smooth.
- Combine: Pour the dressing over the cabbage mixture and toss until everything is well coated.
- Chill: Cover the bowl and refrigerate for at least 1 hour before serving. This helps the flavors meld together.
- Serve: Give it a good stir before serving. Enjoy your homemade coleslaw alongside your favorite BBQ dishes!
Overly Sweet Glazed Carrots

Glazed carrots often find their way onto dinner tables, especially during holidays or family gatherings. These bright orange veggies, shiny with a sugary glaze, can be a bit of a mixed bag. While they look appealing, many people eat them just to be polite. The sweetness can be overwhelming, making them more of a dessert than a side dish.
When served, they sit there, glistening and inviting, but how many actually enjoy the taste? The sugary coating can mask the natural flavor of the carrots, leaving some diners wishing for a more savory option. Yet, they remain a staple, perhaps due to tradition or the desire to please the host.
So, if you find yourself at a gathering with these sweet treats on your plate, remember that it’s okay to take a small bite and leave the rest. After all, it’s all about enjoying the meal and the company!
Ingredients
- 1 pound baby carrots
- 1/4 cup unsalted butter
- 1/4 cup brown sugar
- 1/4 cup honey
- 1 teaspoon cinnamon
- Salt and pepper to taste
- Fresh parsley for garnish
Instructions
- Prepare the Carrots: Rinse the baby carrots under cold water and pat them dry.
- Cook the Carrots: In a large skillet, melt the butter over medium heat. Add the carrots and cook for about 5 minutes until they start to soften.
- Add the Glaze: Stir in the brown sugar, honey, and cinnamon. Mix well to coat the carrots evenly.
- Simmer: Reduce the heat to low and cover the skillet. Let the carrots simmer for about 10-15 minutes, stirring occasionally, until they are tender and the glaze thickens.
- Season: Add salt and pepper to taste. Remove from heat and garnish with fresh parsley before serving.
Plain White Rice
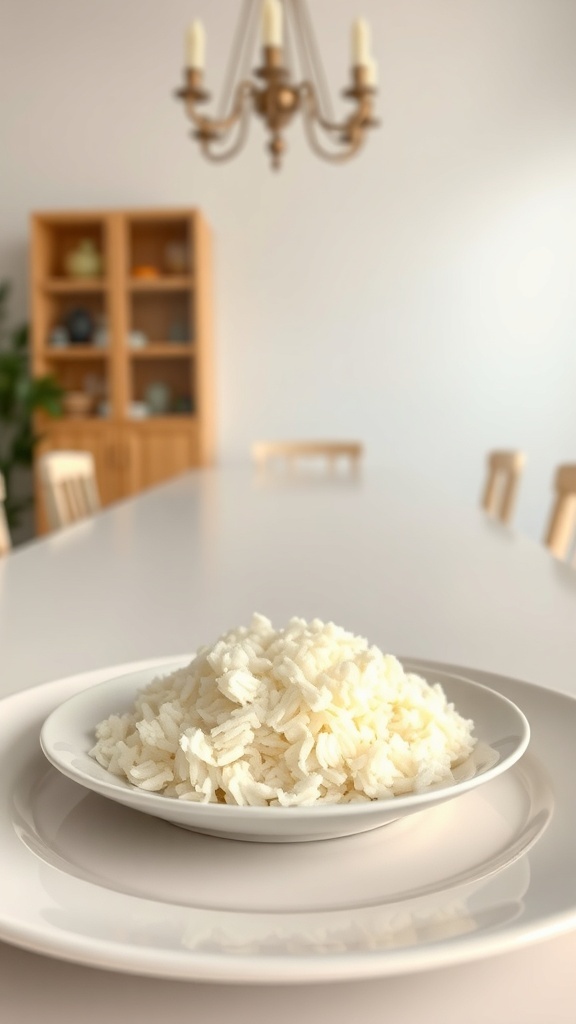
Plain white rice is a classic side dish that often finds its way to the dinner table. It’s simple, unassuming, and sometimes feels like an afterthought. Yet, it plays a crucial role in many meals. Whether it’s served alongside a flavorful curry or a hearty stew, rice is there, quietly soaking up all the delicious juices.
Many people eat plain white rice out of politeness. It’s the safe choice that doesn’t offend anyone’s palate. When you’re at a gathering, and the main dish is a bit too spicy or exotic, rice is the reliable companion that balances everything out. It’s like that friend who always knows how to keep the peace.
While plain rice may not steal the spotlight, it’s versatile. You can dress it up with herbs, spices, or sauces to make it more exciting. But when it’s served plain, it’s often just a filler. Still, there’s something comforting about a warm bowl of rice, especially when you’re trying to be polite and not make a fuss about the main dish.
Ingredients
- 1 cup long-grain white rice
- 2 cups water
- 1 tablespoon butter or oil (optional)
- 1/2 teaspoon salt (optional)
Instructions
- Rinse the Rice: Start by rinsing the rice under cold water until the water runs clear. This helps remove excess starch.
- Boil Water: In a medium saucepan, bring 2 cups of water to a boil. If you’re using salt or butter, add it to the water.
- Add Rice: Once the water is boiling, stir in the rinsed rice. Return to a boil.
- Simmer: Reduce the heat to low, cover the pot, and let it simmer for about 18-20 minutes, or until the rice is tender and the water is absorbed.
- Fluff and Serve: Remove the pot from heat and let it sit for 5 minutes. Fluff the rice with a fork before serving.
Mushy Mashed Potatoes
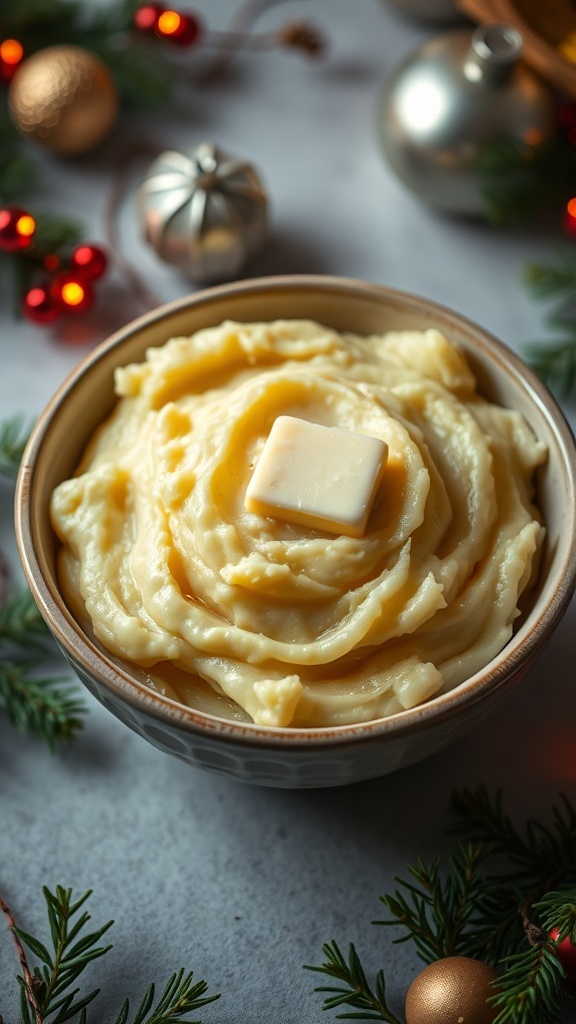
Mushy mashed potatoes often find their way onto our plates during family gatherings or holiday dinners. They sit there, looking creamy and inviting, but many of us only take a spoonful out of politeness. The texture can be a bit off-putting, and the flavor sometimes lacks excitement. Yet, there’s something comforting about them, especially when they’re topped with a pat of butter that melts into the warm surface.
These potatoes are usually made from russet or Yukon Gold varieties, boiled until soft, then mashed with butter and cream. While they may not be the star of the meal, they serve their purpose. They soak up gravy and complement the main dish, even if they don’t steal the show.
So, if you find yourself at a dinner table with a bowl of mushy mashed potatoes, remember that it’s okay to take just a little. You might even discover a hidden charm in their simplicity!
Ingredients
- 2 pounds russet potatoes, peeled and cubed
- 1/2 cup unsalted butter
- 1/2 cup heavy cream
- Salt, to taste
- Black pepper, to taste
Instructions
- Boil the Potatoes: Place the cubed potatoes in a large pot and cover with cold water. Add a pinch of salt. Bring to a boil and cook until tender, about 15-20 minutes.
- Drain and Mash: Drain the potatoes and return them to the pot. Mash with a potato masher until smooth.
- Add Butter and Cream: Stir in the butter and heavy cream until fully combined. Season with salt and pepper to taste.
- Serve Warm: Transfer to a serving bowl and enjoy with your favorite main dish!
Cold Potato Salad
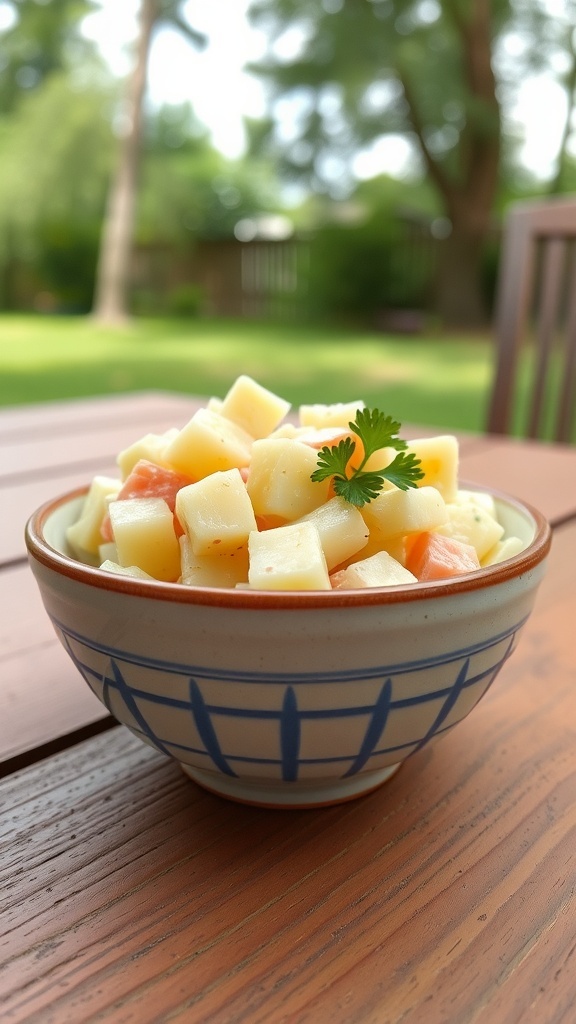
Cold potato salad is one of those side dishes that often ends up on the table, even if it’s not the star of the meal. You know the type: it’s creamy, a bit tangy, and usually comes with a sprinkle of herbs on top. While some people genuinely enjoy it, others might only take a scoop to be polite. It’s a classic dish that seems to appear at every barbecue, picnic, or family gathering.
The beauty of potato salad lies in its simplicity. You can find it made with various ingredients, but the base is always tender potatoes. The creamy dressing, often made from mayonnaise or yogurt, ties everything together. Some folks like to add crunchy veggies like celery or bell peppers, while others prefer a more straightforward approach. Either way, it’s hard to resist a little taste, even if you’re not a huge fan.
When served, cold potato salad can look quite inviting. Imagine a bowl filled with colorful chunks of potatoes, maybe dotted with bits of carrot or green onion, all glistening in a light dressing. It’s a dish that can be easily overlooked, but it has its charm. Plus, it’s a great way to fill your plate without committing to a larger portion of something else.
So, the next time you find yourself at a gathering, and potato salad is on the table, don’t hesitate to take a small scoop. You might just find it’s not as bad as you remember!
Ingredients
- 4 medium potatoes, peeled and diced
- 1/2 cup mayonnaise
- 1 tablespoon Dijon mustard
- 1/4 cup diced celery
- 1/4 cup diced red onion
- 1/4 cup diced bell pepper
- Salt and pepper to taste
- Fresh parsley for garnish
Instructions
- Boil the Potatoes: In a large pot, cover the diced potatoes with water and bring to a boil. Cook until tender, about 10-15 minutes. Drain and let cool.
- Mix the Dressing: In a bowl, combine mayonnaise, Dijon mustard, salt, and pepper. Adjust seasoning to your taste.
- Combine Ingredients: In a large bowl, mix the cooled potatoes with celery, red onion, and bell pepper. Pour the dressing over the mixture and gently stir until everything is well coated.
- Chill: Cover the salad and refrigerate for at least 1 hour before serving to let the flavors meld.
- Serve: Garnish with fresh parsley before serving. Enjoy your cold potato salad!
Frozen Mixed Vegetables

Frozen mixed vegetables often find their way to the dinner table, not because they’re a favorite, but out of politeness. These colorful blends usually include carrots, peas, corn, and green beans. They sit there, bright and cheerful, while everyone else digs into the main dish. Many people eat them just to be nice, even if they’d prefer something else.
These veggies are convenient and easy to prepare. Just toss them in a microwave or on the stove, and they’re ready in minutes. But let’s be honest, they often lack the excitement of other side dishes. Still, they serve a purpose. They add a pop of color and a bit of nutrition, making them a staple at many family gatherings.
So, if you find yourself at a potluck or family dinner, and a bowl of frozen mixed vegetables appears, remember: it’s all about being polite. You might not love them, but a small serving won’t hurt!
Ingredients
- 2 cups frozen mixed vegetables
- 1 tablespoon olive oil
- 1 teaspoon garlic powder
- Salt and pepper to taste
- 1 tablespoon fresh parsley, chopped (optional)
Instructions
- Heat olive oil in a skillet over medium heat.
- Add the frozen mixed vegetables and sauté for about 5-7 minutes until heated through.
- Sprinkle garlic powder, salt, and pepper over the veggies. Stir well to combine.
- Cook for an additional 2-3 minutes, allowing the flavors to meld.
- Garnish with fresh parsley if desired and serve warm.
Plain Pasta with No Sauce

Plain pasta with no sauce often finds its way to the dinner table, especially when someone wants to be polite. It’s the dish that no one really craves, yet it’s served as a filler. You know the scenario: a gathering where everyone is trying to be accommodating. You take a bite, and it’s just… pasta. No flavor, no excitement, just a plate of carbs.
This dish is the ultimate side that gets a nod of approval but rarely a second glance. It’s the culinary equivalent of a shrug. You might see it at family dinners or potlucks, where the host wants to make sure everyone has something to eat, even if it’s not the star of the show.
While plain pasta may not win any awards for taste, it does have its moments. It can be a blank canvas, ready to soak up whatever sauce or toppings you might want to add later. But when it’s served solo, it’s often just there to fill the plate and keep the peace.
Ingredients
- 2 cups of pasta (any shape)
- 1 tablespoon of olive oil
- Salt to taste
- Fresh herbs (like parsley or basil) for garnish
Instructions
- Boil Water: In a large pot, bring salted water to a boil.
- Add Pasta: Once boiling, add the pasta and cook according to package instructions until al dente.
- Drain: Drain the pasta in a colander and return it to the pot.
- Add Olive Oil: Drizzle olive oil over the pasta and toss to coat.
- Season: Add salt to taste and mix well.
- Garnish: Serve in a bowl and garnish with fresh herbs if desired.
Flavorless Corn on the Cob
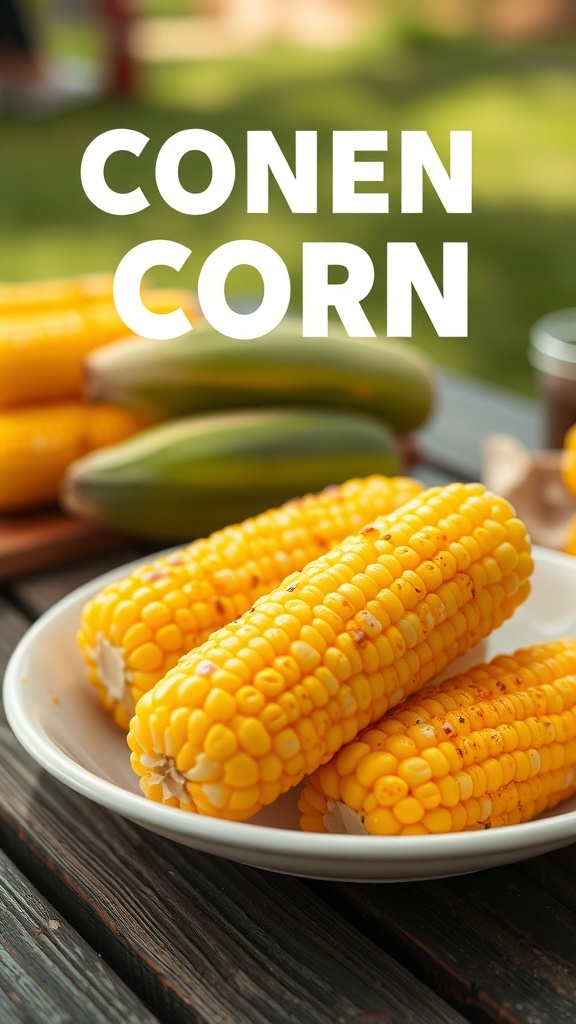
Corn on the cob often finds its way to the dinner table, especially during summer barbecues. It’s bright, cheerful, and seems to scream ‘fun!’ But let’s be honest, sometimes it can be a bit bland. Many people eat it just to be polite, even if they’d rather skip it altogether.
Picture a plate filled with golden corn cobs, perfectly cooked but lacking any real flavor. You might see it sitting there, waiting for someone to take a bite. The truth is, corn can be delightful when seasoned right, but when it’s just boiled and served plain, it often gets left untouched. It’s the kind of side dish that makes you nod politely while secretly wishing for something more exciting.
So, how can we turn this polite dish into something worth savoring? With a few simple ingredients and steps, you can elevate corn on the cob from flavorless to fabulous!
Ingredients
- 4 ears of corn, husked
- 1/4 cup unsalted butter, softened
- 1 teaspoon garlic powder
- 1 teaspoon paprika
- Salt and pepper to taste
- Fresh parsley, chopped (for garnish)
Instructions
- Prepare the Corn: Start by husking the corn and removing all the silk. Rinse under cold water.
- Make the Butter Mixture: In a small bowl, combine softened butter, garlic powder, paprika, salt, and pepper. Mix until well combined.
- Grill or Boil: You can either grill the corn for about 10-15 minutes, turning occasionally, or boil in salted water for 5-7 minutes until tender.
- Spread the Butter: Once cooked, take the corn off the heat and spread the garlic butter mixture generously over each ear.
- Garnish and Serve: Sprinkle with fresh parsley before serving. Enjoy your flavorful corn on the cob!
Dry Stuffing from a Box
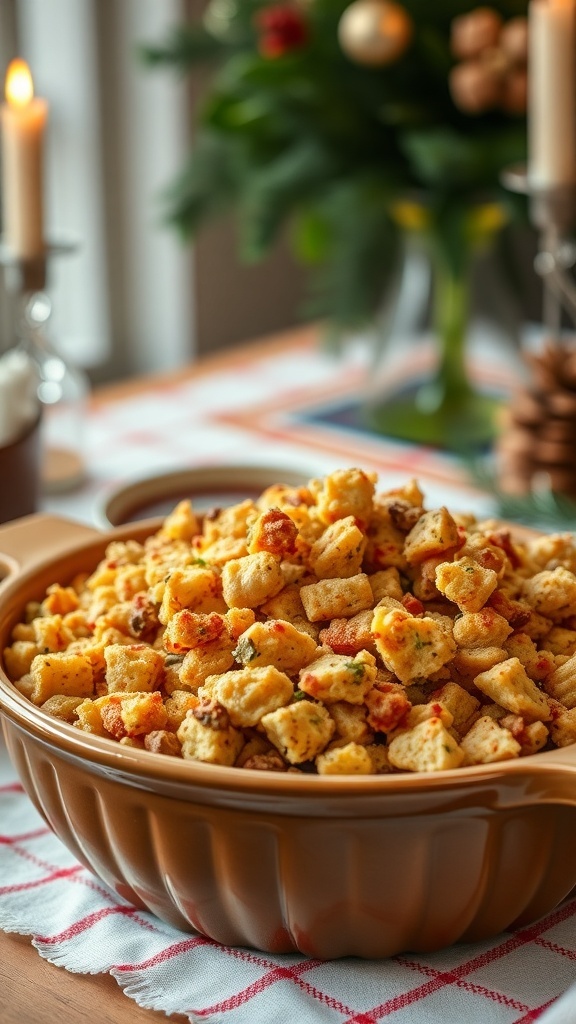
Dry stuffing from a box often makes an appearance at holiday dinners. It’s that side dish everyone knows but few truly love. Yet, it’s served with a smile, often just to keep the peace at the table. You know the one—it’s in a big bowl, looking a bit lonely next to the turkey and mashed potatoes.
This stuffing is usually made from bread cubes, spices, and maybe some dried veggies. It’s easy to prepare, which is why it finds its way onto many tables. Just add water or broth, let it sit, and voilà! You have a dish that fills space on the table, even if it doesn’t fill hearts with joy.
People often eat it out of politeness, nodding along while trying to mask their indifference. It’s a classic side that sparks conversations about family traditions and the importance of being gracious. So, while it may not be the star of the meal, it certainly plays its part.
Ingredients
- 1 box (6 oz) dry stuffing mix
- 1 1/2 cups chicken or vegetable broth
- 1/4 cup unsalted butter
- 1/2 cup chopped onion
- 1/2 cup chopped celery
- 1 teaspoon dried sage
- 1 teaspoon dried thyme
- Salt and pepper to taste
Instructions
- Preheat your oven to 350°F (175°C).
- In a saucepan, melt the butter over medium heat. Add the chopped onion and celery, cooking until softened, about 5 minutes.
- Stir in the broth, sage, thyme, salt, and pepper. Bring to a simmer.
- In a large bowl, combine the dry stuffing mix with the broth mixture. Stir until well combined.
- Transfer the mixture to a greased baking dish. Cover with foil and bake for 25 minutes.
- Remove the foil and bake for an additional 10-15 minutes, until the top is golden brown.
Mayo-Laden Tuna Salad
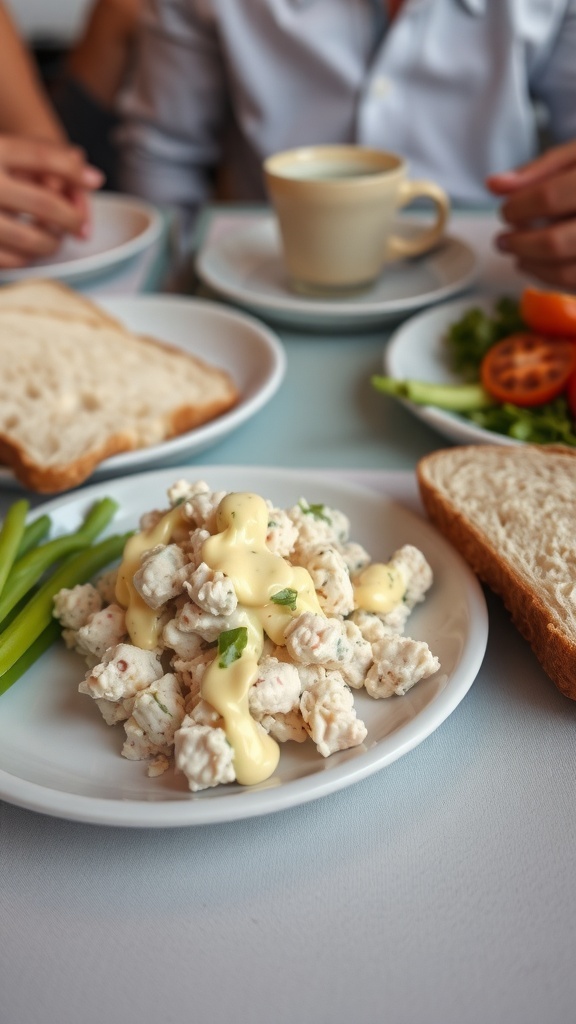
Tuna salad is a classic side dish that often makes an appearance at gatherings. It’s creamy, rich, and usually packed with mayo. While some people genuinely enjoy it, others might only eat it to be polite. The image shows a generous serving of tuna salad, drizzled with mayonnaise, sitting on a plate next to slices of bread and fresh veggies.
This dish often brings back memories of family picnics or potlucks. It’s easy to prepare and can be served in various ways. Whether on a sandwich or as a side, it’s a staple that many feel obligated to try, even if they’d prefer something else.
Making tuna salad is simple and requires just a few ingredients. You can customize it to your liking, adding extras like celery or pickles for crunch. The mayo gives it that creamy texture that many find hard to resist, even if they’re not fans of tuna.
Ingredients
- 2 cans of tuna, drained
- 1/2 cup mayonnaise
- 1 tablespoon Dijon mustard
- 1/4 cup celery, finely chopped
- 1/4 cup red onion, finely chopped
- Salt and pepper to taste
- 1 tablespoon lemon juice
Instructions
- In a large bowl, combine the drained tuna, mayonnaise, and Dijon mustard. Mix well.
- Add the chopped celery and red onion. Stir until everything is evenly combined.
- Season with salt, pepper, and lemon juice to taste.
- Serve on a bed of lettuce, in a sandwich, or with crackers.
- Enjoy your mayo-laden tuna salad!
Bland Macaroni and Cheese
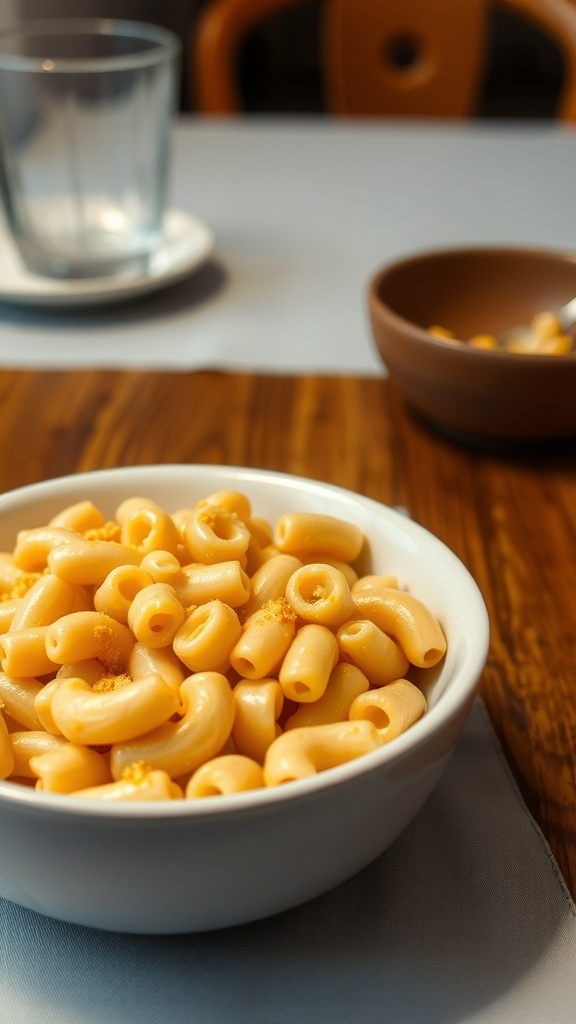
Bland macaroni and cheese often finds its way onto dinner tables, especially when guests are around. It’s that dish that everyone knows but few truly love. You might see it sitting there, looking all creamy and inviting, but let’s be honest—it’s not the star of the show.
This dish is usually made with simple ingredients: macaroni pasta and a basic cheese sauce. It’s comforting, sure, but it lacks the pizzazz that makes other sides shine. It’s the polite choice, the one you take a spoonful of just to be courteous, even if you’re secretly hoping for something more exciting.
When served, it often sits next to more flavorful dishes, making it feel even more bland in comparison. It’s the side that people eat to avoid hurting feelings, not because they crave it. It’s a classic, but it’s also a reminder that sometimes, simplicity can be a little too simple.
So, if you find yourself at a gathering with a bowl of this macaroni, remember: it’s okay to be polite. Just maybe save room for something with a bit more flavor next time!
Ingredients
- 2 cups elbow macaroni
- 2 cups shredded cheddar cheese
- 2 cups milk
- 1/4 cup butter
- 2 tablespoons all-purpose flour
- 1/2 teaspoon salt
- 1/4 teaspoon black pepper
- 1/4 teaspoon paprika (optional)
Instructions
- Cook the Pasta: In a large pot, bring salted water to a boil. Add the elbow macaroni and cook until al dente, about 8 minutes. Drain and set aside.
- Make the Cheese Sauce: In the same pot, melt the butter over medium heat. Stir in the flour and cook for about 1 minute. Gradually whisk in the milk, and cook until the mixture thickens, about 5 minutes.
- Add Cheese: Remove the pot from heat and stir in the shredded cheddar cheese until melted. Season with salt, pepper, and paprika if using.
- Combine: Add the cooked macaroni to the cheese sauce and stir until well combined.
- Serve: Transfer to a serving bowl and enjoy, or keep warm until ready to serve.
Boring Vegetable Medley
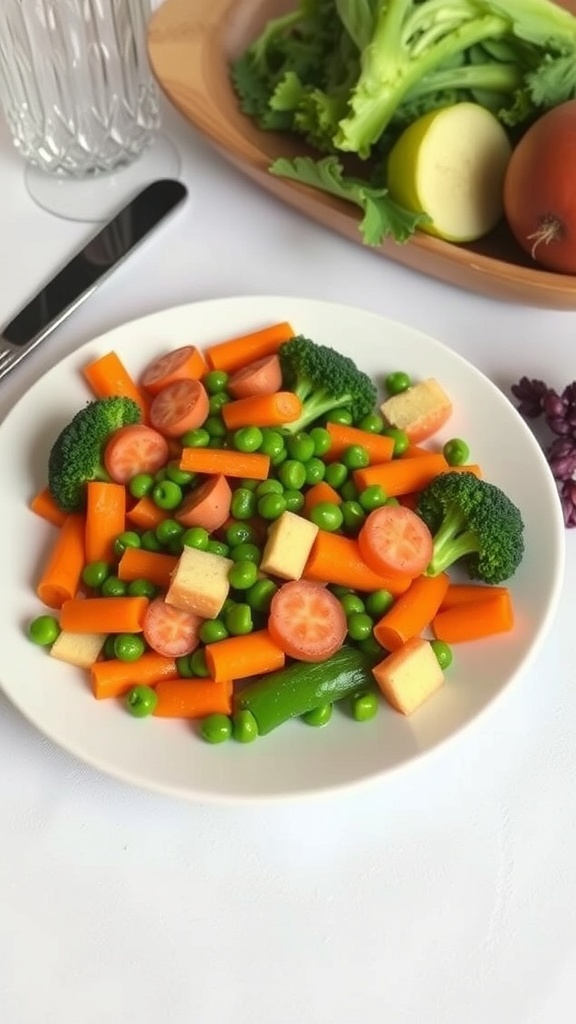
When it comes to side dishes, the boring vegetable medley often gets a bad rap. It’s the dish that shows up at gatherings, and many people eat it just to be polite. You know the one: a mix of broccoli, carrots, peas, and maybe a few other veggies tossed together. It’s colorful, but let’s be honest—it rarely steals the show.
This medley usually sits next to more exciting options on the table. People take a spoonful, nod politely, and then move on to the mashed potatoes or the cheesy casserole. The veggies are often overcooked and lack flavor, making them easy to overlook. Yet, they do have their place, especially when you want to balance out a rich meal.
So, how can we make this dish a bit more appealing? With a few tweaks, we can turn that boring vegetable medley into something that people actually look forward to eating. Adding a splash of lemon juice or a sprinkle of herbs can elevate the flavors. A little garlic or a drizzle of olive oil can also work wonders.
Here’s a simple recipe to transform that classic medley into a dish that might just get some compliments!
Ingredients
- 1 cup broccoli florets
- 1 cup sliced carrots
- 1 cup green peas
- 1 cup bell pepper, diced
- 2 tablespoons olive oil
- 2 cloves garlic, minced
- 1 tablespoon lemon juice
- Salt and pepper to taste
- Fresh parsley for garnish
Instructions
- Prep the Veggies: Start by washing and cutting all the vegetables into bite-sized pieces.
- Sauté: In a large skillet, heat olive oil over medium heat. Add minced garlic and sauté for about 30 seconds until fragrant.
- Add Veggies: Toss in the broccoli, carrots, and bell pepper. Sauté for about 5 minutes, then add the green peas.
- Season: Drizzle with lemon juice and season with salt and pepper. Cook for another 3-4 minutes until the veggies are tender but still crisp.
- Serve: Transfer to a serving dish and garnish with fresh parsley. Enjoy your upgraded vegetable medley!
Unseasoned Quinoa
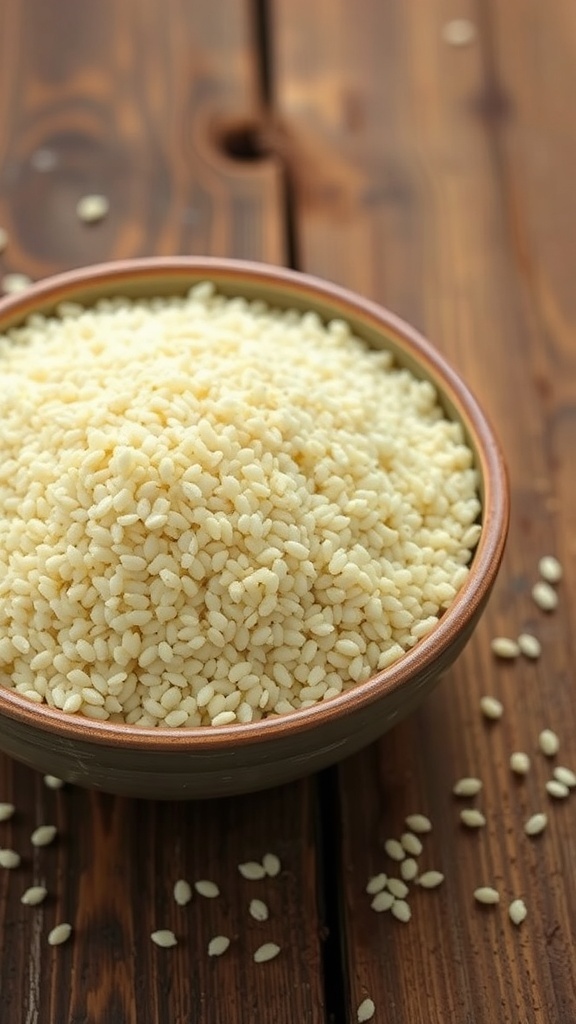
Unseasoned quinoa often finds its way onto our plates during gatherings. It’s that side dish that everyone feels obligated to try, even if they don’t really want to. The truth is, quinoa can be pretty bland on its own. It’s like the wallflower at a party—there, but not really making a splash.
This grain is packed with protein and nutrients, making it a healthy choice. However, without any seasoning or toppings, it can taste a bit like cardboard. People often eat it just to be polite, nodding along as others rave about its health benefits. You know the drill: someone brings a colorful salad, and there it is, the unseasoned quinoa, waiting to be mixed in.
So, how can we make quinoa more appealing? A little seasoning goes a long way! Adding herbs, spices, or a drizzle of olive oil can transform this humble grain into a delightful side. Next time you’re at a gathering, don’t just settle for plain quinoa. Spice it up and make it something people actually want to eat!
Ingredients
- 1 cup quinoa
- 2 cups water or vegetable broth
- 1 tablespoon olive oil
- 1 teaspoon salt
- 1/2 teaspoon black pepper
- 1/2 teaspoon garlic powder
- 1/2 teaspoon onion powder
- Fresh herbs (like parsley or cilantro) for garnish
Instructions
- Rinse the quinoa under cold water to remove any bitterness.
- In a medium saucepan, combine quinoa, water or broth, salt, and olive oil. Bring to a boil.
- Once boiling, reduce heat to low, cover, and simmer for about 15 minutes, or until the quinoa is fluffy and the liquid is absorbed.
- Remove from heat and let it sit for 5 minutes. Fluff with a fork.
- Stir in garlic powder, onion powder, and black pepper. Adjust seasoning to taste.
- Garnish with fresh herbs before serving.
Overly Buttered Popcorn

Popcorn is a classic snack, especially at movie nights. But when it’s drenched in butter, it becomes a side dish that many people eat just to be polite. You know the scenario: you’re at a gathering, and someone offers you a bowl of popcorn that looks more like a butter bath. You hesitate, but then you take a handful, not wanting to offend anyone.
This overly buttered treat can be both delightful and overwhelming. The rich, buttery flavor can mask the natural taste of the popcorn, making it hard to enjoy. Yet, it’s hard to resist the warm, fluffy kernels that seem to call out to you. It’s a funny dance of wanting to say no but feeling the pressure to indulge.
Next time you find yourself faced with a bowl of overly buttered popcorn, remember that it’s okay to enjoy it in moderation. Or, if you really can’t handle it, a polite smile and a gentle decline will do just fine!
Ingredients
- 1/2 cup popcorn kernels
- 1 cup unsalted butter
- Salt to taste
Instructions
- Pop the Corn: In a large pot, heat a tablespoon of oil over medium heat. Add the popcorn kernels and cover the pot. Shake occasionally until popping slows down.
- Melt the Butter: In a small saucepan, melt the butter over low heat. Stir occasionally to ensure it doesn’t burn.
- Combine: Once the popcorn is ready, pour it into a large bowl. Drizzle the melted butter over the popcorn and toss gently to coat.
- Season: Sprinkle salt to taste and mix again. Serve warm and enjoy!
Store-Bought Garlic Bread
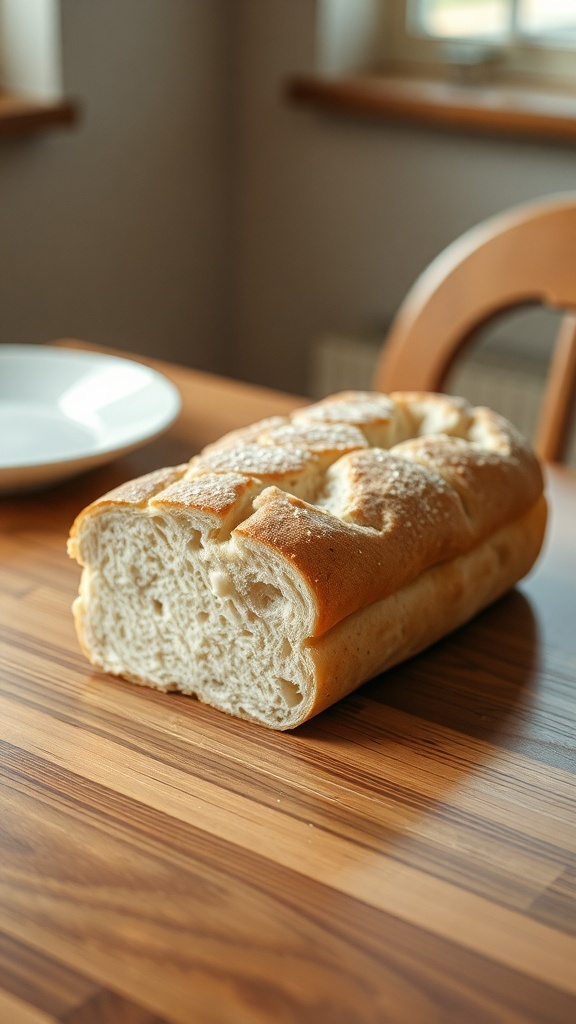
Store-bought garlic bread is a classic side dish that many people eat just to be polite. It’s often placed on the table during family dinners or gatherings, and while it may not be the star of the meal, it certainly has its place. The image shows a loaf of garlic bread, golden and inviting, ready to be sliced and served.
This bread usually comes pre-packaged, making it a convenient option for those who want to add a touch of flavor without much effort. It’s soft on the inside with a crispy crust, often infused with garlic and butter. While some might enjoy it, others may just take a slice to avoid hurting feelings.
It’s the kind of dish that’s easy to overlook, but it can complement pasta, salads, or even soups. It’s a polite addition that fills the table and offers a little something extra. So, the next time you see garlic bread, remember it’s there to make the meal feel complete, even if it’s not the highlight.
Ingredients
- 1 loaf of French bread or Italian bread
- 1/2 cup unsalted butter, softened
- 4 cloves garlic, minced
- 2 tablespoons fresh parsley, chopped
- 1/4 teaspoon salt
- 1/4 teaspoon black pepper
Instructions
- Preheat your oven to 375°F (190°C).
- In a bowl, mix the softened butter, minced garlic, chopped parsley, salt, and pepper until well combined.
- Slice the loaf of bread in half lengthwise. Spread the garlic butter mixture evenly over the cut sides.
- Place the bread on a baking sheet and bake for about 10-15 minutes, or until the edges are golden and crispy.
- Remove from the oven, slice into pieces, and serve warm.
Blanched Asparagus Stalks
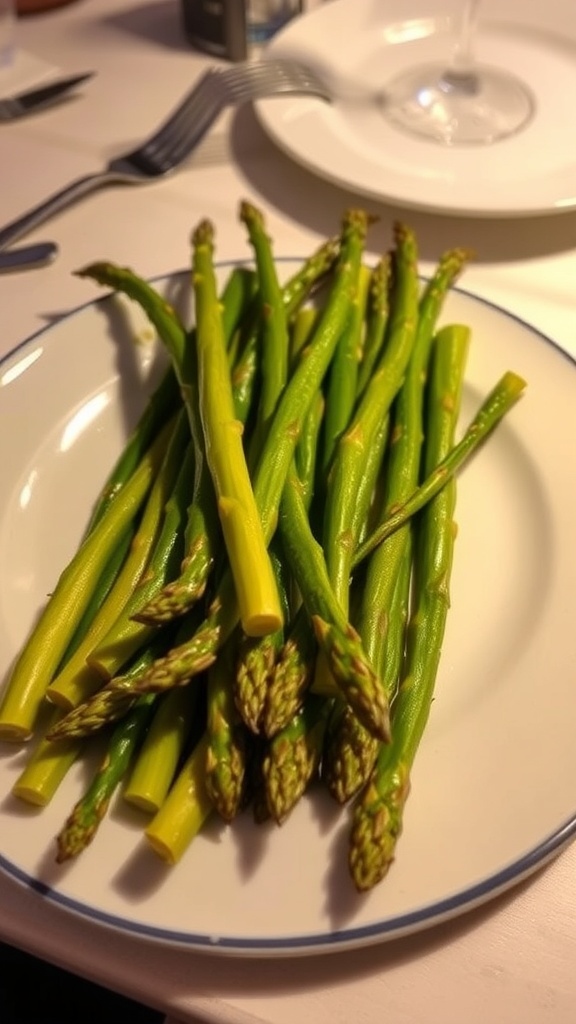
Blanched asparagus stalks are often seen on dinner plates, and they have a reputation for being a polite addition to meals. These vibrant green spears can look appealing, but let’s be honest: many of us only eat them to be courteous. They sit there, looking all fancy, while we secretly wish for something more exciting.
When you think of asparagus, you might picture a fancy dinner or a health-conscious gathering. They’re often served as a side dish, and while they can be nutritious, they don’t always steal the show. The texture can be a bit off-putting for some, and the taste might not be everyone’s favorite. Still, there’s something about them that makes us feel like we should enjoy them.
So, if you find yourself with a plate of these green stalks, don’t fret! They can actually be quite tasty when prepared right. A little seasoning or a squeeze of lemon can make a world of difference. Plus, they’re super easy to make at home!
Ingredients
- 1 pound fresh asparagus
- Salt, to taste
- Ice water
- Olive oil (optional)
- Lemon wedges (optional)
Instructions
- Prepare the Asparagus: Rinse the asparagus under cold water. Snap off the tough ends by bending each stalk until it breaks naturally.
- Boil Water: Bring a large pot of salted water to a boil.
- Blanch the Asparagus: Add the asparagus to the boiling water and cook for 2-3 minutes until bright green and tender-crisp.
- Ice Bath: Immediately transfer the asparagus to a bowl of ice water to stop the cooking process. Let them cool for a few minutes.
- Drain and Serve: Drain the asparagus and pat dry. Drizzle with olive oil and serve with lemon wedges if desired.
Unseasoned Baked Potatoes
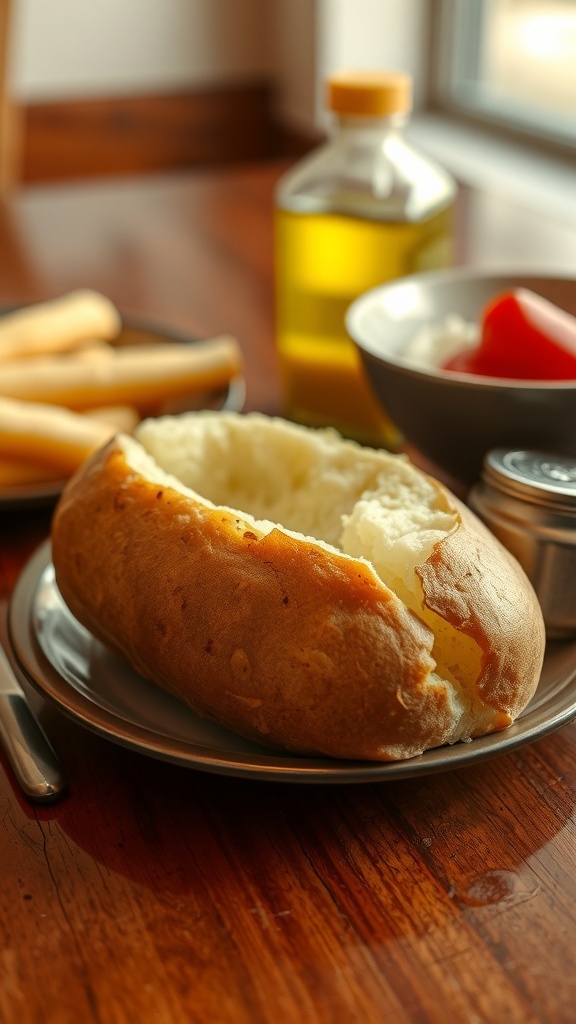
Unseasoned baked potatoes are the ultimate side dish that often ends up on our plates just to keep the peace. They sit there, fluffy and warm, waiting for someone to give them a little love. They’re the kind of dish that people eat out of politeness rather than passion.
Picture this: a table full of vibrant dishes, and then there’s the plain baked potato, looking a bit lonely. It’s not that they’re bad; they just don’t shine like the others. You might find them at family gatherings or potlucks, where everyone is trying to be polite and not leave anything untouched. But let’s be honest, who really craves a potato without any toppings?
These potatoes are versatile, though. You can dress them up with butter, cheese, or sour cream. But when they’re served plain, they often get overlooked. Still, they hold a special place in our hearts as the go-to side when we want to keep things simple.
Next time you see a baked potato on your plate, remember it’s there for a reason. It’s a reminder of the meals we share and the company we keep, even if it’s not the star of the show.
Ingredients
- 4 large russet potatoes
- Olive oil
- Salt
Instructions
- Preheat your oven to 425°F (220°C).
- Wash the potatoes thoroughly and dry them with a towel.
- Poke each potato several times with a fork to allow steam to escape.
- Rub each potato with a little olive oil and sprinkle with salt.
- Place the potatoes directly on the oven rack or on a baking sheet.
- Bake for about 45-60 minutes, or until the skin is crispy and a fork easily pierces the flesh.
- Remove from the oven and let them cool for a few minutes before serving.


