
As we look to the culinary landscape of 2026, some classic dinner recipes seem to have faded into obscurity. From overly-complicated dishes to those that once had their moment in the sun, it’s time to reminisce about the 12 dinner recipes that just haven’t maintained their charm. Let’s explore these forgotten meals and see why they might have been left behind in the kitchen.
Overcooked Spaghetti with Ketchup
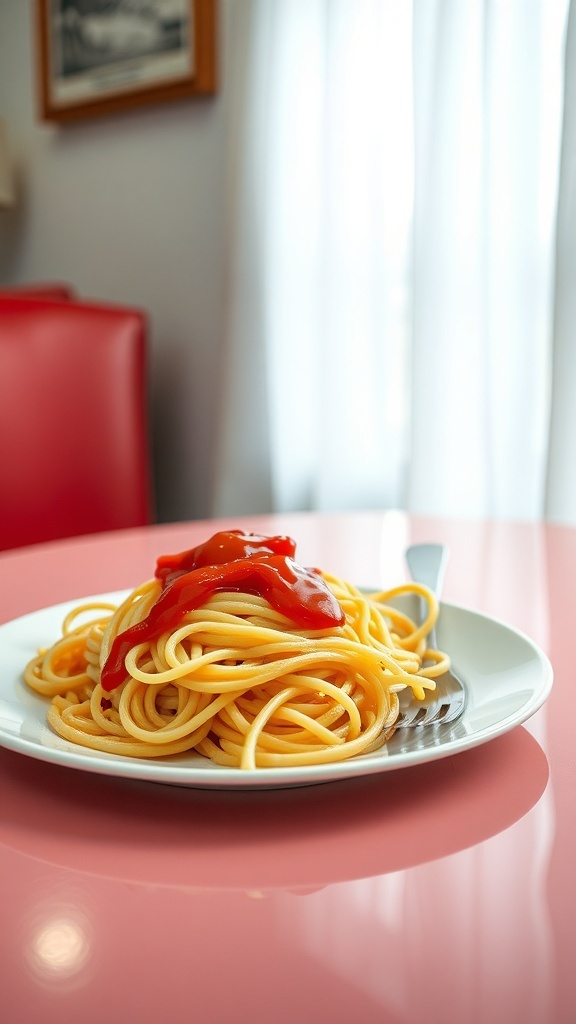
Overcooked spaghetti with ketchup is a dish that many remember from childhood, but it has fallen out of favor in recent years. The image shows a plate of spaghetti, tangled and drenched in bright red ketchup, sitting on a pink table. It’s a nostalgic sight for some, but for many, it’s a meal that’s hard to appreciate.
This dish often brings back memories of quick dinners or late-night snacks. The spaghetti is usually cooked for too long, resulting in a mushy texture that doesn’t quite satisfy. Topping it with ketchup, a condiment more suited for fries, adds to the oddity of this combination.
In 2026, people are looking for more exciting flavors and healthier options. This classic dish, once a staple, now seems outdated. It’s interesting how tastes evolve over time, and what was once a go-to meal can become a thing of the past.
Ingredients
- 8 ounces spaghetti
- 1 cup ketchup
- 1 tablespoon olive oil
- Salt, to taste
- Parmesan cheese, for serving (optional)
Instructions
- Cook the Spaghetti: Bring a large pot of salted water to a boil. Add the spaghetti and cook according to package instructions until al dente. Drain and set aside.
- Mix with Ketchup: In a large bowl, combine the cooked spaghetti with ketchup and olive oil. Toss until the pasta is evenly coated.
- Serve: Plate the spaghetti and sprinkle with salt to taste. Add Parmesan cheese if desired. Enjoy your meal, or perhaps reconsider this classic!
Jell-O Salad with Shredded Carrots
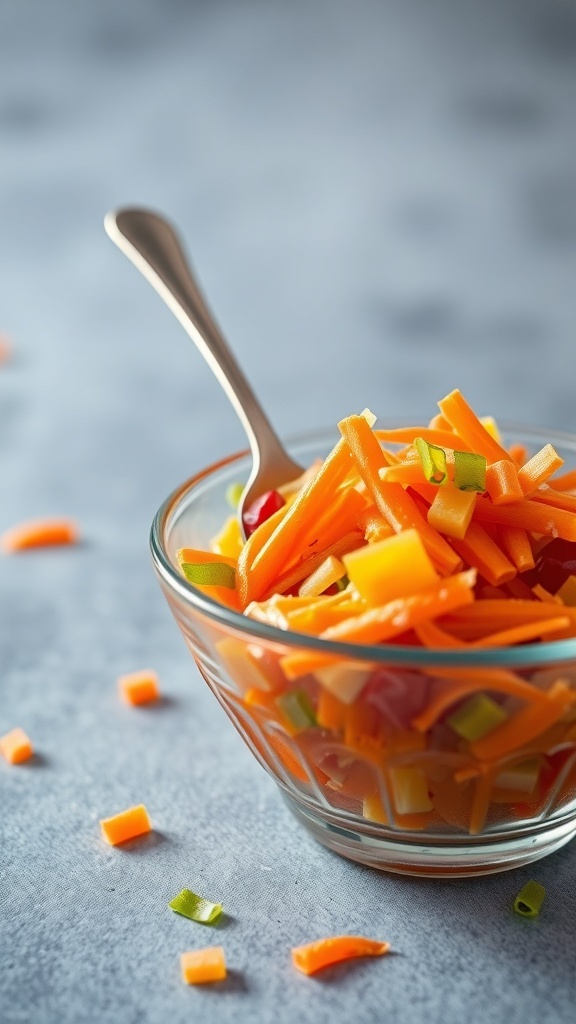
Jell-O salad with shredded carrots might seem like a relic from the past, but it was once a staple at family gatherings and potlucks. This colorful dish combines the sweetness of Jell-O with the crunch of carrots, creating a unique texture that many found appealing. In 2026, however, it seems to have lost its charm. People are moving towards fresher, more vibrant salads that don’t involve gelatin.
The bright orange of the carrots mixed with the vibrant Jell-O creates a visual feast. Yet, the flavor profile can be a bit divisive. Some loved the sweet and savory combination, while others found it puzzling. As tastes evolve, this dish has fallen out of favor, making way for healthier and more innovative recipes.
For those who want to give this nostalgic dish a try, here’s a simple recipe to bring back the Jell-O salad with shredded carrots. It’s easy to make and can be a fun throwback for gatherings!
Ingredients
- 1 package (3 oz) flavored Jell-O (any color)
- 1 cup boiling water
- 1 cup shredded carrots
- 1/2 cup crushed pineapple, drained
- 1/2 cup chopped nuts (optional)
- 1/2 cup mini marshmallows (optional)
Instructions
- In a mixing bowl, dissolve the Jell-O in boiling water. Stir until fully dissolved.
- Add shredded carrots, crushed pineapple, and nuts or marshmallows if using. Mix well.
- Pour the mixture into a mold or a serving dish. Refrigerate for at least 4 hours or until set.
- Once set, slice or scoop out servings and enjoy this retro dish!
Canned Green Bean and Mushroom Soup Bake

Canned green bean and mushroom soup bake was once a staple at family dinners. This dish combines canned green beans, creamy mushroom soup, and crispy toppings. It’s a simple recipe that many have fond memories of, but it seems to have fallen out of favor in recent years. The image shows a hearty bake, topped with crispy onions, nestled in a creamy sauce. It’s served on a classic checkered tablecloth, evoking a sense of nostalgia for home-cooked meals.
To make this dish, you’ll need just a few ingredients. The simplicity is part of its charm, making it easy to whip up for any gathering. While it may not be the trendiest dish anymore, it certainly brings back memories for many.
Ingredients
- 2 cans (14.5 oz each) green beans, drained
- 1 can (10.5 oz) cream of mushroom soup
- 1 cup milk
- 1 cup sliced mushrooms (canned or fresh)
- 1 cup crispy fried onions
- Salt and pepper to taste
Instructions
- Preheat your oven to 350°F (175°C).
- In a large bowl, mix the drained green beans, cream of mushroom soup, and milk until well combined.
- Add the sliced mushrooms and season with salt and pepper. Stir everything together.
- Pour the mixture into a baking dish and spread it out evenly.
- Bake in the preheated oven for about 25 minutes.
- Remove from the oven and sprinkle the crispy fried onions on top.
- Return to the oven and bake for an additional 10 minutes, or until the onions are golden brown.
- Let it cool slightly before serving. Enjoy your nostalgic dish!
Pasta Primavera with Frozen Vegetables
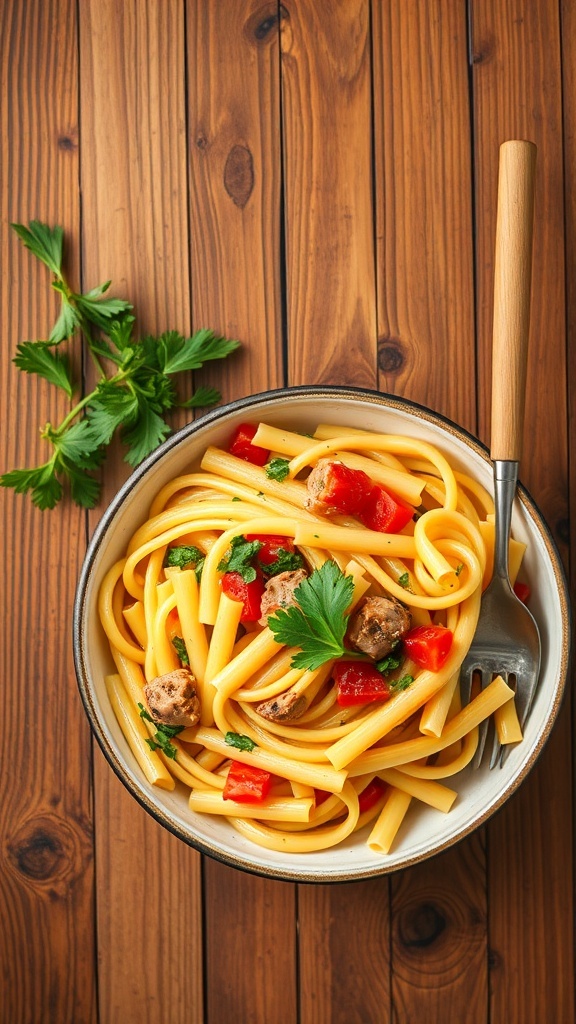
Pasta Primavera is a classic dish that used to be a favorite for many. It combines pasta with fresh vegetables, creating a colorful and vibrant meal. However, in 2026, this dish has lost its charm, especially when made with frozen vegetables. The convenience of frozen veggies might seem appealing, but they often lack the fresh taste that makes this dish shine.
When you look at a bowl of Pasta Primavera made with frozen ingredients, it can feel a bit sad. The bright colors of fresh vegetables are replaced by muted tones. The texture can be mushy, and the flavors just don’t pop like they should. It’s a dish that many have moved on from, seeking more exciting options.
For those who still want to whip up a quick meal, here’s a simple recipe for Pasta Primavera using frozen vegetables. While it might not be the go-to choice anymore, it’s still a quick fix for busy nights.
Ingredients
- 8 ounces pasta (any type)
- 2 cups frozen mixed vegetables (like bell peppers, carrots, and peas)
- 2 tablespoons olive oil
- 2 cloves garlic, minced
- 1 teaspoon Italian seasoning
- Salt and pepper to taste
- Fresh parsley, chopped (for garnish)
Instructions
- Cook the Pasta: Boil a pot of salted water and cook the pasta according to package instructions. Drain and set aside.
- Sauté the Vegetables: In a large skillet, heat olive oil over medium heat. Add minced garlic and sauté for about a minute until fragrant.
- Add Frozen Vegetables: Toss in the frozen mixed vegetables and Italian seasoning. Cook for about 5-7 minutes, stirring occasionally, until heated through.
- Combine: Add the cooked pasta to the skillet. Toss everything together, seasoning with salt and pepper to taste.
- Serve: Garnish with fresh parsley before serving. Enjoy your quick meal!
Tuna Casserole with Potato Chips
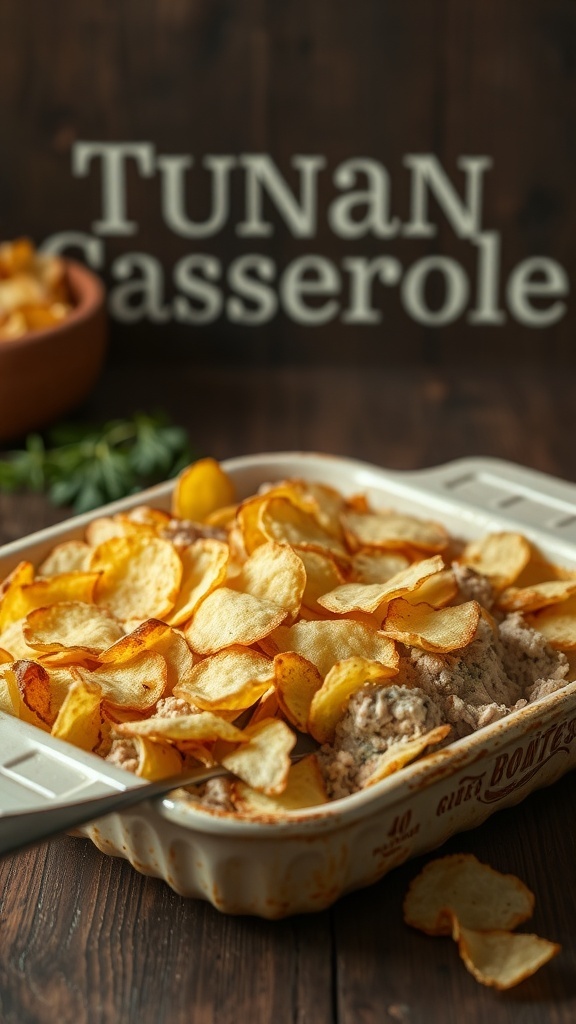
Tuna casserole has been a staple in many homes for years. It’s a dish that brings back memories of family dinners and comfort food. However, in 2026, it seems to have lost its charm. The image shows a classic tuna casserole topped with crispy potato chips, a nostalgic sight for many. The golden chips add a crunchy texture that contrasts with the creamy filling underneath.
This dish usually combines canned tuna, creamy soup, and pasta, all baked together until bubbly. The potato chips on top are a fun twist, giving it that extra crunch. While it was once a favorite, it seems that tastes have shifted, and fewer people are reaching for this dish these days.
Let’s take a look at how to make this classic tuna casserole, even if it’s not as popular anymore. It’s still a simple and satisfying meal that can be whipped up in no time!
Ingredients
- 2 cans (5 oz each) tuna, drained
- 1 can (10.5 oz) cream of mushroom soup
- 1 cup frozen peas
- 2 cups cooked pasta (elbow or shell)
- 1 cup shredded cheddar cheese
- 1 cup potato chips, crushed
- 1/2 cup milk
- 1/2 teaspoon garlic powder
- Salt and pepper to taste
Instructions
- Preheat your oven to 350°F (175°C).
- In a large bowl, mix together the drained tuna, cream of mushroom soup, frozen peas, cooked pasta, milk, garlic powder, salt, and pepper.
- Fold in half of the shredded cheddar cheese.
- Transfer the mixture into a greased baking dish and spread it evenly.
- Top with the remaining cheddar cheese and crushed potato chips.
- Bake for 25-30 minutes, or until the casserole is hot and bubbly.
- Let it cool for a few minutes before serving. Enjoy!
Frozen Chicken Nuggets with Sweet and Sour Sauce

Frozen chicken nuggets have long been a staple in many households. They are quick, easy, and perfect for busy weeknights. However, as we move into 2026, it seems that this once-beloved dish is losing its charm. The image shows a bowl filled with crispy chicken nuggets drizzled with sweet and sour sauce, a classic pairing that many grew up loving.
While these nuggets might still be a go-to for kids, adults are increasingly seeking healthier and more gourmet options. The nostalgia of biting into a crunchy nugget dipped in sweet and sour sauce is fading as culinary trends shift towards fresh ingredients and homemade meals.
For those who still enjoy this quick meal, there’s nothing wrong with indulging in a little nostalgia. Pairing these nuggets with a homemade sweet and sour sauce can elevate the experience. It’s all about finding that balance between convenience and quality.
Ingredients
- 1 pound frozen chicken nuggets
- 1/2 cup ketchup
- 1/4 cup apple cider vinegar
- 1/4 cup brown sugar
- 1 tablespoon soy sauce
- 1 teaspoon garlic powder
- 1 teaspoon ginger powder
- 1 tablespoon cornstarch (optional, for thickening)
Instructions
- Cook the Nuggets: Preheat your oven according to the package instructions for the frozen chicken nuggets. Bake them until golden brown and crispy.
- Make the Sauce: In a small saucepan, combine ketchup, apple cider vinegar, brown sugar, soy sauce, garlic powder, and ginger powder. Heat over medium heat, stirring until well mixed.
- Thicken the Sauce (Optional): If you prefer a thicker sauce, mix cornstarch with a little water to create a slurry. Stir this into the sauce and cook until it thickens.
- Serve: Once the nuggets are cooked, serve them hot with the sweet and sour sauce on the side for dipping.
Sloppy Joes with Processed Cheese

Sloppy Joes have long been a staple in American comfort food. However, as we move into 2026, this classic dish seems to be losing its charm. The image shows a hearty Sloppy Joe piled high with a sweet and tangy meat mixture, topped with a slice of processed cheese, all nestled in a soft bun. While it used to be a favorite for many, tastes are changing.
Processed cheese, once a go-to for adding creaminess, is now viewed with skepticism. People are leaning towards fresher, more natural ingredients. This shift in preference reflects a broader trend in dining, where homemade and wholesome meals are taking center stage.
Despite its decline in popularity, making Sloppy Joes can still be a fun and nostalgic experience. If you’re feeling adventurous, why not give this recipe a try? It’s simple and can be a hit at gatherings or family dinners.
Ingredients
- 1 pound ground beef
- 1 small onion, diced
- 1/2 cup ketchup
- 2 tablespoons brown sugar
- 1 tablespoon Worcestershire sauce
- 1 teaspoon mustard
- Salt and pepper to taste
- 4 hamburger buns
- 4 slices of processed cheese
Instructions
- Cook the Beef: In a skillet over medium heat, brown the ground beef with the diced onion until the meat is fully cooked. Drain excess fat.
- Add the Sauce: Stir in ketchup, brown sugar, Worcestershire sauce, mustard, salt, and pepper. Let it simmer for about 5-10 minutes until heated through.
- Prepare the Buns: Toast the hamburger buns lightly if desired.
- Assemble: Spoon the meat mixture onto the bottom half of each bun. Top with a slice of processed cheese.
- Serve: Place the top half of the bun on and enjoy your Sloppy Joes while they’re warm!
Stuffed Bell Peppers with Instant Rice
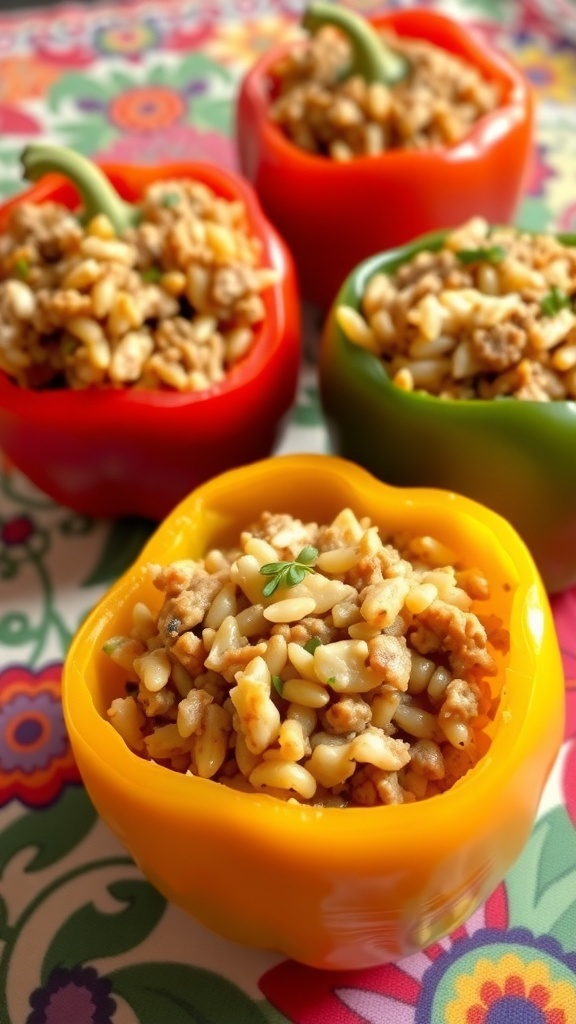
Stuffed bell peppers have been a classic dish for many years, but in 2026, they seem to have lost their charm. Once a family favorite, these colorful peppers filled with a savory mixture have fallen out of favor. The image shows vibrant red, green, and yellow bell peppers, each brimming with a hearty filling of rice and meat. The presentation is inviting, but it’s clear that tastes have shifted.
These peppers were once a go-to for busy weeknights. They are easy to prepare and can be customized with various ingredients. However, with the rise of new culinary trends, many home cooks are opting for different meals that offer more excitement and flavor. The simplicity of stuffed peppers just doesn’t cut it anymore.
Despite their decline in popularity, stuffed bell peppers can still be a delightful dish when made with fresh ingredients. If you’re feeling nostalgic or want to give them a try, here’s a simple recipe to bring them back to your table.
Ingredients
- 4 large bell peppers (any color)
- 1 cup instant rice
- 1 pound ground beef or turkey
- 1 can diced tomatoes (14.5 oz)
- 1 teaspoon garlic powder
- 1 teaspoon onion powder
- 1 teaspoon Italian seasoning
- Salt and pepper to taste
- 1 cup shredded cheese (optional)
Instructions
- Preheat your oven to 375°F (190°C).
- Cook the instant rice according to package instructions and set aside.
- In a skillet, brown the ground meat over medium heat. Drain any excess fat.
- Add the diced tomatoes, cooked rice, garlic powder, onion powder, Italian seasoning, salt, and pepper to the skillet. Mix well and let simmer for about 5 minutes.
- While the mixture simmers, cut the tops off the bell peppers and remove the seeds. Place them upright in a baking dish.
- Stuff each pepper with the meat and rice mixture, packing it in gently.
- If using cheese, sprinkle it on top of the stuffed peppers.
- Cover the dish with foil and bake for 25-30 minutes. Remove the foil for the last 10 minutes to let the cheese melt and brown slightly.
- Let cool for a few minutes before serving. Enjoy your stuffed peppers!
Meatloaf with Ketchup Glaze

Meatloaf has been a staple in many homes for years, but it seems to be losing its charm in 2026. This classic dish, often topped with a sweet ketchup glaze, used to be a family favorite. The image shows a slice of meatloaf, perfectly glazed and served with a side of creamy mashed potatoes. It’s a comforting meal that many grew up loving, but tastes have shifted over time.
While meatloaf was once a go-to for weeknight dinners, it now feels a bit outdated. People are leaning towards fresher, lighter options. Yet, there’s something nostalgic about this dish that can’t be ignored. It’s hearty, filling, and brings back memories of home-cooked meals.
If you’re feeling adventurous, why not give meatloaf another shot? You can always tweak the recipe to make it more appealing. Try adding different spices or even some veggies to the mix. It’s all about making it your own!
Ingredients
- 1 1/2 pounds ground beef
- 1 cup breadcrumbs
- 1/2 cup onion, finely chopped
- 1/2 cup milk
- 2 large eggs
- 1/4 cup ketchup (plus more for topping)
- 1 tablespoon Worcestershire sauce
- 1 teaspoon salt
- 1/2 teaspoon black pepper
- 1 teaspoon garlic powder
Instructions
- Preheat your oven to 350°F (175°C).
- In a large bowl, combine the ground beef, breadcrumbs, chopped onion, milk, eggs, ketchup, Worcestershire sauce, salt, pepper, and garlic powder. Mix until well combined.
- Transfer the mixture to a loaf pan and shape it into a loaf.
- Spread a layer of ketchup on top of the meatloaf for that classic glaze.
- Bake in the preheated oven for about 1 hour, or until the internal temperature reaches 160°F (70°C).
- Let it rest for a few minutes before slicing. Serve with mashed potatoes or your favorite side.
Taco Salad with Doritos
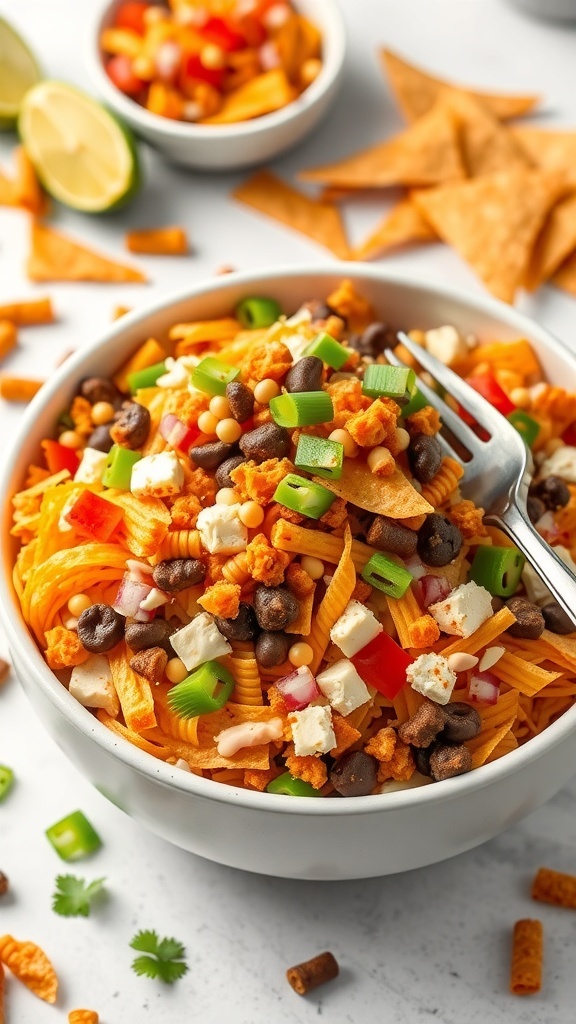
Taco salad with Doritos was once a staple at gatherings and potlucks. This dish combines the crunch of Doritos with fresh veggies and seasoned meat, creating a fun and flavorful meal. In 2026, however, it seems to have lost its charm. Many people are moving towards healthier options, leaving this classic behind.
The vibrant colors of the salad make it visually appealing. You can see the bright orange of the Doritos, mixed with greens, reds, and blacks from the vegetables and beans. It’s a dish that used to bring smiles, but now it’s often overlooked.
If you want to give this nostalgic recipe a try, here’s how to make it:
Ingredients
- 1 bag of Doritos (Nacho Cheese or Cool Ranch)
- 1 pound ground beef or turkey
- 1 packet taco seasoning
- 1 can black beans, rinsed and drained
- 1 cup cherry tomatoes, halved
- 1 cup shredded lettuce
- 1/2 cup diced red onion
- 1 cup shredded cheese (cheddar or Mexican blend)
- 1/2 cup sour cream
- 1/4 cup salsa
Instructions
- Cook the Meat: In a skillet, brown the ground beef or turkey over medium heat. Drain excess fat and add taco seasoning according to package instructions. Stir until well combined.
- Prepare the Salad: In a large bowl, combine the cooked meat, black beans, cherry tomatoes, lettuce, and red onion. Toss gently to mix.
- Add the Crunch: Just before serving, crush the Doritos and sprinkle them over the salad. This keeps them crunchy!
- Top It Off: Add shredded cheese, sour cream, and salsa on top. Serve immediately for the best texture.
Beef Stroganoff with Egg Noodles
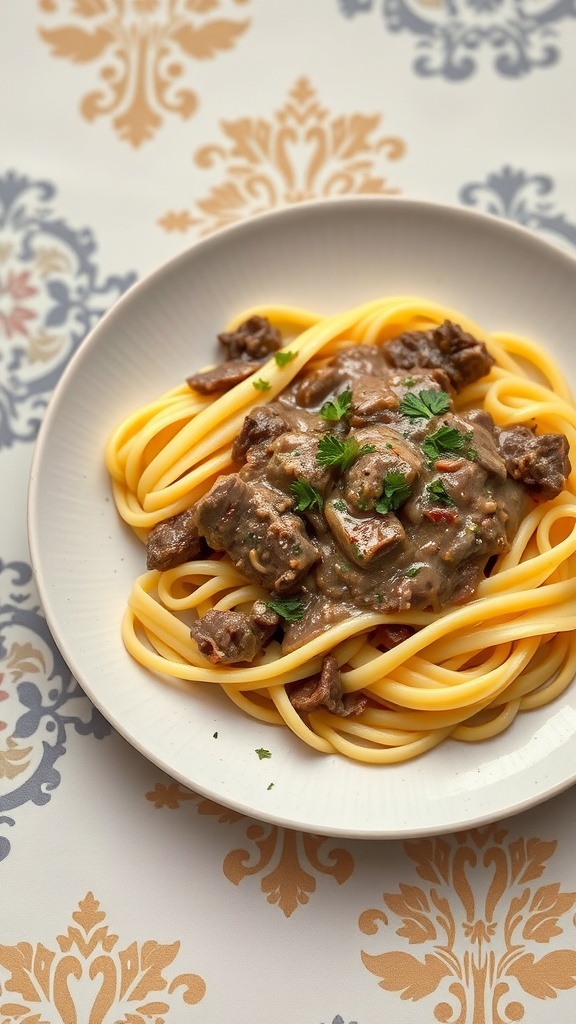
Beef Stroganoff has been a staple in many households for years. This creamy dish, featuring tender beef and mushrooms, is served over egg noodles, making it a comforting meal. However, as tastes change, this classic recipe seems to be falling out of favor. In 2026, fewer people are reaching for this dish, opting instead for lighter, more modern fare.
The image shows a generous serving of Beef Stroganoff, with rich, savory sauce coating the noodles perfectly. The tender pieces of beef and mushrooms are inviting, but they may not hold the same allure they once did. With the rise of plant-based diets and healthier eating trends, traditional comfort foods like this are often overlooked.
Still, for those who cherish the nostalgia of Beef Stroganoff, it remains a delicious option. It’s easy to prepare and can be a hit at family dinners or gatherings. Let’s not forget the joy of a warm, hearty meal on a chilly evening!
Ingredients
- 1 pound beef sirloin, cut into strips
- 2 tablespoons olive oil
- 1 onion, chopped
- 2 cloves garlic, minced
- 8 ounces mushrooms, sliced
- 1 cup beef broth
- 1 tablespoon Worcestershire sauce
- 1 cup sour cream
- Salt and pepper to taste
- 12 ounces egg noodles
- Fresh parsley for garnish
Instructions
- Cook the Noodles: In a large pot, cook the egg noodles according to package instructions. Drain and set aside.
- Brown the Beef: In a large skillet, heat olive oil over medium-high heat. Add the beef strips and cook until browned. Remove from the skillet and set aside.
- Sauté the Vegetables: In the same skillet, add the chopped onion and garlic. Sauté until the onion is translucent. Add the mushrooms and cook until tender.
- Add the Sauce: Pour in the beef broth and Worcestershire sauce. Bring to a simmer, then stir in the sour cream. Return the beef to the skillet and mix well. Season with salt and pepper.
- Combine: Toss the cooked egg noodles with the beef mixture until well coated. Serve hot, garnished with fresh parsley.
Chili with Canned Beans and Corn
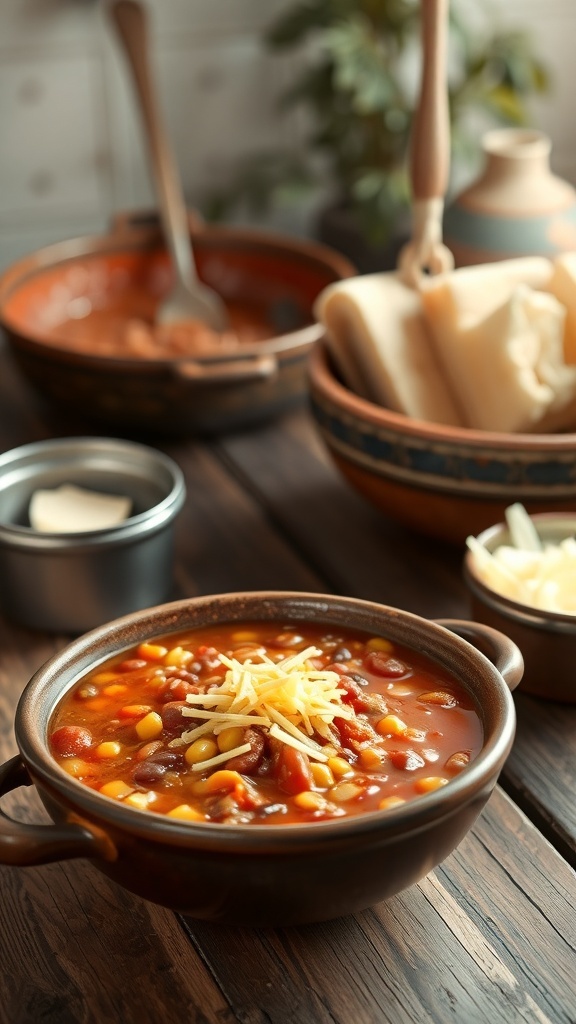
Chili with canned beans and corn has seen its popularity fade in recent years. Once a staple for cozy dinners, this dish now feels a bit outdated. The image shows a hearty bowl of chili, filled with vibrant colors from the beans and corn. It’s topped with a sprinkle of cheese, making it look inviting. However, many people are moving towards fresher, more innovative recipes.
This chili is easy to make, but it lacks the excitement that newer dishes bring. The convenience of canned beans and corn makes it quick, but some feel it doesn’t compare to homemade versions with fresh ingredients. It’s a classic comfort food, but tastes have shifted.
For those who still enjoy this dish, it can be a nostalgic reminder of simpler meals. It’s perfect for a quick weeknight dinner or a gathering with friends. Let’s not forget, everyone has their own twist on chili, and that’s what makes it special.
Ingredients
- 1 can kidney beans, drained and rinsed
- 1 can black beans, drained and rinsed
- 1 can corn, drained
- 1 can diced tomatoes
- 1 medium onion, chopped
- 2 cloves garlic, minced
- 2 tablespoons chili powder
- 1 teaspoon cumin
- Salt and pepper to taste
- 1 cup shredded cheese (optional)
Instructions
- In a large pot, sauté the chopped onion and minced garlic over medium heat until softened.
- Add the canned beans, corn, and diced tomatoes to the pot.
- Stir in the chili powder, cumin, salt, and pepper. Mix well.
- Let the chili simmer for about 20 minutes, stirring occasionally.
- Serve hot, topped with shredded cheese if desired.


