
Comfort foods often carry the weight of nostalgia and warmth, but not all beloved dishes are universally adored. In fact, some meals that are dubbed “classics” can inspire more grimaces than smiles. Here’s a look at 13 comfort foods that surprisingly have their fair share of critics, proving that tastes can vary far and wide—even when it comes to those once thought to be crowd-pleasers.
Cottage Cheese: A Polarizing Snack

Cottage cheese often finds itself in the spotlight as a comfort food that sparks mixed feelings. For some, it’s a creamy delight packed with protein, while others can’t get past its lumpy texture. This snack is a classic example of how personal taste can vary widely.
Many people remember cottage cheese from childhood. It’s often paired with fruits or used in recipes, but the taste can be divisive. Some enjoy it with a sprinkle of salt, while others prefer it sweetened with honey or fruit. The debate continues: is it a healthy snack or just an acquired taste?
Whether you love it or hate it, cottage cheese has its place in the comfort food category. It’s versatile, too! You can mix it into pancakes, use it in lasagna, or even enjoy it straight from the bowl. If you’re looking to give it a try or change up your routine, here’s a simple recipe for a cottage cheese parfait that might just win you over.
Ingredients
- 2 cups cottage cheese
- 1 cup mixed berries (strawberries, blueberries, raspberries)
- 1/4 cup honey or maple syrup
- 1/4 cup granola
- Fresh mint leaves for garnish
Instructions
- In a bowl, layer half of the cottage cheese at the bottom.
- Add half of the mixed berries on top of the cottage cheese.
- Drizzle half of the honey or maple syrup over the berries.
- Sprinkle half of the granola on top.
- Repeat the layers with the remaining ingredients.
- Garnish with fresh mint leaves before serving.
Beets: An Acquired Taste

Beets are one of those foods that often spark strong opinions. Some people love their earthy sweetness, while others can’t stand the taste. This vibrant root vegetable is often seen on restaurant menus, but it’s not always a hit with diners. The image shows a colorful beet salad, beautifully arranged with greens and slices of beet, but the expression on the diner’s face hints at a different story.
Many folks find beets to be an acquired taste. Their unique flavor can be off-putting, especially for those who prefer milder vegetables. The bright red color is eye-catching, but it doesn’t always translate to a pleasing taste experience for everyone. It’s a classic example of a comfort food that some just can’t get behind.
If you’re curious about beets, why not give them a try in a simple salad? Here’s a quick recipe to help you explore this interesting vegetable.
Ingredients
- 2 medium beets, roasted and sliced
- 4 cups mixed salad greens
- 1/4 cup red onion, thinly sliced
- 1/4 cup feta cheese, crumbled
- 2 tablespoons olive oil
- 1 tablespoon balsamic vinegar
- Salt and pepper to taste
Instructions
- Roast the Beets: Preheat your oven to 400°F (200°C). Wrap the beets in foil and roast for about 45 minutes, or until tender. Let them cool, then peel and slice.
- Prepare the Salad: In a large bowl, combine the mixed greens, sliced beets, and red onion.
- Add Cheese: Sprinkle the feta cheese over the salad.
- Dress the Salad: In a small bowl, whisk together olive oil, balsamic vinegar, salt, and pepper. Drizzle over the salad and toss gently.
- Serve: Enjoy your beet salad as a side dish or a light meal!
Brussels Sprouts: A Bitter Taste

Brussels sprouts often get a bad rap. Many people remember them as the dreaded side dish from childhood dinners. The image shows a bowl of these little green veggies, looking innocent enough, but the frowny face emoji hints at the truth: they’re not everyone’s favorite.
These tiny cabbages can have a strong, bitter taste that turns off many eaters. Even when cooked well, they can still carry that distinct flavor that some find hard to enjoy. It’s no wonder they often end up at the back of the fridge, forgotten and unloved.
Despite their reputation, Brussels sprouts can be transformed into a delicious dish with the right preparation. Roasting them can bring out a sweeter flavor, making them more appealing. Tossing them with olive oil, garlic, and a sprinkle of salt can change the game. But for many, the bitterness still lingers.
Ingredients
- 1 pound Brussels sprouts, trimmed and halved
- 2 tablespoons olive oil
- 3 cloves garlic, minced
- Salt and pepper to taste
- 1 tablespoon balsamic vinegar (optional)
- Parmesan cheese for topping (optional)
Instructions
- Preheat your oven to 400°F (200°C).
- In a large bowl, toss the halved Brussels sprouts with olive oil, minced garlic, salt, and pepper.
- Spread the sprouts on a baking sheet in a single layer.
- Roast for 20-25 minutes, stirring halfway through, until they are golden brown and crispy.
- If desired, drizzle with balsamic vinegar and sprinkle with Parmesan cheese before serving.
Anchovies: Love Them or Hate Them

Anchovies are one of those foods that spark strong opinions. Some people adore their salty, umami flavor, while others can’t stand the thought of them. This little fish often appears on pizzas, salads, and in sauces, making it a staple in many kitchens. But let’s be honest, when it comes to comfort food, anchovies are often a dealbreaker for many.
The image shows a pizza topped with anchovies, olives, and cheese. It’s a classic combination that some find irresistible, while others would rather skip it altogether. The contrast of flavors can be polarizing, and that’s what makes anchovies such a hot topic in the food world.
If you’re curious about trying anchovies in a new way, why not whip up a delicious anchovy pasta? It’s simple, quick, and might just change your mind about these little fish!
Ingredients
- 200g spaghetti
- 4 anchovy fillets
- 2 cloves garlic, minced
- 1/4 teaspoon red pepper flakes
- 2 tablespoons olive oil
- 1 tablespoon capers, rinsed
- Fresh parsley, chopped
- Salt and pepper to taste
Instructions
- Cook the spaghetti according to package instructions until al dente. Drain and set aside.
- In a large skillet, heat olive oil over medium heat. Add minced garlic and red pepper flakes, sautéing until fragrant.
- Add the anchovy fillets and capers, stirring until the anchovies dissolve into the oil.
- Toss the cooked spaghetti into the skillet, mixing well to coat the pasta with the anchovy sauce.
- Season with salt and pepper, and garnish with fresh parsley before serving.
Tofu: The Texture Debate

Tofu often sparks a lively discussion among food lovers. Some adore its versatility, while others can’t get past its unique texture. In the image, you see a colorful tofu dish that showcases its potential. The cubes are golden and inviting, surrounded by vibrant veggies. This presentation can make anyone curious, but the texture can still be a dealbreaker for many.
For some, tofu feels too soft or spongy. It can be a challenge to enjoy if you’re used to heartier textures. Others find it a blank canvas, ready to soak up flavors. The debate continues: is it a comfort food or a culinary conundrum? Regardless, tofu remains a staple in many diets, especially for those seeking plant-based options.
Feeling adventurous? Why not try making a delicious tofu stir-fry? It’s simple and can be tailored to your taste. Here’s a quick recipe to get you started!
Ingredients
- 1 block firm tofu, drained and pressed
- 2 tablespoons soy sauce
- 1 tablespoon sesame oil
- 2 cups mixed vegetables (like bell peppers, broccoli, and snap peas)
- 2 cloves garlic, minced
- 1 tablespoon ginger, minced
- 1 tablespoon cornstarch
- 2 tablespoons vegetable oil
- Cooked rice or noodles, for serving
Instructions
- Prepare the Tofu: Cut the pressed tofu into cubes. Toss with soy sauce and cornstarch until evenly coated.
- Heat the Oil: In a large pan, heat vegetable oil over medium-high heat. Add the tofu cubes and cook until golden brown on all sides, about 8-10 minutes. Remove and set aside.
- Stir-Fry the Veggies: In the same pan, add sesame oil, garlic, and ginger. Sauté for 1-2 minutes until fragrant. Add mixed vegetables and stir-fry until tender-crisp, about 3-5 minutes.
- Combine: Return the tofu to the pan and mix everything together. Cook for another 2 minutes to heat through.
- Serve: Serve hot over rice or noodles. Enjoy your tasty tofu dish!
Liver and Onions: A Culinary Divide
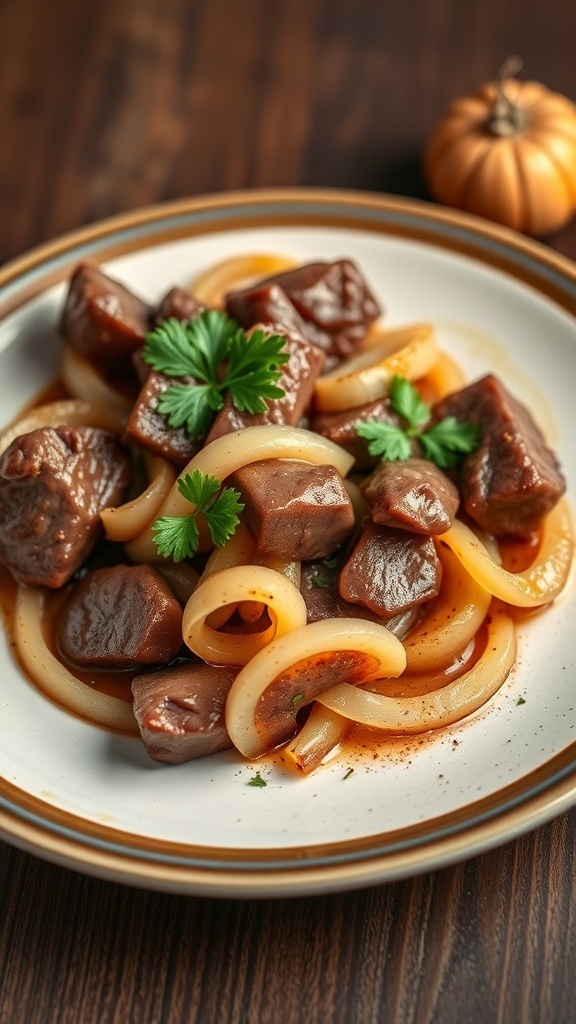
Liver and onions is one of those dishes that sparks strong opinions. For some, it’s a nostalgic comfort food, while for others, it’s a plate of dread. The image captures a hearty serving of liver, beautifully cooked and paired with tender onions, garnished with fresh herbs. It looks inviting, but many people would rather pass.
This dish often brings back memories of family dinners, where it was served with pride. Yet, the taste and texture of liver can be polarizing. Some find it rich and flavorful, while others describe it as too strong or metallic. This divide makes liver and onions a classic example of comfort food that many actually hate.
If you’re feeling adventurous and want to give this dish a try, here’s a simple recipe to make your own liver and onions at home. Who knows? You might just find a new favorite!
Ingredients
- 1 pound beef liver, sliced
- 2 large onions, sliced
- 1/4 cup all-purpose flour
- Salt and pepper to taste
- 3 tablespoons butter
- 1 tablespoon olive oil
- 1/2 cup beef broth
- Fresh parsley for garnish
Instructions
- Prepare the Liver: Rinse the liver slices under cold water and pat them dry. Season with salt and pepper, then dredge in flour, shaking off any excess.
- Sauté the Onions: In a large skillet, melt 2 tablespoons of butter and the olive oil over medium heat. Add the sliced onions and cook until they are soft and caramelized, about 10 minutes. Remove and set aside.
- Cook the Liver: In the same skillet, add the remaining butter. Increase the heat to medium-high and add the liver slices. Cook for about 3-4 minutes on each side until browned and cooked through.
- Add Broth: Pour in the beef broth, scraping the bottom of the pan to deglaze. Let it simmer for a couple of minutes to combine the flavors.
- Combine: Return the onions to the skillet and mix well. Cook for an additional minute to heat everything through.
- Serve: Plate the liver and onions, garnishing with fresh parsley. Enjoy your meal!
Mushroom Risotto: Creamy Controversy
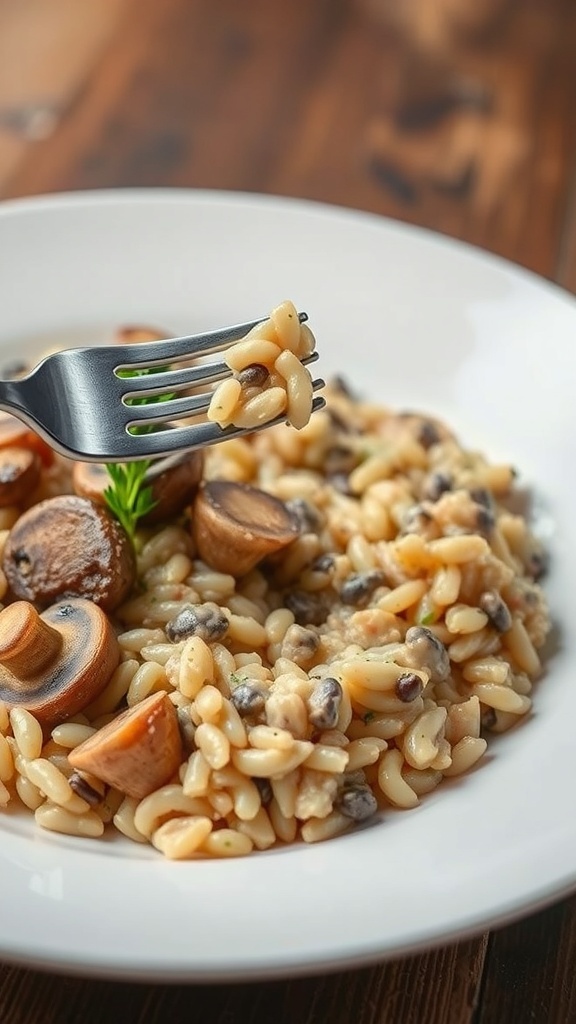
Mushroom risotto often sparks mixed feelings among food lovers. Some adore its creamy texture and earthy flavors, while others find it bland or overly rich. The image shows a plate of mushroom risotto, with tender grains of rice coated in a luscious sauce, topped with sautéed mushrooms. A fork is poised to take a bite, hinting at the dish’s comforting appeal.
Risotto is a classic Italian dish, typically made with Arborio rice, which gives it that creamy consistency. The mushrooms add depth, but not everyone is a fan of their texture or taste. This dish can be polarizing, making it a perfect candidate for our list of comfort foods that some people actually hate.
For those who love it, mushroom risotto is a warm hug on a plate. It’s perfect for cozy nights in or as a fancy dinner party dish. If you want to give it a try, here’s a simple recipe to make your own!
Ingredients
- 1 cup Arborio rice
- 4 cups vegetable broth
- 1 cup mushrooms, sliced
- 1 small onion, finely chopped
- 2 cloves garlic, minced
- 1/2 cup white wine (optional)
- 1/2 cup grated Parmesan cheese
- 2 tablespoons olive oil
- Salt and pepper to taste
- Fresh parsley for garnish
Instructions
- Heat the vegetable broth in a saucepan and keep it warm over low heat.
- In a large skillet, heat olive oil over medium heat. Add the chopped onion and garlic, cooking until softened.
- Add the sliced mushrooms and cook until they are tender.
- Stir in the Arborio rice, allowing it to toast for a minute.
- If using, pour in the white wine and stir until absorbed.
- Gradually add the warm broth, one ladle at a time, stirring frequently. Wait until the liquid is mostly absorbed before adding more.
- Continue this process until the rice is creamy and al dente, about 18-20 minutes.
- Stir in the Parmesan cheese, and season with salt and pepper to taste.
- Serve hot, garnished with fresh parsley.
Fruitcake: The Holiday Dread

Fruitcake has a reputation that precedes it. Often found at holiday gatherings, this dense dessert is usually packed with candied fruits and nuts. It’s a colorful sight, but many people dread the moment it appears on the dessert table. The image captures a beautifully decorated fruitcake, adorned with pecans and festive berries, sitting on a silver platter. Despite its charm, the taste can leave many feeling less than thrilled.
Why does fruitcake get such a bad rap? For starters, its texture can be off-putting. The combination of dried fruits and nuts creates a chewy experience that doesn’t sit well with everyone. Plus, the flavor can be overly sweet, masking the natural taste of the ingredients. Many people find themselves politely pushing it aside, opting for more traditional holiday treats.
Despite its unpopularity, fruitcake has a long history. It dates back to ancient Rome and has evolved over the centuries. Some families even have their own recipes, passed down through generations. Yet, even with its rich background, it often ends up as a joke during the holidays. So, if you’re looking for a dessert that everyone will love, you might want to skip the fruitcake.
Ingredients
- 2 cups mixed dried fruit (raisins, cherries, apricots)
- 1 cup chopped nuts (walnuts, pecans)
- 1 cup all-purpose flour
- 1 teaspoon baking powder
- 1/2 teaspoon salt
- 1 teaspoon ground cinnamon
- 1/2 teaspoon ground nutmeg
- 1/2 cup unsalted butter, softened
- 1 cup brown sugar
- 2 large eggs
- 1/4 cup orange juice
- 1/4 cup rum or whiskey (optional)
Instructions
- Preheat your oven to 325°F (165°C). Grease a bundt pan or loaf pan.
- In a bowl, mix the flour, baking powder, salt, cinnamon, and nutmeg. Set aside.
- In another bowl, cream together the butter and brown sugar until light and fluffy. Add the eggs one at a time, mixing well after each addition.
- Stir in the orange juice and rum (if using). Gradually add the dry ingredients, mixing until just combined.
- Fold in the mixed dried fruit and nuts. Pour the batter into the prepared pan.
- Bake for 60-70 minutes, or until a toothpick inserted in the center comes out clean. Let it cool in the pan for 10 minutes before transferring to a wire rack.
- Once cooled, you can glaze it with a simple icing or serve it plain. Enjoy, if you dare!
Pimento Cheese: A Southern Divide

Pimento cheese is a classic Southern dish that sparks strong opinions. Some folks can’t get enough of its creamy texture and tangy flavor, while others find it unappealing. This spread, made with cheese, pimentos, and various seasonings, often finds its way onto crackers or sandwiches at gatherings.
The image captures a gathering where pimento cheese might be served, surrounded by friends enjoying their time together. You can see a table filled with delicious treats, showcasing how this dish can be a part of social events, even if it’s not everyone’s favorite.
For those who love it, pimento cheese is comfort food at its finest. It’s easy to make and perfect for sharing. If you’re curious about trying your hand at this Southern staple, here’s a simple recipe to whip up your own batch!
Ingredients
- 2 cups shredded sharp cheddar cheese
- 1 cup cream cheese, softened
- 1/2 cup mayonnaise
- 1/4 cup diced pimentos, drained
- 1 teaspoon garlic powder
- 1 teaspoon onion powder
- Salt and pepper to taste
Instructions
- In a large bowl, combine the shredded cheddar cheese and softened cream cheese.
- Add the mayonnaise, diced pimentos, garlic powder, and onion powder. Mix until well combined.
- Season with salt and pepper to taste. Adjust the flavors as desired.
- Chill in the refrigerator for at least an hour to let the flavors meld.
- Serve with crackers, on sandwiches, or as a dip for veggies.
Egg Salad: A Textural Challenge
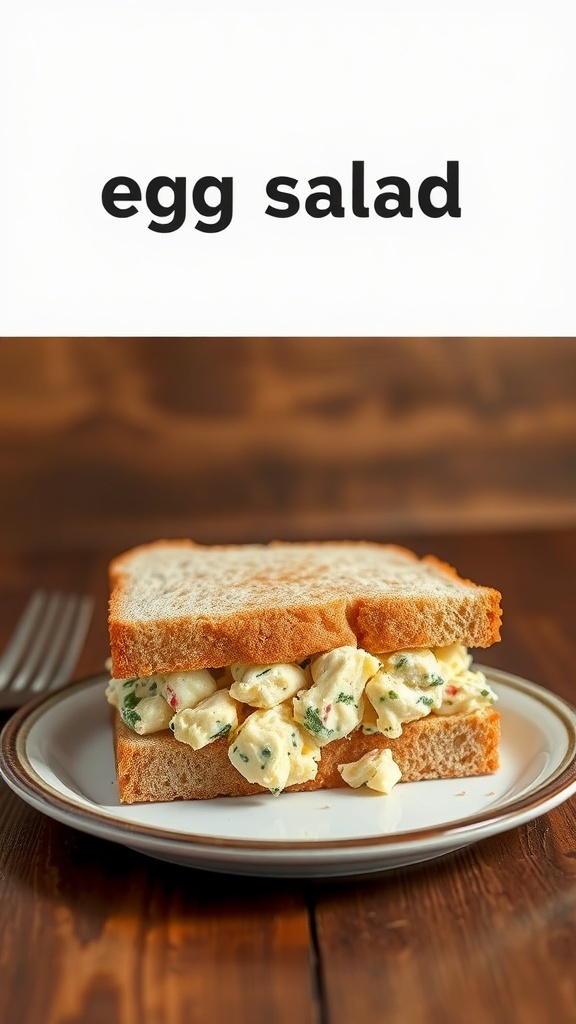
Egg salad is one of those comfort foods that often divides opinions. Some people love it, while others can’t stand the texture. The image shows a classic egg salad sandwich, nestled between two slices of bread. The creamy filling, dotted with bits of herbs and spices, looks inviting but can be a bit off-putting for those sensitive to textures.
The combination of soft, mashed eggs and creamy mayonnaise creates a unique mouthfeel. For some, it’s a nostalgic treat, while for others, it feels like a mushy challenge. The sandwich is easy to make, but its texture can be polarizing.
If you’re curious about making your own egg salad, here’s a simple recipe to try. You might just find a new favorite!
Ingredients
- 6 large eggs
- 1/4 cup mayonnaise
- 1 teaspoon Dijon mustard
- 1 tablespoon chopped fresh chives
- Salt and pepper to taste
- 2 slices of bread
Instructions
- Boil the Eggs: Place eggs in a pot and cover with water. Bring to a boil, then cover and remove from heat. Let sit for 12 minutes.
- Cool and Peel: Transfer the eggs to an ice bath to cool. Once cool, peel the eggs and chop them into small pieces.
- Mix Ingredients: In a bowl, combine chopped eggs, mayonnaise, Dijon mustard, chives, salt, and pepper. Mix until well combined.
- Assemble the Sandwich: Spread the egg salad onto one slice of bread and top with the other slice. Cut in half and enjoy!
Corn Pudding: A Sweet Surprise

Corn pudding is one of those dishes that can spark a lot of debate. Some people love its sweet, creamy texture, while others can’t quite get on board. In this image, two friends are sharing a bowl of corn pudding, and their reactions say it all. One is excitedly holding a piece of cornbread, while the other seems to be enjoying the dish, albeit with a hint of skepticism.
This dish often finds its way to family gatherings and holiday dinners. It’s a mix of corn, eggs, milk, and sugar, baked until it’s fluffy and golden. The sweetness can be surprising for those expecting a savory side. It’s a comfort food that can be polarizing, making it a perfect candidate for our list of foods that everyone actually hates.
Ingredients
- 2 cups corn kernels (fresh or frozen)
- 1 cup milk
- 3 large eggs
- 1/4 cup granulated sugar
- 1/4 cup unsalted butter, melted
- 1 teaspoon baking powder
- 1/2 teaspoon salt
- 1/4 teaspoon black pepper
Instructions
- Preheat your oven to 350°F (175°C).
- In a large bowl, whisk together the eggs, milk, and melted butter.
- Add the corn, sugar, baking powder, salt, and pepper. Mix until well combined.
- Pour the mixture into a greased baking dish.
- Bake for 45-50 minutes, or until the top is golden and a toothpick comes out clean.
- Let it cool slightly before serving. Enjoy your sweet surprise!
Seafood Salad: An Acquired Taste

Seafood salad often stirs up mixed feelings. For some, it’s a delightful dish, while others can’t quite get on board. The image shows a bowl filled with shrimp and other seafood, garnished with fresh vegetables. It looks colorful and inviting, but many people find the texture and flavor off-putting.
This dish usually combines various seafood, like shrimp and scallops, mixed with a tangy dressing. The combination of flavors can be a bit overwhelming for those who prefer simpler tastes. The sight of seafood salad might make some cringe, while others can’t wait to dig in.
Despite its reputation, seafood salad has its fans. It’s often served at gatherings, bringing a touch of elegance to the table. But for many, the thought of eating seafood in a salad form is just too much. It’s a classic example of how food can be polarizing.
Ingredients
- 1 pound cooked shrimp, peeled and deveined
- 1 cup scallops, cooked and chopped
- 1 cup diced celery
- 1/2 cup diced red bell pepper
- 1/2 cup diced cucumber
- 1/4 cup mayonnaise
- 2 tablespoons lemon juice
- Salt and pepper to taste
- Fresh parsley for garnish
Instructions
- In a large bowl, combine the shrimp, scallops, celery, bell pepper, and cucumber.
- In a separate bowl, mix the mayonnaise, lemon juice, salt, and pepper until smooth.
- Pour the dressing over the seafood mixture and gently toss to combine.
- Chill in the refrigerator for at least 30 minutes before serving.
- Garnish with fresh parsley and serve cold.
Chili: The Bean Debate

Chili is a classic comfort food, but it often sparks heated debates, especially when it comes to beans. Some people swear by adding beans to their chili, while others argue that true chili should be bean-free. This divide can lead to some passionate discussions at dinner tables and cook-offs alike.
In the image, we see a steaming bowl of chili, rich with various beans and colorful ingredients. It’s the kind of dish that warms you up on a chilly day, but it also raises the question: are beans a delightful addition or a culinary faux pas? The answer often depends on personal taste and regional traditions.
Whether you’re team beans or team no beans, chili remains a beloved dish. It’s hearty, filling, and perfect for gatherings. So, why not whip up your own version? Here’s a simple recipe to get you started!
Ingredients
- 1 pound ground beef or turkey
- 1 can (15 oz) kidney beans, drained and rinsed
- 1 can (15 oz) black beans, drained and rinsed
- 1 can (28 oz) diced tomatoes
- 1 medium onion, chopped
- 2 cloves garlic, minced
- 2 tablespoons chili powder
- 1 teaspoon cumin
- Salt and pepper to taste
- 1 tablespoon olive oil
Instructions
- In a large pot, heat olive oil over medium heat. Add chopped onion and garlic, sautéing until softened.
- Add the ground meat to the pot, cooking until browned. Drain excess fat if necessary.
- Stir in chili powder, cumin, salt, and pepper, mixing well.
- Add the diced tomatoes and beans to the pot. Stir everything together.
- Bring the mixture to a simmer, then reduce heat. Let it cook for at least 30 minutes, stirring occasionally.
- Serve hot, and enjoy your chili with your favorite toppings!
Pickled Herring: A Cultural Divide
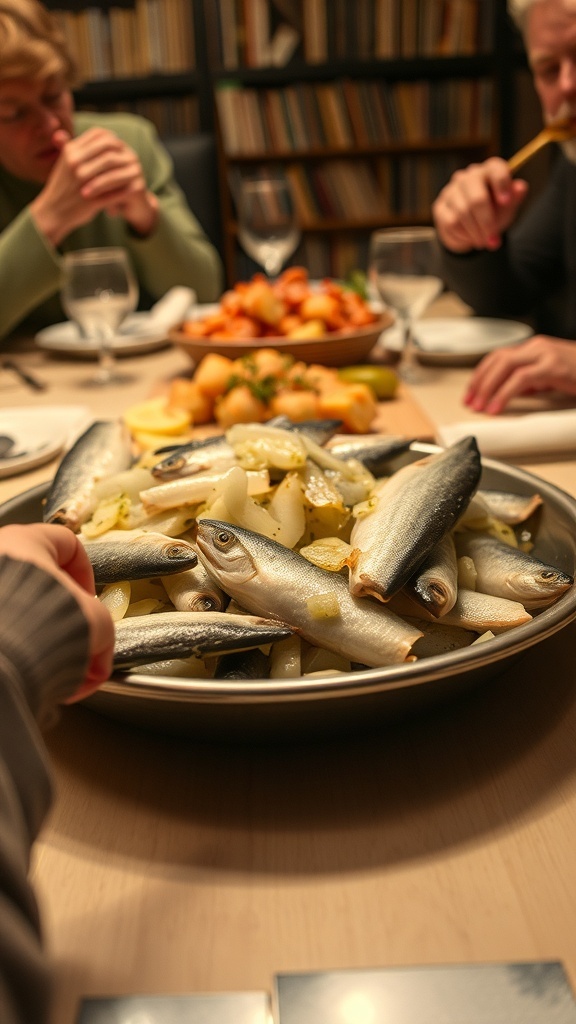
Pickled herring is a dish that often sparks strong opinions. For many, it’s a beloved staple, especially in Scandinavian and Eastern European cultures. However, for others, the thought of eating fish preserved in vinegar can be off-putting. This divide highlights how food preferences can be deeply rooted in cultural backgrounds.
In the image, we see a group of people gathered around a table, sharing a meal that prominently features pickled herring. The fish is arranged beautifully, surrounded by other dishes. While some diners seem eager to dig in, others may be hesitant. This scene captures the essence of how food can bring people together, yet also reveal differing tastes.
For those unfamiliar with pickled herring, it’s typically made by marinating fresh herring fillets in a mixture of vinegar, onions, and spices. The result is a tangy, flavorful dish that can be served on its own or as part of a larger spread. It’s often enjoyed with rye bread or potatoes, making it a hearty option.
Whether you love it or hate it, pickled herring is a dish that certainly makes a statement. It’s a reminder of how food can reflect our identities and traditions. If you’re feeling adventurous, why not give it a try? You might just find a new favorite!
Ingredients
- 4 herring fillets
- 1 cup white vinegar
- 1/2 cup water
- 1/2 cup sugar
- 1 onion, thinly sliced
- 1 teaspoon mustard seeds
- 1 teaspoon black peppercorns
- 1 bay leaf
- Salt to taste
Instructions
- Prepare the Marinade: In a saucepan, combine vinegar, water, sugar, mustard seeds, peppercorns, and bay leaf. Bring to a boil, then let it cool.
- Layer the Herring: Place the herring fillets in a glass jar. Add the sliced onion on top.
- Add the Marinade: Pour the cooled marinade over the herring and onion, ensuring everything is submerged.
- Refrigerate: Seal the jar and refrigerate for at least 24 hours to allow the flavors to meld.
- Serve: Enjoy the pickled herring with rye bread, potatoes, or on its own as a flavorful snack.
Okra: Slimy or Savory?
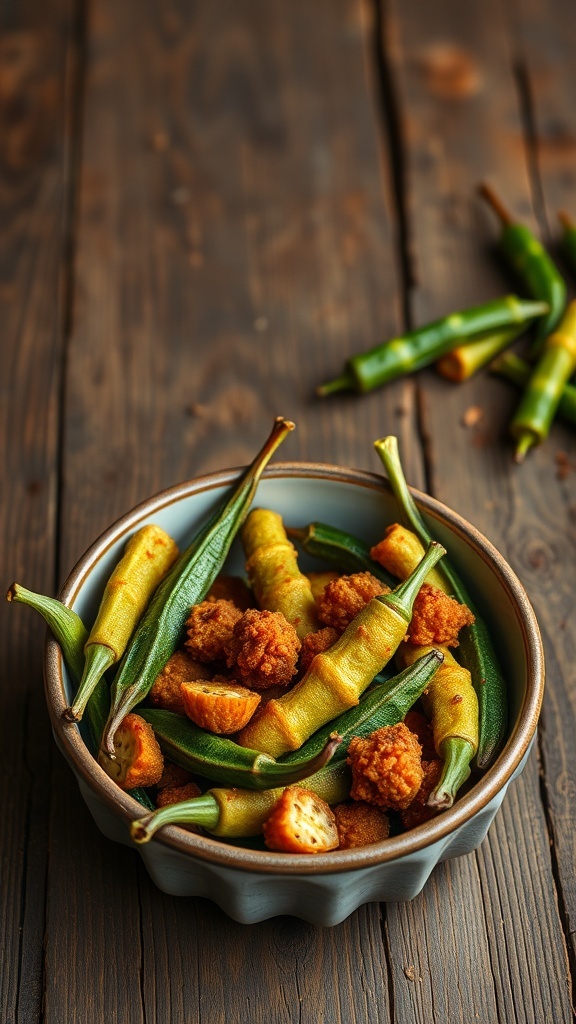
Okra is one of those foods that sparks strong opinions. Some people love its unique texture, while others can’t stand the sliminess. This green vegetable often shows up in Southern cooking, particularly in gumbo and fried dishes. The image captures a bowl of crispy fried okra, a popular way to prepare it. The golden-brown pieces contrast with the vibrant green of the okra, making it look tempting for those who enjoy it.
Fried okra is often seasoned with spices and served as a side dish or snack. For many, it’s a comfort food that brings back memories of family gatherings and home-cooked meals. Yet, for others, the slimy texture of okra when cooked in stews or boiled can be a deal-breaker. It’s a classic example of how comfort foods can be divisive.
Ingredients
- 1 pound fresh okra, sliced
- 1 cup buttermilk
- 1 cup cornmeal
- 1 teaspoon salt
- 1/2 teaspoon black pepper
- Vegetable oil for frying
Instructions
- Prepare the Okra: Rinse the okra and slice it into 1/2-inch pieces. Place the sliced okra in a bowl and cover it with buttermilk. Let it soak for about 30 minutes.
- Mix the Coating: In another bowl, combine the cornmeal, salt, and black pepper.
- Coat the Okra: Remove the okra from the buttermilk, letting the excess drip off. Dredge the pieces in the cornmeal mixture until well coated.
- Heat the Oil: In a deep skillet, heat about 1 inch of vegetable oil over medium-high heat until hot.
- Fry the Okra: Carefully add the coated okra to the hot oil in batches. Fry for about 3-4 minutes or until golden brown. Remove with a slotted spoon and drain on paper towels.
- Serve: Enjoy your crispy fried okra as a snack or side dish!


