
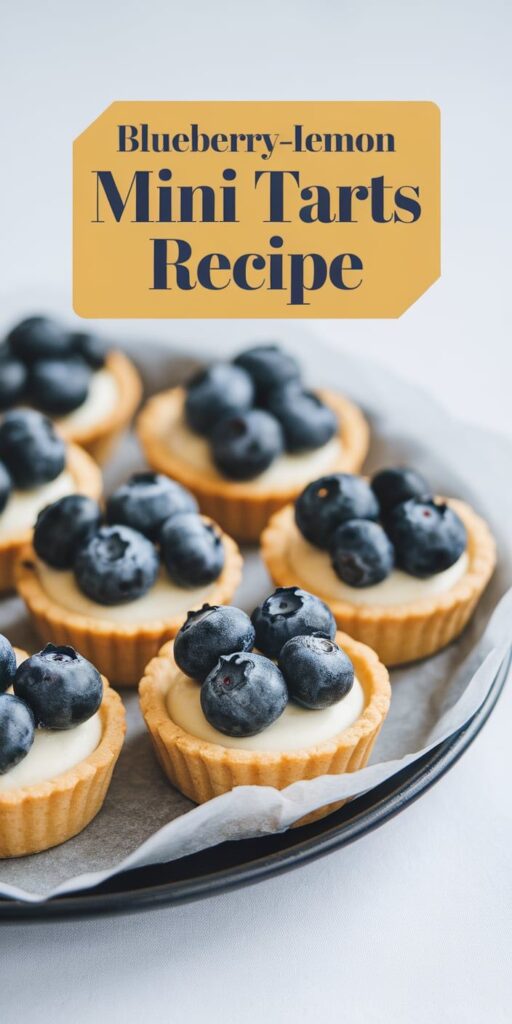
Craving a sweet and tangy dessert that’ll impress your guests? My blueberry-lemon mini tarts are the perfect solution! These homemade mini tarts combine the bright zestiness of fresh lemons with the sweet burst of ripe blueberries, all nestled in a delicate, buttery pastry shell.
Imagine biting into a miniature dessert that delivers an explosion of flavor in every single bite. These blueberry-lemon mini tarts are not just a treat for your taste buds but a visual delight that will make any gathering special. Whether you’re hosting a summer brunch or looking for a sophisticated dessert, these little gems are sure to steal the show.
The beauty of this recipe lies in its simplicity. With just a few quality ingredients and some basic baking skills, you can create a dessert that looks like it came straight from a professional bakery. I’ll walk you through each step to ensure your homemade mini tarts turn out perfectly every single time.
Why These Mini Tarts Will Become Your New Favorite Dessert
As a passionate home baker, I’ve discovered a truly remarkable favorite dessert recipe that will transform your approach to sweet treats. These Blueberry-Lemon Mini Tarts are more than just a dessert – they’re a culinary experience that captures the heart of home baking.
The Perfect Sweet and Tart Balance
The magic of these mini tarts lies in their incredible sweet and tart balance. Fresh blueberries bring a natural sweetness that perfectly complements the bright, zesty lemon filling. This harmonious flavor combination creates a taste sensation that appeals to both fruit lovers and dessert enthusiasts.
- Bursting with fresh blueberry flavor
- Tangy lemon undertones
- Delicate buttery crust
- Visually stunning presentation
Ideal for Special Occasion Dessert
Planning a gathering or celebration? These mini tarts are the ultimate special occasion dessert. Their elegant appearance and individual serving size make them perfect for everything from bridal showers to summer dinner parties. Guests will be impressed by both their looks and incredible taste.
| Occasion | Perfect Fit |
|---|---|
| Bridal Shower | Elegant and delicate |
| Summer Dinner Party | Light and refreshing |
| Family Gathering | Easy to serve and share |
Make-Ahead Dessert Convenience
Busy home cooks will love that these are a make-ahead dessert. You can prepare the crust and filling in advance, giving you more time to enjoy your guests. The components can be stored separately and assembled just before serving, ensuring maximum freshness and minimal stress.
Essential Ingredients for Blueberry-Lemon Mini Tarts Recipe
Creating delicious mini tart ingredients requires careful selection of high-quality components. I’ll walk you through the precise ingredients needed to craft these delightful blueberry tart ingredients that will impress your guests.
For the perfect tart crust, you’ll need the following pantry staples:
- 1½ cups all-purpose flour
- ½ cup unsalted butter (cold and cubed)
- ¼ cup powdered sugar
- 1 large egg yolk
- Pinch of salt
The lemon tart filling requires fresh ingredients to create a vibrant, tangy flavor:
- 3 large eggs
- ½ cup fresh lemon juice
- ½ cup granulated sugar
- Zest of 2 lemons
- ½ cup heavy cream
For the blueberry topping, I recommend using fresh, ripe berries:
- 2 cups fresh blueberries
- 2 tablespoons granulated sugar
- 1 teaspoon cornstarch
- 1 tablespoon lemon juice
Pro tip: Always use room temperature ingredients for the best texture and flavor in your mini tarts. Fresh lemon juice and high-quality butter make a significant difference in the final result.
Kitchen Tools and Equipment You’ll Need
Preparing delicious blueberry-lemon mini tarts requires the right mini tart baking tools and baking equipment. I’ll walk you through the essential items you’ll need to create these delightful desserts with ease and precision.
Essential Baking Equipment for Success
Having the right kitchen tools can make all the difference in your baking adventure. Here are the must-have items for crafting perfect mini tart pans:
- Mixing bowls in various sizes
- Measuring cups and spoons
- Whisk and rubber spatula
- Rolling pin
- Sharp knife or pastry cutter
Specialized Mini Tart Pan Details
Selecting the right mini tart pans is crucial for creating beautiful, professional-looking desserts. I recommend investing in high-quality equipment that ensures even baking and easy removal.
| Pan Type | Size | Material | Best For |
|---|---|---|---|
| Removable Bottom Tart Pan | 2-3 inches diameter | Aluminum | Precise edges and easy release |
| Non-Stick Tart Pan | 1.5-2 inches diameter | Steel with non-stick coating | Smaller individual servings |
Optional Helpful Baking Tools
While not essential, these additional tools can elevate your mini tart baking experience:
- Food processor for quick crust preparation
- Citrus zester
- Pastry brush
- Kitchen scale for precise measurements
Making the Perfect Buttery Tart Crust
Creating a homemade tart shell is an art form that can elevate your mini tart recipe from good to extraordinary. My buttery tart crust recipe has been perfected through years of baking experience, and I’m excited to share my top mini tart crust tips with you.
The key to a perfect buttery tart crust lies in a few critical techniques. Cold ingredients are your secret weapon. I always recommend using ice-cold butter and chilling your dough before rolling it out. This helps create those delightful flaky layers that make a tart crust truly special.
- Use unsalted butter straight from the refrigerator
- Measure ingredients precisely
- Work quickly to keep butter cold
- Chill dough for at least 1 hour before rolling
When preparing your homemade tart shell, technique matters as much as ingredients. Cut the cold butter into small cubes and work it into the flour using your fingertips or a pastry cutter. The goal is to create pea-sized butter crumbles that will transform into those magical flaky layers.
For mini tart crusts, I suggest using a specialized mini tart pan to ensure uniform shape and even baking. Gently press the dough into the pan, trimming excess edges for a clean, professional look. Blind baking is crucial – use pie weights or dried beans to prevent the crust from puffing up during initial baking.
Pro tip: If your dough seems too crumbly, add ice water one teaspoon at a time. The perfect consistency should hold together when pressed but not feel wet or sticky.
Creating the Creamy Lemon Filling
Crafting the perfect creamy lemon filling is an art that transforms ordinary desserts into extraordinary culinary experiences. My homemade lemon curd recipe will elevate your blueberry-lemon mini tarts to a whole new level of deliciousness.
The secret to an exceptional creamy lemon filling lies in carefully selected ingredients and precise technique. Let me walk you through the essential lemon tart filling tips that will guarantee a silky-smooth result every time.
Tips for the Perfect Lemon Curd
- Use fresh, high-quality lemons for maximum flavor
- Zest lemons before juicing to capture maximum citrus essence
- Strain the mixture to ensure a smooth, creamy consistency
- Cook over low heat to prevent curdling
Storage and Make-Ahead Options
| Storage Method | Duration | Recommended Conditions |
|---|---|---|
| Refrigerator | Up to 1 week | Sealed in an airtight container |
| Freezer | Up to 3 months | Frozen in a freezer-safe container |
Troubleshooting Common Issues
When preparing your homemade lemon curd, watch for these potential challenges. Grainy texture often results from overheating or insufficient whisking. To prevent this, use a low heat setting and whisk continuously. If the mixture starts to separate, remove from heat and whisk vigorously.
Pro tip: Always use a digital thermometer to monitor the temperature. The ideal range for a perfect creamy lemon filling is between 170-175°F. This ensures a smooth, spreadable consistency without scrambling the eggs.
Fresh Blueberry Topping Preparation
Creating the perfect fresh blueberry topping can transform your mini tarts from ordinary to extraordinary. I’ll walk you through selecting the best blueberries and crafting a stunning blueberry tart topping that will make your dessert truly memorable.
When preparing your blueberry glaze recipe, start by choosing the ripest, most vibrant blueberries. Look for berries that are deep blue with a slight silvery sheen, indicating peak freshness. I recommend using fresh blueberries when possible, but high-quality frozen berries can work beautifully in a pinch.
- Select plump, firm blueberries with rich color
- Gently wash and pat berries dry before use
- Remove any stems or damaged berries
To create a glossy blueberry topping, I use a simple technique that elevates the natural sweetness of the fruit. Here’s my go-to method for a professional-looking fresh blueberry topping:
- Combine 1 cup of blueberries with 2 tablespoons of sugar
- Cook over medium heat until berries release their juices
- Strain the mixture to create a clear, shiny glaze
- Cool slightly before drizzling over tarts
Pro tip: Arrange your blueberries in a beautiful pattern on top of the lemon filling. I like to create a circular design or a gentle cascade that shows off the berries’ natural beauty. The key is to be gentle and intentional with your placement.
Your blueberry tart topping should be a delightful balance of sweet and tangy, complementing the creamy lemon filling beneath. With these simple steps, you’ll create a stunning dessert that looks as incredible as it tastes.
Storage Tips and Serving Suggestions
When it comes to mini tart storage, I’ve learned a few tricks to keep these delicate desserts fresh and delicious. Store your blueberry-lemon mini tarts in an airtight container in the refrigerator for up to 3-4 days. I recommend placing a sheet of parchment paper between layers to prevent sticking and maintain their pristine appearance.
For serving mini tarts, presentation is key. I love to arrange these bite-sized treats on a beautiful ceramic platter, garnishing with fresh mint leaves or a light dusting of powdered sugar. Dessert presentation ideas can elevate these mini tarts from simple treats to show-stopping desserts. If you’re hosting a dinner party, consider serving them slightly chilled with a small dollop of whipped cream.
Freezing is an excellent option for longer-term storage. Wrap each mini tart individually in plastic wrap, then place them in a freezer-safe container. They’ll keep well for up to one month. When you’re ready to serve, thaw the tarts in the refrigerator overnight and bring them to room temperature about 30 minutes before serving to restore their perfect texture.
Pro tip: If you’re transporting these delicate desserts, use a cupcake carrier or a sturdy container with dividers to prevent them from getting damaged. The blueberry-lemon mini tarts are delicate but with a bit of care, they’ll arrive looking as beautiful as when they were first made.


