
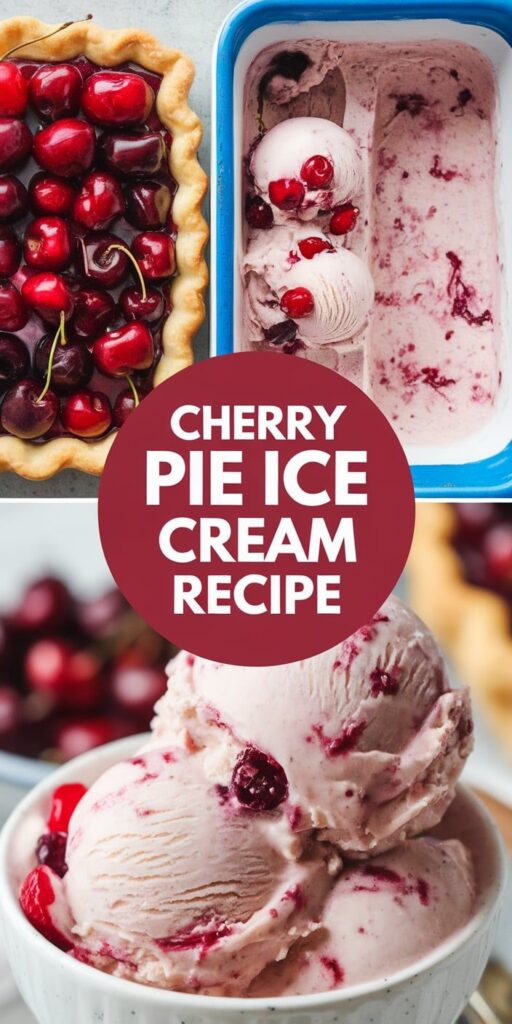
Summer calls for something special, and this homemade ice cream recipe transforms the classic cherry pie dessert into a cool, creamy indulgence. I’ve crafted a delightful summer treat that combines the rich flavors of traditional cherry pie with the smooth texture of artisan ice cream.
Imagine scooping into a bowl of velvety ice cream packed with bursts of tart cherries and buttery pie crust pieces. This isn’t just any dessert – it’s a nostalgic journey that brings together two beloved classics in one unforgettable dish.
My recipe promises to elevate your summer dessert game with a unique twist on traditional ice cream. Whether you’re hosting a backyard barbecue or craving a sweet afternoon pick-me-up, this cherry pie ice cream will become your new go-to indulgence.
Get ready to dive into a recipe that’s simple to make but impressive in every single bite. Let’s transform your kitchen into a gourmet dessert workshop!
Why This Cherry Pie Ice Cream Will Become Your New Favorite Dessert
I’ve discovered the ultimate summer treat that combines the best of two worlds: a creamy cherry dessert that captures the essence of classic pie in every delightful bite. Pie-inspired desserts rarely hit the mark, but this cherry pie ice cream is about to change everything you know about frozen treats.
Imagine a dessert that transports you back to childhood summers, where the flavors of fresh cherry pie dance with smooth, rich ice cream. The best cherry ice cream isn’t just about taste—it’s about creating an experience that awakens all your senses.
The Perfect Blend of Tart and Sweet
What makes this recipe extraordinary is its remarkable balance. The tart cherries cut through the sweetness, creating a complex flavor profile that keeps you coming back for more. It’s not just an ice cream—it’s a culinary journey.
- Bursting with fresh cherry flavor
- Creamy texture that melts perfectly
- Nostalgic pie-inspired taste
Classic Cherry Pie Meets Creamy Ice Cream
I’ve carefully crafted a recipe that seamlessly blends the comfort of traditional cherry pie with the refreshing coolness of homemade ice cream. Each spoonful brings together crisp pie crust notes and luscious cherry filling, transformed into a frozen delight that’s sure to become your new summer obsession.
Get ready to experience a dessert that’s not just delicious, but a true celebration of flavor and texture.
Essential Ingredients for Cherry Pie Ice Cream Recipe
Creating the perfect cherry ice cream ingredients requires careful selection and preparation. I’ll walk you through the key components that will transform your homemade dessert from ordinary to extraordinary.
Fresh vs Frozen Cherry Selection
When choosing cherries for your ice cream, you have two primary options:
- Fresh cherries: Peak summer flavor, ideal when in season
- Frozen cherries: Convenient year-round, consistent taste
I recommend using sweet dark cherries like Bing or Rainier for the most robust flavor in your cherry ice cream ingredients.
Crafting the Perfect Homemade Pie Crust
For an authentic pie crust experience, you’ll need these core ingredients:
- All-purpose flour (2½ cups)
- Unsalted butter (1 cup, cold and cubed)
- Ice water (¼-½ cup)
- Pinch of salt
Ice Cream Base Recipe Essentials
The foundation of any great ice cream base recipe requires high-quality dairy and sweeteners:
- Heavy cream (2 cups)
- Whole milk (1 cup)
- Granulated sugar (¾ cup)
- Egg yolks (4-5 large)
- Vanilla extract (1 teaspoon)
Selecting premium ingredients ensures your homemade pie crust and ice cream base recipe will result in a truly spectacular dessert that captures the essence of classic cherry pie.
Kitchen Tools and Equipment You’ll Need
Creating the perfect cherry pie ice cream requires some specialized baking tools and kitchen equipment. I’ll walk you through the essential items that will help you craft this delightful dessert with ease.
Core Kitchen Equipment for Ice Cream Making
The most critical piece of equipment is an ice cream maker. This machine transforms your liquid base into a smooth, creamy treat. While traditional models require ice and salt, modern ice cream makers are much simpler to use.
- Ice cream maker (electric or manual)
- Cherry pitter (for fresh cherries)
- Large mixing bowls
- Heavy-bottomed saucepan
- Baking sheet
- Whisk
- Measuring cups and spoons
Optional but Helpful Tools
If you don’t have a cherry pitter, don’t worry! A sharp paring knife can work just as well for removing cherry pits. For those without an ice cream maker, you can still create a delicious no-churn version using your freezer and some patience.
| Tool | Primary Function | Alternative Options |
|---|---|---|
| Ice Cream Maker | Churning ice cream base | Freezer method, stand mixer |
| Cherry Pitter | Removing cherry pits | Paring knife, paperclip method |
| Baking Sheet | Preparing pie crust | Rimmed cookie sheet |
With these baking tools in your kitchen, you’ll be well-prepared to create a delicious cherry pie ice cream that will impress family and friends. The right equipment makes all the difference in achieving that perfect creamy texture and delightful flavor.
Step-by-Step Mixing and Churning Process
Creating the perfect homemade ice cream process requires precision and care. I’ll walk you through the essential steps to transform simple ingredients into a delectable cherry pie ice cream that will impress your family and friends.
Preparing the Cherry Filling
The cherry filling recipe is the heart of this dessert. Start by selecting fresh or frozen cherries and follow these key steps:
- Pit and chop 2 cups of ripe cherries
- Combine cherries with 1/4 cup sugar in a saucepan
- Cook over medium heat for 10-12 minutes until slightly thickened
- Remove from heat and let cool completely
Creating the Perfect Ice Cream Base
My ice cream churning tips begin with crafting a rich, creamy base. You’ll need:
- 2 cups heavy cream
- 1 cup whole milk
- 3/4 cup granulated sugar
- 4 egg yolks
- 1 teaspoon vanilla extract
Whisk egg yolks with sugar until pale. Slowly temper the mixture by adding warm cream, stirring constantly to prevent scrambling. Strain the base and chill thoroughly before churning.
Incorporating Pie Crust Pieces
The final touch involves adding crispy pie crust pieces. Bake pie crust scraps at 375°F for 10-12 minutes until golden brown. Cool completely, then break into small chunks. During the last few minutes of churning, fold in the crust pieces for perfect distribution.
Storage Tips and Serving Suggestions
Proper ice cream storage is crucial for maintaining the delightful texture and flavor of your homemade Cherry Pie Ice Cream. I recommend using an airtight container with a tight-fitting lid to prevent freezer burn and preserve the creamy consistency. Glass or high-quality plastic containers work best for keeping your frozen treat fresh.
When it comes to homemade ice cream serving, I love getting creative with presentation. Try serving your cherry dessert pairings alongside a warm slice of vanilla pound cake or as a decadent topping for fresh fruit crisp. For an extra special touch, sprinkle some crushed pie crust pieces on top to add a delightful crunch.
To prevent ice crystal formation, store your ice cream at the back of the freezer where temperature remains most consistent. Keep the freezer temperature around 0°F (-18°C) for optimal preservation. I suggest consuming your homemade Cherry Pie Ice Cream within two weeks for the best flavor and texture.
For a stunning dessert experience, consider creating an elegant sundae with additional cherry sauce, a dollop of whipped cream, and a sprinkle of toasted almonds. This versatile treat pairs wonderfully with complementary flavors like bourbon vanilla or almond extract, allowing you to experiment and create your own unique variations.


