
Summer calls for delightful homemade frozen treats, and my chocolate covered banana pops are the perfect solution for beating the heat. These simple yet irresistible summer dessert recipe creations transform ordinary bananas into a delectable frozen snack that both kids and adults will love.
My chocolate covered banana pops are incredibly easy to make, requiring just a few basic ingredients and minimal kitchen skills. With a rich chocolate coating and endless topping possibilities, these homemade frozen treats offer a refreshing and nutritious dessert option that’s sure to become a family favorite.
Whether you’re looking for a quick afternoon snack or a fun cooking activity with children, these chocolate covered banana pops deliver incredible flavor and enjoyment. The best part? You can customize them with various toppings and chocolate types to suit your taste preferences.
In this recipe, I’ll walk you through the simple steps to create these delicious frozen treats, sharing tips and tricks to ensure your chocolate covered banana pops turn out perfectly every time. Get ready to transform a simple banana into a gourmet dessert that will impress everyone!
Why You’ll Love These Homemade Frozen Banana Treats
Creating chocolate covered banana pops isn’t just about making a tasty dessert. These frozen treats offer a perfect blend of nutrition, fun, and affordability that makes them an ideal healthy dessert for families looking to enjoy a delicious snack.
My recipe transforms a simple banana into a nutritious and exciting treat that everyone will love. Let me share why these frozen delights are more than just an ordinary snack.
Health Benefits of Banana-Based Desserts
Bananas pack a powerful nutritional punch that makes them an excellent base for a healthy dessert. They provide essential nutrients like:
- Potassium for heart health
- Vitamin C for immune support
- Dietary fiber for digestion
- Natural sugars for energy
Kid-Friendly Kitchen Activity
This family-friendly recipe offers more than just a tasty treat. It’s an engaging kitchen activity that gets children involved in food preparation, teaching them basic cooking skills while creating memories.
Budget-Friendly Snack Option
When looking for affordable snacks, these banana pops are a game-changer. Compared to store-bought frozen treats, my homemade version saves money and provides complete control over ingredients.
| Snack Option | Cost per Serving | Nutritional Value |
|---|---|---|
| Store-Bought Frozen Treat | $1.50 | Limited nutrients |
| Homemade Banana Pops | $0.50 | High in vitamins |
By choosing this recipe, you’re not just making a snack – you’re creating a fun, nutritious, and economical treat that your entire family will enjoy.
Essential Ingredients for Chocolate Covered Banana Pops Recipe
Creating delicious chocolate covered banana pops starts with selecting the right ingredients. I’ll walk you through the key components that transform fresh fruit into a delightful dessert that everyone will love.
Fresh Fruit Base
- 4-5 ripe bananas (medium-sized)
- Wooden popsicle sticks
- Parchment paper for preparation
Chocolate Coating Options
The chocolate coating is crucial for making these banana pops irresistible. I recommend using high-quality chocolate that melts smoothly and creates a perfect shell.
| Chocolate Type | Best For | Quantity Needed |
|---|---|---|
| Dark Chocolate | Intense flavor, vegan option | 12 oz |
| Milk Chocolate | Sweet, classic taste | 12 oz |
| White Chocolate | Creamy, mild flavor | 12 oz |
Additional Ingredients
To make your fresh fruit dessert even more exciting, consider these optional ingredients for enhancing your banana pops:
- 2 tablespoons coconut oil (helps chocolate coating set)
- Optional toppings:
- Chopped nuts
- Shredded coconut
- Sprinkles
When selecting bananas for your pops, choose ones that are ripe but still firm. Overripe bananas will be too soft and difficult to work with in this recipe.
Pro tip: Always have all your banana pops ingredients measured and ready before starting. This makes the preparation process smooth and enjoyable.
Kitchen Tools and Equipment Needed
Creating delicious chocolate covered banana pops requires some essential kitchen utensils that make the process smooth and enjoyable. I’ll walk you through the must-have tools and some creative alternatives for making these frozen treats.
For your banana pop adventure, you’ll want to gather these key kitchen utensils:
- Baking sheet
- Parchment paper
- Popsicle sticks or wooden skewers
- Mixing bowls
- Spatula
- Measuring cups
Creative DIY Popsicle Molds
Not everyone has traditional popsicle molds, but don’t worry! You can easily create DIY popsicle molds using items you likely have at home. Wooden skewers work great as an alternative to standard popsicle sticks. Simply insert them into peeled banana halves and you’re ready to go.
Chocolate Melting Techniques
Mastering chocolate melting techniques is crucial for creating smooth, glossy banana pops. I recommend two primary methods for melting chocolate:
- Double Boiler Method
- Gentle, even heating
- Prevents chocolate from burning
- Ensures smooth consistency
- Microwave Method
- Quick and convenient
- Stir every 30 seconds
- Use low power setting
Pro tip: Always use a dry bowl when melting chocolate, as water can cause the chocolate to seize and become grainy. With these kitchen tools and techniques, you’ll be crafting professional-looking chocolate covered banana pops in no time!
Step-by-Step Preparation Guide
Creating delicious chocolate covered banana pops is easier than you might think! My banana pops tutorial will walk you through each stage of preparation, ensuring you craft the perfect frozen treat.
Let’s break down the chocolate dipping instructions into simple, manageable steps:
- Select perfectly ripe bananas with minimal brown spots
- Cut bananas in half for ideal serving sizes
- Insert wooden popsicle sticks carefully into banana centers
- Prepare a freezing technique by placing bananas on a parchment-lined baking sheet
- Freeze bananas for 2-3 hours until completely solid
Melting chocolate requires precision. I recommend using a double boiler or microwave method for smooth, glossy results. When dipping frozen bananas, work quickly to prevent melting.
| Preparation Stage | Time Required | Key Tip |
|---|---|---|
| Banana Preparation | 10 minutes | Choose firm, ripe bananas |
| Freezing | 2-3 hours | Ensure complete freezing |
| Chocolate Dipping | 15 minutes | Work swiftly to prevent melting |
Pro tip for freezing techniques: Wrap individual banana pops in wax paper after dipping to prevent freezer burn and maintain their delightful texture.
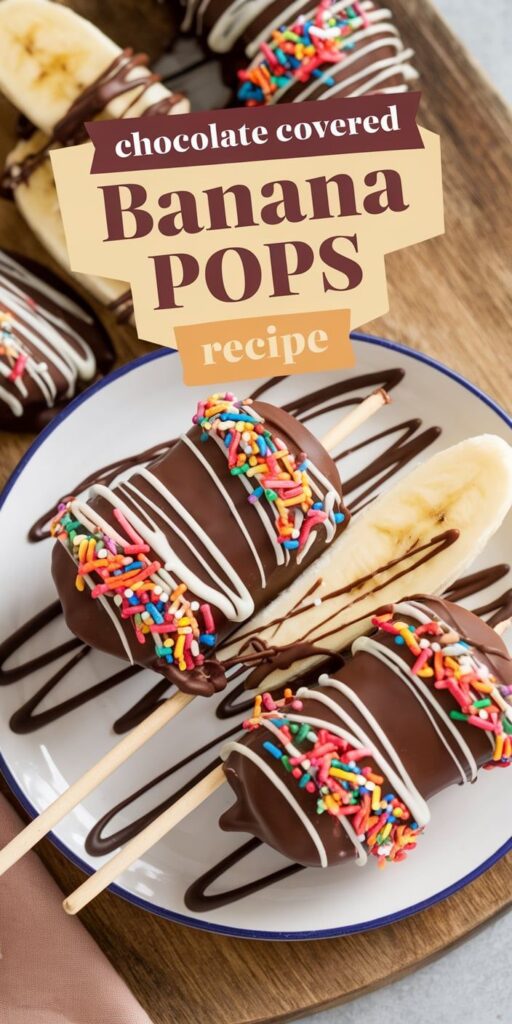
Delicious Topping Variations and Combinations
Creating gourmet frozen treats is all about unleashing your creativity with banana pops toppings. These customizable desserts offer endless possibilities to transform a simple frozen banana into a spectacular treat that delights both kids and adults.
Nutty Crunch Toppings
Nuts can elevate your banana pops with rich textures and flavors. My favorite nut-based toppings include:
- Finely chopped roasted almonds
- Crushed pistachios with sea salt
- Ground peanuts mixed with cinnamon
- Toasted hazelnuts for a decadent touch
Sweet and Crunchy Add-Ons
Amp up the excitement with these irresistible banana pops toppings that provide amazing crunch and sweetness:
- Rainbow sprinkles
- Crushed graham crackers
- Shredded coconut
- Crushed chocolate sandwich cookies
Specialty Garnishes
For those seeking unique customizable desserts, try these unexpected yet delightful toppings:
- Edible flower petals
- Dried raspberry crumbles
- Lavender-infused sea salt
- Candied ginger pieces
Experimenting with these gourmet frozen treats allows you to create personalized desserts that reflect your taste and imagination. Remember, the best banana pops are the ones that make you smile!
Storage Tips and Make-Ahead Instructions
When it comes to frozen dessert storage, my Chocolate Covered Banana Pops are incredibly versatile. I recommend storing them in an airtight container with parchment paper between each layer to prevent sticking. These long-lasting treats can stay fresh in the freezer for up to three weeks when properly wrapped.
Batch cooking these delightful treats is a game-changer for busy families. I suggest preparing multiple batches at once, which saves time and provides a quick dessert option. Wrap each pop individually in plastic wrap before placing them in a freezer-safe container to maintain their chocolate coating and prevent freezer burn.
For the best taste and texture, remove the banana pops from the freezer about 2-3 minutes before serving. This brief thawing period allows the chocolate to soften slightly while keeping the banana’s frozen core intact. If you’re planning a party or gathering, these make-ahead treats are perfect for preparing in advance and impressing your guests with minimal last-minute effort.
Pro tip: Label your container with the preparation date to keep track of freshness. Your homemade Chocolate Covered Banana Pops will remain a delicious, refreshing treat that’s always ready when you need a quick and sweet snack.


