
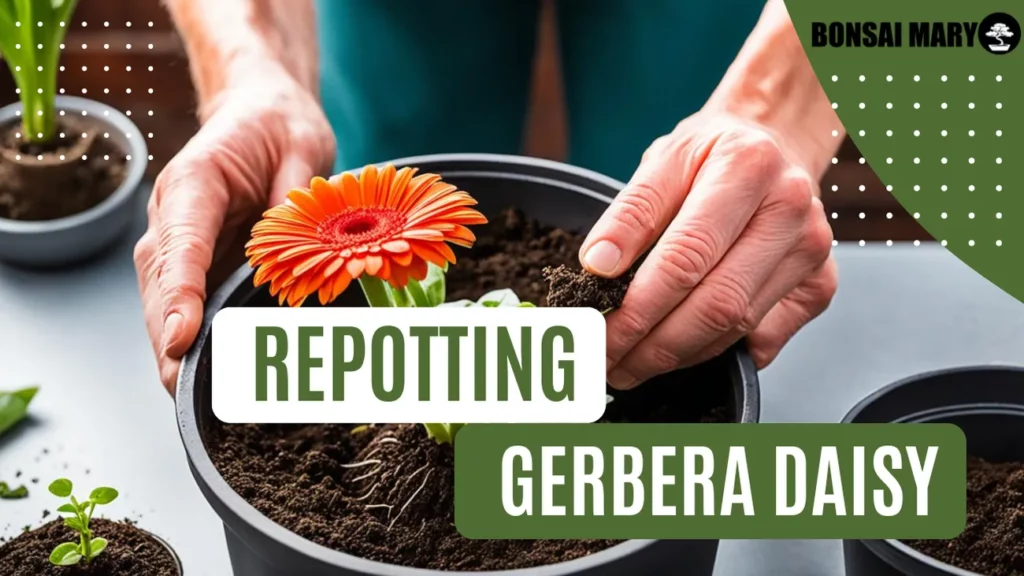
To repot a Gerbera Daisy for healthy blooms, carefully remove the plant from its current container, gently loosen the roots, place it in a new pot with fresh, well-draining soil, ensuring the crown is slightly above the soil surface, and water it thoroughly.
This guide simplifies the repotting process for Gerbera Daisies, a necessary step for their vibrant health and bloom. It covers choosing the correct pot and soil, preparing for repotting, and post-repotting care, offering a straightforward approach for both new and experienced gardeners to ensure these colorful plants thrive in their environment.
Why Repotting Gerbera Daisies is Important

Before we delve into the repotting process, let’s understand why repotting Gerbera Daisies is crucial for their overall health and growth.
Repotting allows the plants to establish a strong root system, providing them with the necessary support for optimal growth and development.
When Gerbera Daisies are grown in the same pot for an extended period, their roots can become cramped and restricted, affecting their ability to absorb nutrients and water effectively. By repotting, you give them ample space to spread their roots and flourish.
Moreover, repotting provides fresh nutrients to the plants. Over time, the potting mix may become depleted of essential nutrients, impeding the daisies’ growth and flowering potential.
Repotting gives you the opportunity to replenish the soil with nutrient-rich compost or fertilizer, ensuring that your Gerbera Daisies have access to the nutrients they need for vibrant blooms.
Better drainage is another benefit of repotting Gerbera Daisies. Overwatering can lead to root rot and other diseases, causing harm to your beloved daisies.
By repotting, you can improve the drainage capacity of the soil, preventing excess water from saturating the roots and promoting healthier plant growth.
Lastly, repotting helps prevent overcrowding. Gerbera Daisies are known for their prolific spreading nature, and if left unchecked, they can overcrowd the pot, leading to stunted growth and poor flowering.
By repotting regularly, you can divide and transplant the daisies, giving each plant adequate space to thrive and showcase its full potential.
When to Repot Gerbera Daisies

Timing is crucial when it comes to repotting Gerbera Daisies. Knowing when to repot your daisies is essential for their overall health and successful growth. Here are some signs to look for that indicate it’s time to repot your Gerbera Daisies:
- The plant has become rootbound: When you notice roots circling the inside of the pot or growing out of drainage holes, it’s a clear indication that your Gerbera Daisy needs more space to grow.
- Poor drainage and waterlogging: If your daisy’s current pot doesn’t provide adequate drainage, the soil may become waterlogged, leading to root rot and other issues. Repotting into a pot with better drainage will help prevent this problem.
- Stunted growth and lack of blooms: If your Gerbera Daisy has stopped growing, the leaves are turning yellow, or it’s not producing as many blooms as before, it may be time to repot and rejuvenate the plant with fresh nutrients.
- Seasonal changes: Gerbera Daisies typically experience a growth spurt during the spring and summer months. If you notice your daisy has outgrown its current pot during this period, it’s a good time to repot and provide it with a larger container for continued growth.
Choosing the Right Pot and Soil

When it comes to repotting your Gerbera Daisies, selecting the right pot and soil is crucial for their overall well-being and growth. The choice of pot size, material, drainage features, and soil mix can greatly impact the success of your daisies.
Let’s dive into some tips to help you make the best choices.
Choosing the Right Pot Size
The size of the pot plays a significant role in the health and development of your Gerbera Daisies. As a general rule of thumb, choose a pot that’s one size larger than their current pot.
This will allow their roots to spread and grow comfortably, promoting healthy growth and preventing root-bound issues.
Selecting the Ideal Pot Material
When it comes to pot materials, options like terracotta, ceramic, plastic, and fabric pots are available. Each material has its pros and cons. Terracotta pots provide excellent drainage but can dry out quickly.
Ceramic pots retain moisture well, but drainage may be an issue if not properly designed. Plastic pots are lightweight and retain moisture, while fabric pots improve root health through air pruning.
Optimizing Drainage Features
Adequate drainage is crucial for the health of your Gerbera Daisies. Look for pots with drainage holes at the bottom to prevent waterlogged soil, which can lead to root rot.
You can also add a layer of pebbles or broken pottery shards at the bottom of the pot to enhance drainage. This allows excess water to escape freely, preventing waterlogged soil conditions.
Selecting the Ideal Soil Mix
Gerbera Daisies prefer well-draining soil that retains some moisture while allowing excess water to flow through. A suitable soil mix consists of a combination of peat moss or coconut coir, perlite or sand, and a quality potting mix.
This blend provides good aeration and prevents the soil from becoming compacted, allowing the roots to access nutrients and water effectively.
Preparing for Repotting

Before you embark on the repotting process for your Gerbera Daisies, it’s essential to make the necessary preparations. By following these steps, you can ensure that the repotting process goes smoothly, providing your daisies with the best chance of thriving in their new pot.
- Gather the required tools: Prepare all the tools you’ll need for repotting, including a clean pair of pruning shears, gloves, a small trowel, and a watering can or a spray bottle.
- Prepare the new pot: Choose a pot that is slightly larger than the current one to allow for root growth. Ensure the pot has drainage holes at the bottom to prevent waterlogged soil. Fill the pot with fresh, well-draining potting mix formulated for Gerbera Daisies.
- Take care of your daisies: In the days leading up to the repotting process, provide optimal care for your Gerbera Daisies. Ensure they receive adequate sunlight, water them as needed, and fertilize them according to the recommended feeding schedule. This will help keep the plants healthy and reduce any stress they may experience during repotting.
How to Repot Gerbera Daisies – Step-by-Step Guide

Now it’s time to get your hands dirty! In this section, I’ll provide a detailed, step-by-step guide on how to repot your Gerbera Daisies. Follow these instructions to ensure a successful repotting process without causing harm to your plants.
- Choose the right time: Start repotting your Gerbera Daisies during the early spring when they are actively growing. This will minimize stress and help them establish quickly in the new pot.
- Gather the necessary tools: Before you begin, make sure you have the following tools handy: garden gloves, pruners, a trowel, and a suitable pot for repotting.
- Prepare the new pot: Select a pot that is slightly larger than the current one, with drainage holes at the bottom. Fill it with a well-draining potting mix specifically designed for Gerbera Daisies.
- Water the daisies: Thoroughly water your Gerbera Daisies a day or two before repotting to ensure they are well-hydrated.
- Remove the daisies from the current pot: Gently tip the pot upside down while supporting the base of the plant. Tap the sides of the pot to loosen the root ball, then carefully lift the daisies out of the pot.
- Inspect the roots: Once the daisies are out of the pot, examine the roots. Trim any damaged or excessively long roots using clean pruners.
- Place the daisies in the new pot: Position the daisies in the center of the new pot, making sure they are at the same depth as they were in the previous pot. Backfill the pot with the potting mix, gently pressing it around the roots to remove any air pockets.
- Water and settle: After repotting, thoroughly water the daisies and allow any excess water to drain from the pot. Place the pot in a bright location with indirect sunlight.
- Care after repotting: During the initial weeks after repotting, monitor the moisture levels in the soil and water the daisies when the top inch of soil feels dry. Avoid overwatering.
Caring for Repotted Gerbera Daisies
After successfully repotting your Gerbera Daisies, it’s important to provide them with the care and maintenance they need to thrive. Here are the essential aspects to consider:
Watering
Proper watering is crucial for the health of your repotted Gerbera Daisies. These plants prefer consistently moist but well-drained soil. It’s best to water them when the top inch of soil feels dry to the touch.
Avoid overwatering, as it can lead to root rot. Make sure water doesn’t sit in the saucer or pot, as excess moisture can cause issues. As a rule of thumb, water deeply and allow the soil to dry slightly between waterings.
Fertilizing
Gerbera Daisies benefit from regular fertilization to promote healthy growth and abundant blooms. Use a balanced, water-soluble fertilizer specifically designed for flowering plants.
Follow the package instructions for the correct application rate and frequency. It’s advisable to fertilize every two to three weeks during the growing season, reducing frequency during winter dormancy.
Providing Adequate Sunlight
Gerbera Daisies thrive in bright, indirect light. Place them near a sunny window or a well-lit area where they can receive at least six hours of indirect sunlight per day. Avoid direct sunlight, as it can scorch the leaves.
If natural light is insufficient, consider supplementing with a grow light to ensure your daisies receive the necessary light energy for photosynthesis.
Monitoring for Potential Issues
Regular monitoring is essential to catch any potential issues early on and prevent them from affecting the health of your Gerbera Daisies. Keep an eye out for signs of pests such as aphids, spider mites, or whiteflies.
Inspect the foliage for any signs of disease, including yellowing, spotting, or wilting. If any issues are detected, take appropriate action promptly to mitigate the problem.
Common Mistakes to Avoid When Repotting Gerbera Daisies
Repotting Gerbera Daisies is an important step in their care routine, but it can also be a challenging task. To help you achieve the best results for your daisies, it’s essential to avoid common mistakes that can hinder their growth and health.
Here are some mistakes to steer clear of when repotting your Gerbera Daisies:
- Choosing the wrong pot size: Selecting a pot that is too small can restrict the root growth and limit nutrient uptake, while using a pot that is too large can lead to overwatering and root rot. Choose a pot that provides enough room for the roots to spread, but not excessively large.
- Using improper soil: Gerbera Daisies thrive in well-draining soil. Avoid using heavy or compacted soil, as it can lead to waterlogged roots and rot. Opt for a well-balanced potting mix that allows for adequate drainage.
- Not preparing the new pot: Before repotting, ensure that the new pot is clean and has proper drainage holes. This will prevent water accumulation and promote healthy root growth.
- Disturbing the root ball excessively: When removing the daisies from their old pot, be gentle and avoid tearing or damaging the root ball. Excessive disturbance can cause transplant shock and slow down the plant’s recovery.
- Improper watering after repotting: Overwatering or underwatering after repotting can stress the plants and impede their growth. Strike a balance by providing enough moisture to keep the soil slightly moist, but not soggy.
- Not acclimating the daisies to new conditions: If you’re moving the daisies to a new environment with different light or temperature levels, it’s important to acclimate them gradually. Sudden changes can shock the plants, affecting their health and growth.
Repotting Established Gerbera Daisy Clumps
If you have established clumps of Gerbera Daisies that are in need of repotting, don’t worry! I’m here to provide you with specific guidance on how to go about repotting these clumps.
These clumps might have multiple flower stalks and densely packed roots, but with the right techniques, you can ensure that each plant gets enough space to thrive.
To start, gently remove the clump from its current pot, being careful not to damage any of the flower stalks or roots. If the clump is too large to handle comfortably, you can use a clean knife or garden shears to carefully divide it into smaller sections.
Once you have separated the clumps, examine the roots and remove any overly crowded or damaged ones. This will help promote healthy growth and prevent any potential issues in the future.
Next, choose a new pot that is slightly larger than the clump’s size. Make sure the pot has drainage holes to prevent waterlogged soil. I recommend using a well-draining potting mix specifically formulated for Gerbera Daisies.
This will provide the right balance of moisture retention and airflow for optimal growth.
Gently place each clump in its own pot, ensuring that the roots are adequately covered with soil. Press the soil lightly around the base of the clump to stabilize it.
After repotting, give your Gerbera Daisies a thorough watering to settle the soil around the roots. Be careful not to overwater, as excessive moisture can lead to root rot.
Transplant Shock and Recovery
When it comes to repotting your Gerbera Daisies, you may encounter a common concern known as transplant shock. Transplant shock refers to the stress and temporary setback that plants experience after being uprooted and moved to a new container or growing location.
Transplant shock can occur due to the disruption of the plant’s root system during the repotting process. It can manifest as wilting, yellowing leaves, stunted growth, or even temporary leaf loss.
To minimize the impact of transplant shock on your Gerbera Daisies, it’s important to handle them with care during repotting. Be gentle when removing them from their old pot, taking care not to damage the roots.
After repotting, you can help your Gerbera Daisies recover by providing them with the following:
- Adequate watering: Ensure that the new potting mix is moist, but not waterlogged. Water the daisies appropriately and avoid overwatering, which can lead to root rot.
- Optimal light conditions: Place your repotted Gerbera Daisies in a location where they can receive bright, indirect sunlight. Avoid placing them in direct sunlight, as this can further stress the plants.
- Steady temperature and humidity: Maintain a consistent temperature and humidity level that is suitable for Gerbera Daisies, typically between 65-75°F (18-24°C) and 50-60% humidity.
Troubleshooting Common Repotting Issues
Despite your best efforts, sometimes issues may arise during or after the repotting process. Don’t worry! I’m here to help you troubleshoot common repotting issues for your Gerbera Daisies and get them back on track to vibrant, healthy growth.
1. Issue: Wilting
If you notice your Gerbera Daisies wilting after repotting, it could be due to transplant shock or improper watering. Ensure that you water your daisies properly, providing enough moisture but avoiding overwatering.
Place the pot in a location with appropriate sunlight and maintain consistent watering until the plants recover.
2. Issue: Root Rot
Root rot can occur when the soil retains excessive moisture, leading to fungal infections. To prevent root rot, make sure your pot has proper drainage to allow excess water to escape.
Also, avoid overwatering and use a well-draining soil mix specifically formulated for Gerbera Daisies.
3. Issue: Nutrient Deficiencies
If your Gerbera Daisies exhibit signs of nutrient deficiencies, such as pale or yellowing leaves, it could indicate a lack of essential nutrients. Consider fertilizing your daisies with a balanced fertilizer formulated for flowering plants.
Follow the manufacturer’s instructions on application rates and frequency to provide the necessary nutrients for healthy growth.
Frequently Asked Questions
As a Gerbera Daisy enthusiast, you may have some burning questions about repotting. Don’t worry, I’ve got you covered! Here are answers to some frequently asked questions that will help you navigate the repotting process:
1. How often should I repot my Gerbera Daisies?
Gerbera Daisies typically need to be repotted every one to two years, especially when their roots become overcrowded. However, it’s essential to assess your individual plant’s needs and consider factors such as growth rate and pot size. If you notice stunted growth or lackluster blooms, it may be time to repot.
2. Can I repot Gerbera Daisies while they are flowering?
It’s generally best to avoid repotting Gerbera Daisies while they are in full bloom. The transition can be stressful for the plants, and it may affect their ability to produce vibrant flowers. Wait until the blooming period has ended and the plant is in a dormant or resting phase before repotting.
3. Should I prune my Gerbera Daisies before repotting?
It is not necessary to prune your Gerbera Daisies before repotting. However, if you notice any damaged or diseased leaves or stems, you can remove them to promote healthier growth. Avoid excessive pruning, as it may cause additional stress to the plant during the repotting process.
By following these tips and understanding the essentials of repotting Gerbera Daisies, you’ll be well-equipped to give your plants the care they need for thriving blooms. Happy repotting!


