
Looking for a quick and delicious way to boost your energy? My protein energy balls recipe is the perfect solution for anyone seeking healthy snacks that pack a nutritional punch. These no-bake snacks are incredibly simple to make and can transform your daily nutrition in just minutes.
As a fitness enthusiast, I’ve discovered that protein energy balls are the ultimate convenient treat. They’re not just tasty – they’re a powerhouse of nutrients designed to keep you fueled throughout the day. Whether you’re an athlete, busy professional, or health-conscious individual, these no-bake snacks will become your new go-to energy boost.
What makes these healthy snacks so special? They combine protein-rich ingredients with natural sweeteners and wholesome mix-ins. You’ll get a balanced blend of nutrients that support sustained energy and satisfy your hunger between meals. Best of all, my protein energy balls recipe requires no cooking and can be prepared in under 15 minutes.
In the upcoming sections, I’ll walk you through everything you need to know – from essential ingredients to preparation techniques that guarantee delicious results every single time.
Why Protein Energy Balls Are Your Perfect Healthy Snack
Discovering the power of homemade energy balls has transformed my approach to nutrition and snacking. These compact powerhouses are more than just a quick bite – they’re a game-changing solution for health-conscious individuals looking to fuel their body efficiently.
Homemade energy balls offer an incredible blend of taste and nutrition that store-bought snacks simply can’t match. They provide a convenient way to control exactly what goes into your body, ensuring every ingredient supports your wellness goals.
Benefits of Homemade Energy Balls
- Complete control over ingredient quality
- Cost-effective alternative to packaged snacks
- Customizable to personal dietary needs
- Quick and easy to prepare
Nutritional Value Overview
The nutritional benefits of these energy balls are remarkable. Packed with protein, healthy fats, and complex carbohydrates, they deliver a balanced nutritional profile that supports sustained energy and muscle recovery.
Perfect Pre and Post Workout Fuel
As a pre-workout snack, protein energy balls provide a quick energy boost without weighing you down. Their compact size and nutrient density make them ideal for consuming 30-60 minutes before exercise. After your workout, they help replenish energy stores and support muscle repair with their protein-rich composition.
Whether you’re an athlete, fitness enthusiast, or simply someone seeking a nutritious snack, homemade energy balls offer a versatile solution that meets multiple dietary and performance needs.
Essential Ingredients for Perfect Protein Energy Balls
Creating delicious protein energy balls starts with selecting the right protein ball ingredients that pack a nutritional punch. I’ll walk you through the key components that transform simple ingredients into nutrient-dense foods that fuel your body and satisfy your taste buds.
The foundation of great energy balls begins with high-quality base ingredients. Here are the essential healthy ingredients you’ll want to keep on hand:
- Rolled oats: Provides fiber and creates a perfect chewy texture
- Nut butter (almond or peanut): Adds protein and healthy fats
- Protein powder: Boosts protein content and helps bind ingredients
- Honey or maple syrup: Natural sweeteners that help hold everything together
- Chia or flax seeds: Adds omega-3 fatty acids and extra nutrition
I recommend mixing different protein ball ingredients to create unique flavor profiles. Some of my favorite add-ins include:
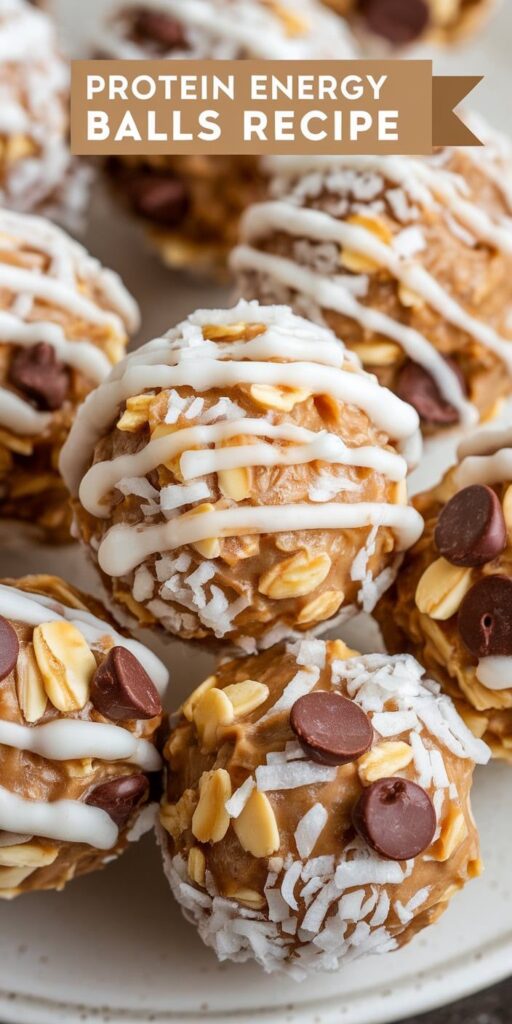
- Dark chocolate chips for antioxidants
- Shredded coconut for texture
- Dried fruits like cranberries or raisins
- Nuts for extra crunch
When selecting ingredients, focus on quality and nutritional value. Look for minimally processed options that provide maximum nutritional benefits. These nutrient-dense foods will transform your energy balls from a simple snack into a powerful mini-meal that supports your health and fitness goals.
Pro tip: Always check ingredient labels and choose options with minimal added sugars. Your body will thank you for selecting clean, wholesome protein ball ingredients that deliver real nutritional value.
Kitchen Tools You’ll Need for Making Energy Balls
Preparing protein energy balls doesn’t require a full professional kitchen. With a few essential kitchen tools for energy balls, you can create delicious and nutritious snacks right at home. I’ll walk you through the equipment you’ll need to get started.
Let’s break down the must-have and optional tools to make your energy ball preparation smooth and enjoyable.
Basic Equipment Requirements
When making energy balls, you’ll want to have these core kitchen tools ready:
- Mixing bowls in various sizes for ingredient preparation
- Measuring cups and spoons for precise ingredient measurements
- Spatula or wooden spoon for mixing
- Baking sheet or plate for forming and chilling balls
- Airtight container for storage
Optional Tools for Advanced Preparation
For those looking to elevate their energy ball game, consider investing in these advanced kitchen tools:
- Food processor: This powerful appliance can quickly blend nuts, dates, and other ingredients to create a smooth mixture
- High-powered blender: Great for achieving a consistent texture
- Cookie scoop: Helps create uniform-sized energy balls
- Parchment paper: Makes cleanup and ball formation easier
Don’t worry if you don’t have all these tools. A food processor isn’t mandatory – you can use mixing bowls and elbow grease to create delicious energy balls. The key is having clean, functional kitchen tools and a bit of creativity.
Protein Energy Balls Recipe: Step-by-Step Instructions
Creating the perfect protein ball recipe is easier than you might think! This no-bake recipe will walk you through making delicious and nutritious energy balls that are both simple to prepare and packed with protein.
Before you begin, gather all your ingredients and ensure you have a clean workspace. The key to a great protein ball recipe is precise measurements and proper mixing.
- Combine dry ingredients:
- Protein powder
- Rolled oats
- Chia seeds
- Mix wet ingredients separately:
- Nut butter
- Honey or maple syrup
- Vanilla extract
- Blend dry and wet ingredients until well incorporated
- Refrigerate mixture for 15-20 minutes to firm up
- Roll into small, uniform balls using clean hands
- Optional: Roll balls in coconut flakes or crushed nuts
For the best step-by-step instructions, work with chilled hands and don’t overwork the mixture. The goal is to create protein energy balls that hold together without becoming too dense.
Pro tip for your no-bake recipe: If the mixture seems too dry, add a little more nut butter. If it’s too wet, sprinkle in extra protein powder or oats to achieve the perfect consistency.
These homemade protein energy balls will keep you fueled and satisfied, making them an ideal snack for busy days or pre and post-workout nutrition.
Storage Tips and Shelf Life
Knowing how to properly store your protein energy balls is crucial for maintaining their taste, texture, and nutritional value. The right storage method can significantly extend their energy ball shelf life and keep them fresh and delicious.
Proper Storage Methods
When storing protein balls, refrigeration is your best friend. I recommend keeping them in an airtight container to preserve their quality. Here are some key storage tips:
- Store in a sealed container with parchment paper between layers
- Keep refrigerated for up to 7-10 days
- Use glass or plastic containers with tight-fitting lids
- Avoid storing near strong-smelling foods
Freezing and Thawing Guidelines
Freezing energy balls is an excellent way to extend their shelf life and have a quick snack ready. Follow these simple freezing instructions:
- Place energy balls on a baking sheet lined with parchment paper
- Freeze for 1-2 hours until solid
- Transfer to a freezer-safe container or zip-lock bag
- Label with the date of preparation
When you’re ready to enjoy your frozen energy balls, thaw them in the refrigerator for about 30 minutes. They’ll return to their original texture and remain just as delicious.
Signs of Freshness
Pay attention to these indicators to ensure your protein energy balls are still good to eat:
- No unusual odors
- Consistent texture without hardening
- No visible mold or discoloration
- Stored within the recommended time frame
By following these storage tips, you’ll maximize the energy ball shelf life and always have a nutritious snack ready to fuel your day.
Customize Your Energy Balls: Flavor Variations
Creating customized protein balls is an exciting way to keep your snacks interesting and delicious. As a protein ball enthusiast, I’ve discovered numerous energy ball flavors that can transform your basic recipe into a culinary adventure.
Protein ball variations offer endless possibilities for taste and nutrition. Let me share some of my favorite flavor combinations that will elevate your homemade energy balls:
- Chocolate Lovers Delight: Mix cocoa powder, dark chocolate chips, and a hint of espresso powder
- Tropical Paradise: Incorporate dried mango, coconut flakes, and macadamia nuts
- Autumn Spice: Blend pumpkin puree, cinnamon, and crushed pecans
- Berry Blast: Add dried cranberries, freeze-dried raspberries, and almond butter
When experimenting with customized protein balls, keep these tips in mind:
- Start with a base of oats, nuts, and protein powder
- Adjust liquid ingredients to maintain proper consistency
- Use natural sweeteners like honey or maple syrup
- Balance flavors with complementary ingredients
To help you explore different flavor profiles, I’ve created a quick reference guide for energy ball flavor combinations:
| Flavor Theme | Key Ingredients | Protein Boost |
|---|---|---|
| Classic Peanut Butter | Peanut butter, vanilla extract | Whey protein powder |
| Chocolate Mint | Cocoa powder, mint extract | Chocolate protein powder |
| Blueberry Cheesecake | Dried blueberries, graham cracker crumbs | Vanilla protein powder |
Remember, the key to amazing protein ball variations is creativity and willingness to experiment. Don’t be afraid to mix unexpected ingredients and find your signature energy ball flavor!
Common Mistakes to Avoid When Making Energy Balls
Creating the perfect protein energy balls can be tricky. I’ve learned through countless kitchen experiments that understanding potential energy ball mistakes is key to success. The secret lies in mastering protein ball texture and getting ingredient ratios just right.
When preparing energy balls, home cooks often encounter several common challenges that can derail their recipe. Knowing how to troubleshoot these issues will help you create delicious, nutritious snacks every time.
Texture Troubleshooting Techniques
- Prevent dry energy balls by adding liquid ingredients gradually
- Ensure proper binding with sticky ingredients like nut butter or honey
- Use a food processor for consistent texture and even ingredient distribution
Ingredient Ratio Strategies
| Ingredient Category | Recommended Proportion | Common Mistake |
|---|---|---|
| Dry Ingredients | 40-50% | Adding too much protein powder |
| Binding Ingredients | 30-40% | Not enough liquid binders |
| Sweeteners | 10-20% | Overly sweet mixtures |
Mastering energy ball preparation requires practice and patience. By understanding these key principles of ingredient balance and texture management, you’ll create perfect protein energy balls every time.
Meal Prep Tips: Make Ahead and Save Time
I’ve discovered that meal prep energy balls are a game-changer for busy individuals seeking healthy snacks. Batch cooking protein balls can save you hours during the week, allowing you to have nutritious treats ready at a moment’s notice. I recommend setting aside about 30 minutes on a Sunday to create multiple batches that will fuel your entire week.
When preparing time-saving snacks like these protein energy balls, invest in quality airtight containers. I always portion my batch into individual servings, making grab-and-go options super convenient. By pre-measuring and storing them properly, you’ll ensure maximum freshness and minimize the daily prep work that can feel overwhelming.
Pro tip for efficient batch cooking protein balls: double or triple your recipe when you have extra time. These snacks freeze beautifully for up to three months, which means you can create a substantial stockpile of healthy treats. I personally label each container with the date and contents to keep track of my meal prep inventory and maintain optimal freshness.
My final recommendation is to experiment with different protein ball recipes during your meal prep sessions. Rotating flavors prevents boredom and keeps your snack routine exciting. By dedicating a small amount of time to preparation, you’ll set yourself up for nutritious, delicious eating throughout the week.