
As autumn leaves start to fall, I’m excited to share my favorite pumpkin donuts recipe that captures the essence of the season. These homemade pumpkin donuts are more than just a treat – they’re a warm hug of fall flavors that will transform your breakfast or afternoon snack.
Imagine biting into a soft, perfectly spiced donut that’s bursting with rich pumpkin flavor. This fall treat is surprisingly simple to make at home, bringing the cozy comfort of bakery-style donuts right to your kitchen. Whether you’re a baking novice or a seasoned pro, this pumpkin donuts recipe promises delicious results that will impress family and friends.
I’ve perfected this recipe to bring out the most incredible autumn flavors. The combination of pumpkin puree, warm spices, and a tender donut base creates a breakfast option that’s both nostalgic and utterly delectable. Get ready to fill your kitchen with the most irresistible autumn aroma!
Why You’ll Love These Seasonal Pumpkin Donuts
Imagine starting your fall morning with a warm, freshly baked seasonal pumpkin donut that fills your kitchen with the most incredible autumn aroma. These delightful treats are more than just a breakfast option – they’re a celebration of fall flavors that will become your new morning ritual.
Let me share why these seasonal pumpkin donuts will quickly become a family favorite:
Perfect Fall Breakfast Option
Fall breakfast doesn’t get better than these spiced pumpkin donuts. They capture the essence of autumn with their rich, warm spices and tender texture. Each bite brings together classic fall flavors that make your morning feel special and comforting.
- Packed with seasonal spices like cinnamon and nutmeg
- Perfectly balanced sweet and spicy profile
- Ideal companion to your morning coffee or tea
Make-Ahead Convenience
Busy families will love these make-ahead donuts. You can prepare the batter the night before and quickly bake them in the morning. These make-ahead donuts save precious time during hectic morning routines while ensuring a delicious breakfast everyone will enjoy.
- Prepare batter up to 24 hours in advance
- Quick 15-minute baking time
- Stays fresh for 2-3 days when stored properly
Family-Friendly Recipe
This recipe is designed to bring families together. Kids will love helping mix the batter and decorating the donuts, while adults appreciate the wholesome ingredients and nostalgic fall flavors. It’s a recipe that creates memories as delicious as the donuts themselves.
- Simple ingredients kids can help measure
- Fun decorating options for all ages
- Healthier alternative to store-bought pastries
Essential Ingredients for Pumpkin Donuts Recipe
Creating delicious homemade donut recipe requires selecting the perfect pumpkin donut ingredients. I’ll walk you through the essential components that will transform your kitchen into a fall baking paradise.
Let’s break down the key ingredients you’ll need for these delectable pumpkin donuts:
- All-purpose flour (provides structure)
- Pumpkin puree (adds moisture and flavor)
- Granulated sugar
- Brown sugar (enhances depth of flavor)
- Eggs
- Vegetable oil
- Baking powder
- Salt
The spice blend is crucial for authentic pumpkin donut ingredients. I recommend a combination of:
- Ground cinnamon
- Nutmeg
- Ground ginger
- Cloves (use sparingly)
| Ingredient | Quantity | Purpose |
|---|---|---|
| All-purpose flour | 2 cups | Base structure |
| Pumpkin puree | 1 cup | Moisture and flavor |
| Granulated sugar | 3/4 cup | Sweetness |
| Cinnamon | 2 tsp | Warm spice flavor |
Pro tip: Always use pure pumpkin puree, not pumpkin pie filling. The right ingredients make all the difference in your homemade donut recipe. Fresh spices will elevate the flavor profile and create those irresistible autumn vibes in every bite.
Kitchen Tools and Equipment Needed
Creating delicious pumpkin donuts requires the right baking equipment and kitchen tools for donuts. I’ll walk you through the essential items you’ll need to make your baking experience smooth and enjoyable.
Selecting the Perfect Donut Pan
Your donut pan is the most crucial piece of equipment for making perfectly shaped donuts. I recommend investing in a high-quality non-stick donut pan that ensures even baking and easy release. You’ll find two primary options:
- Standard-sized donut pans (6-cavity)
- Mini donut pans for bite-sized treats
Essential Mixing Tools
Preparing your pumpkin donut batter requires some specific kitchen tools. My go-to mixing equipment includes:
- Large mixing bowl
- Whisk for blending dry ingredients
- Rubber spatula for folding
- Electric hand mixer or stand mixer
- Measuring cups and spoons
Smart Storage Solutions
After baking your delicious donuts, proper storage is key to maintaining freshness. I suggest using airtight containers with tight-sealing lids. Plastic containers with compartments work great for preventing donuts from sticking together.
Pro tip: Consider having multiple donut pans if you plan to make large batches. This saves time and allows you to bake more donuts simultaneously.
Step-by-Step Mixing Instructions
Creating delicious pumpkin donuts requires careful mixing techniques. I’ll walk you through the precise pumpkin donut mixing instructions to ensure your baked treats turn out perfectly every time.
When learning how to make pumpkin donuts, preparation is key. Start by gathering all your ingredients and bringing them to room temperature. This helps create a smoother, more consistent batter.
- Combine dry ingredients first
- Sift flour, baking powder, and spices together
- Eliminate potential clumps for even distribution
- Mix wet ingredients separately
- Whisk pumpkin puree, eggs, and oil until smooth
- Add vanilla extract for enhanced flavor
- Blend wet and dry ingredients
- Fold gently to prevent overmixing
- Stop mixing when ingredients are just combined
Professional baking tip: Use a rubber spatula for folding to maintain the batter’s light texture. Overmixing can lead to dense, tough donuts.
| Mixing Stage | Key Action | Time Estimate |
|---|---|---|
| Dry Ingredients | Sift and combine | 2-3 minutes |
| Wet Ingredients | Whisk thoroughly | 1-2 minutes |
| Final Mixing | Gentle folding | 30-45 seconds |
Remember, the secret to perfect pumpkin donuts is in the mixing technique. Take your time, be gentle, and enjoy the process!
Baking Tips for Perfect Texture
Creating the ultimate pumpkin donuts requires mastering a few key baking techniques. Achieving the perfect donut texture isn’t just about following a recipe—it’s an art that combines precision and careful attention to detail.
Successful pumpkin donut baking tips rely on understanding how different factors impact your final product. I’ll share some professional insights to help you create donuts with an irresistible, tender crumb.
Mastering Temperature Control
Oven temperature plays a crucial role in perfect donut texture. I recommend preheating your oven to exactly 350°F (175°C) for consistent results. Temperature variations can dramatically affect your donuts’ moisture and overall quality.
- Use an oven thermometer for precise temperature reading
- Avoid opening the oven door frequently during baking
- Place donuts in the center rack for even heat distribution
Maintaining Moisture Balance
Moisture is the secret weapon in creating soft, delectable pumpkin donuts. The right ingredient ratios and mixing techniques ensure your donuts remain delightfully tender.
| Ingredient | Moisture Impact | Recommended Amount |
|---|---|---|
| Pumpkin Puree | High Moisture Content | 1/2 cup per batch |
| Vegetable Oil | Adds Softness | 1/4 cup |
| Buttermilk | Enhances Tenderness | 1/3 cup |
Precise Timing Guidelines
Timing is critical in achieving the perfect donut texture. Overbaking can lead to dry, tough donuts, while underbaking results in a gummy center. I suggest baking for 12-15 minutes, watching carefully for a golden-brown exterior.
- Set a timer immediately after placing donuts in the oven
- Check donuts at the 12-minute mark
- Use a toothpick to test for doneness
By implementing these pumpkin donut baking tips, you’ll be well on your way to creating bakery-quality treats with a perfect donut texture that will impress family and friends.
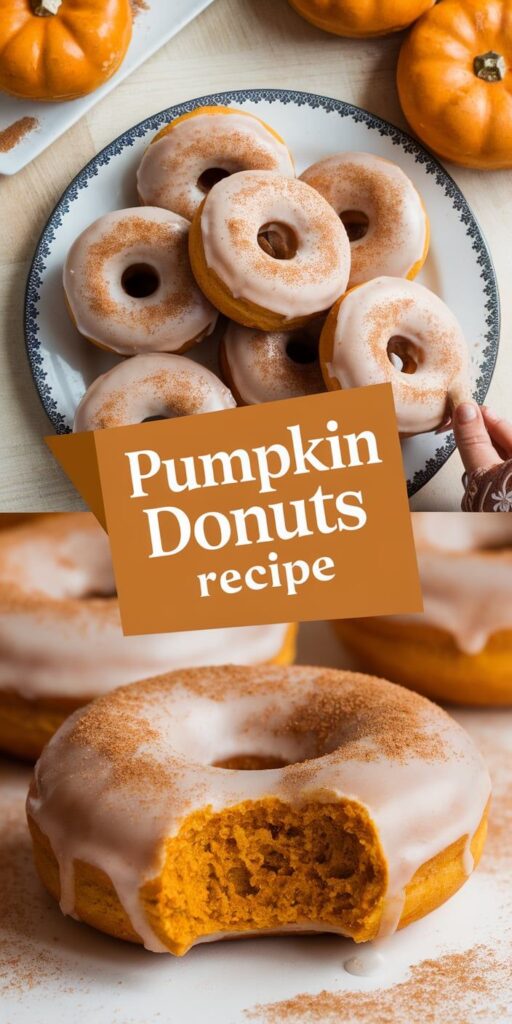
Delicious Glazing Options
Creating the perfect pumpkin donut glaze can transform your homemade treats from good to extraordinary. I’ve discovered several mouthwatering pumpkin donut glaze techniques that will elevate your baking game and impress everyone at the breakfast table.
Let me share some delightful donut topping ideas that complement the rich pumpkin flavor:
- Classic Cream Cheese Glaze: A tangy, smooth coating that balances the sweet pumpkin base
- Maple Cinnamon Drizzle: Captures the essence of autumn with warm, rich flavors
- Caramel Pecan Topping: Adds crunch and decadent sweetness
- Spiced Brown Sugar Glaze: Intensifies the seasonal pumpkin donut experience
When preparing your pumpkin donut glaze, temperature matters. I recommend letting donuts cool completely before glazing to ensure a smooth, even coating. For the best results, dip the donuts directly into the glaze or use a spoon to drizzle it artfully across the top.
My favorite donut topping ideas include sprinkling crushed graham crackers, toasted nuts, or even a light dusting of cinnamon after glazing. These simple additions can transform a basic pumpkin donut into a gourmet treat that looks as good as it tastes.
Pro tip: Keep your glaze at room temperature for the perfect consistency. If it’s too thick, add a splash of milk. If it’s too thin, mix in more powdered sugar until you reach your desired texture.
Storage and Freshness Tips
Preserving the delightful taste and texture of homemade pumpkin donuts requires careful storing techniques. I’ll share my top methods for keeping your donuts fresh and delicious, whether you plan to enjoy them today or save some for later.
When it comes to storing pumpkin donuts, you have several options that will help maintain their quality and taste. The key is to protect them from moisture and air, which can quickly diminish their freshness.
Counter Storage Strategies
If you plan to eat your pumpkin donuts within a day or two, counter storage is perfect. Here are my recommended steps for how to keep donuts fresh at room temperature:
- Store donuts in an airtight container
- Place a paper towel at the bottom to absorb excess moisture
- Keep container at room temperature
- Consume within 1-2 days for best flavor
Freezing for Long-Term Storage
For extended storage, freezing is an excellent option. You can preserve your pumpkin donuts for up to three months with proper technique.
| Storage Method | Duration | Best Practices |
|---|---|---|
| Counter Storage | 1-2 days | Airtight container, room temperature |
| Refrigerator | 3-4 days | Sealed container, wrapped individually |
| Freezer | 2-3 months | Wrap in plastic wrap, then foil |
Reheating for Maximum Enjoyment
When you’re ready to enjoy your stored pumpkin donuts, proper reheating can help restore their original texture and warmth. Microwave for 10-15 seconds or warm in an oven at 350°F for 3-5 minutes to bring back that fresh-baked taste.
Customization and Variations
I love exploring pumpkin donut variations that let home bakers get creative in the kitchen. The base recipe provides a fantastic foundation for experimenting with different flavors and textures. By customizing donut recipes, you can transform a classic seasonal treat into something uniquely yours.
Adding mix-ins can elevate your pumpkin donuts dramatically. Try folding in chopped pecans, dark chocolate chips, or dried cranberries to create exciting flavor profiles. Sprinkle toasted pumpkin seeds on top for extra crunch, or swirl in some cream cheese for a rich, tangy twist. These simple additions can turn a standard pumpkin donut into a gourmet experience.
Spice blends offer another fantastic way to customize your donut recipe. While traditional pumpkin spice works wonderfully, you might experiment with cardamom, ginger, or even a pinch of cayenne for unexpected depth. Different glazes can also dramatically change the donut’s character – consider maple, cream cheese, or a brown butter drizzle to complement the warm pumpkin flavors.
Ultimately, pumpkin donut variations are all about personal creativity. Don’t be afraid to experiment and make the recipe your own. Each batch can be a delicious adventure that reflects your unique taste and culinary imagination.


