
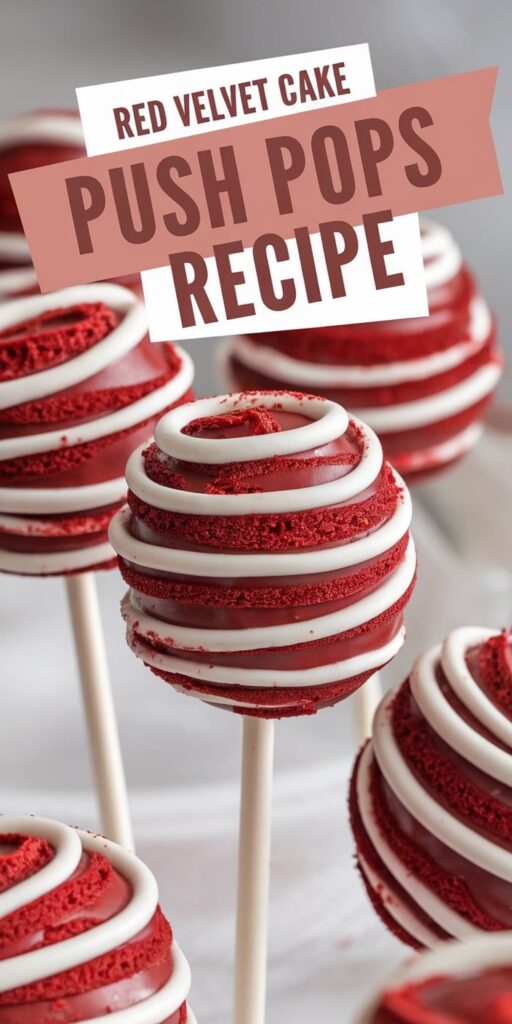
I’m excited to share a delightful twist on a classic dessert: red velvet cake push pops. These handheld desserts are the perfect way to enjoy a decadent treat that’s both portable and impressive. Imagine layers of rich, moist red velvet cake combined with silky cream cheese frosting, all packed into a convenient push pop container.
Red velvet cake push pops have become a sensation at parties, gatherings, and special events. They offer a unique and fun way to serve dessert that both kids and adults absolutely love. The individual portion size makes them ideal for everything from birthday celebrations to casual get-togethers.
In this recipe, I’ll guide you through creating these delectable handheld desserts from scratch. You’ll learn how to bake the perfect red velvet cake, whip up a creamy frosting, and assemble these eye-catching treats that are sure to impress your guests. Get ready to elevate your dessert game with these irresistible red velvet cake push pops!
Why These Red Velvet Push Pops Will Become Your New Favorite Dessert
Red velvet push pops are about to revolutionize your dessert game. These delightful treats combine the classic charm of red velvet cake with an innovative serving style that makes them the ultimate party treat. I’ve discovered why these customizable push pops are quickly becoming everyone’s favorite dessert.
Let me break down the irresistible qualities that make these push pops a game-changer for any celebration:
The Perfect Party Treat
Imagine a dessert that’s both visually stunning and incredibly convenient. Red velvet push pops solve the classic party dessert dilemma. They eliminate messy cutting and serving, allowing guests to enjoy their favorite dessert with zero hassle. The portable design means no plates, no forks – just pure enjoyment.
- Individual portion control
- No mess or complicated cutting
- Easy to distribute at parties
- Instagram-worthy presentation
Make-Ahead Convenience
As a busy baker, I appreciate make-ahead desserts that simplify event preparation. These red velvet push pops can be prepared days in advance, stored perfectly in the refrigerator, and brought out right before serving. This make-ahead dessert strategy saves time and reduces day-of stress.
Customization Options
The real magic of these customizable push pops lies in their versatility. You can transform them to match any theme or personal preference. From classic cream cheese frosting to creative flavor combinations, these push pops become a canvas for culinary creativity.
| Customization Category | Possible Variations |
|---|---|
| Frosting Flavors | Cream cheese, chocolate, vanilla, strawberry |
| Decorative Toppings | Sprinkles, chocolate shavings, fruit garnishes |
| Color Schemes | Seasonal colors, wedding themes, birthday palettes |
Essential Tools and Equipment for Push Pop Creation
Creating delightful red velvet cake push pops requires specific baking equipment and cake decorating supplies. I’ll walk you through the essential push pop tools you’ll need to make these stunning desserts with ease and precision.
Selecting the right tools can make a significant difference in your push pop preparation. Professional bakers know that quality equipment transforms an ordinary recipe into an extraordinary treat.
- Push Pop Containers: Clear plastic tubes designed specifically for layered desserts
- Piping Bags: Large disposable or reusable bags for frosting application
- Cake Decorating Tips: Various sizes for intricate frosting designs
- Round Cake Pans: 9-inch pans for baking consistent cake layers
- Offset Spatula: Perfect for smooth frosting application
I recommend investing in high-quality push pop tools that will streamline your baking process. Stainless steel utensils and professional-grade baking equipment ensure consistent results every time.
| Tool Category | Recommended Items | Price Range |
|---|---|---|
| Push Pop Accessories | Clear Plastic Containers | $10-$25/set |
| Cake Decorating Supplies | Piping Bags, Metal Tips | $15-$40 |
| Baking Equipment | 9-inch Cake Pans, Offset Spatula | $30-$60 |
By gathering these essential tools, you’ll be well-prepared to create stunning red velvet cake push pops that will impress your friends and family.
Red Velvet Cake Push Pops Recipe
Creating the perfect red velvet cake push pops requires careful selection of ingredients and precise preparation. I’ll guide you through the essential components that will transform your dessert into a delightful treat everyone will love.
Cake Base Ingredients
For the red velvet cake ingredients, you’ll need a combination of high-quality items to achieve that signature rich flavor and vibrant color:
- 2½ cups all-purpose flour
- 1½ cups granulated sugar
- 2 tablespoons cocoa powder
- 1 teaspoon baking soda
- 1 teaspoon salt
- 2 large eggs
- 1½ cups vegetable oil
- 1 cup buttermilk
- 2 tablespoons red food coloring
- 1 teaspoon white vinegar
- 1 teaspoon vanilla extract
Cream Cheese Frosting Components
My cream cheese frosting recipe requires these key ingredients:
- 16 ounces cream cheese, softened
- ½ cup unsalted butter, room temperature
- 4 cups powdered sugar
- 1 teaspoon vanilla extract
- Pinch of salt
Additional Decorative Elements
For stunning cake decorations that will elevate your push pops, consider these embellishments:
- Sprinkles in matching color schemes
- Chocolate shavings
- Edible glitter
- Mini chocolate chips
- Crushed candy pieces
Mastering the Perfect Red Velvet Cake Base
Creating a moist cake recipe for red velvet requires precision and attention to detail. I’ll share my top red velvet cake baking tips to help you achieve a bakery-worthy result every time.
The secret to an incredible red velvet cake lies in selecting the right ingredients. Your key components will include:
- High-quality cake flour
- Cocoa powder
- Buttermilk
- Vinegar
- Vibrant red food coloring
Mixing technique plays a crucial role in developing a tender, moist cake recipe. Start by creaming butter and sugar until light and fluffy. This introduces air into the batter, creating a soft texture. Sift dry ingredients separately to prevent lumps and ensure even distribution.
Temperature matters when baking red velvet cake. I recommend using room-temperature ingredients to guarantee smooth mixing. Eggs and buttermilk should sit out for about 30 minutes before combining.
Red velvet cake baking tips include:
- Don’t overmix the batter
- Use gel food coloring for deeper red color
- Check cake doneness with a toothpick
- Allow cake to cool completely before frosting
The chemical reaction between cocoa powder, vinegar, and buttermilk creates the signature tanginess of red velvet cake. This unique combination gives the cake its distinctive flavor profile that sets it apart from other desserts.
Creating Silky Smooth Cream Cheese Frosting
Crafting the perfect cream cheese frosting recipe is an art that can elevate your Red Velvet Push Pops from good to absolutely spectacular. I’ll share my tried-and-true method for achieving a luxuriously smooth frosting that pipes beautifully and tastes incredible.
The key to an exceptional cream cheese frosting lies in understanding frosting consistency tips that professional bakers swear by. Temperature plays a crucial role in creating the ideal texture.
Ingredients for Foolproof Cream Cheese Frosting
- 8 oz cream cheese (room temperature)
- 1/2 cup unsalted butter (softened)
- 4 cups powdered sugar
- 1 teaspoon vanilla extract
- Pinch of salt
Mixing Techniques for Perfect Consistency
When preparing your cream cheese frosting recipe, follow these critical steps:
- Ensure all ingredients are at room temperature
- Beat cream cheese and butter until completely smooth
- Gradually add powdered sugar
- Mix on low speed to prevent air bubbles
- Add vanilla and salt for enhanced flavor
Frosting Storage Guidelines
Proper frosting storage is essential for maintaining quality. Store your cream cheese frosting in an airtight container in the refrigerator for up to 5 days. Before using, let it sit at room temperature for 15-20 minutes and re-whip to restore its silky texture.
Pro tip: If your frosting seems too soft, refrigerate for 15 minutes before piping. If it’s too stiff, briefly warm it or add a tablespoon of milk to achieve the perfect spreadable consistency.
Step-by-Step Assembly Instructions
Mastering the push pop assembly process is key to creating stunning red velvet dessert presentation. I’ll walk you through the precise layering techniques that will transform your cake into an impressive treat.
Start by gathering your essential tools:
- Clean push pop containers
- Piping bags
- Offset spatula
- Cake leveler or sharp knife
Begin your push pop assembly with these strategic steps:
- Cut your red velvet cake into uniform small circles that fit perfectly inside the push pop container
- Prepare your cream cheese frosting in a piping bag with a star tip for elegant layering
- Create a base layer of cake at the bottom of each container
- Pipe a smooth layer of cream cheese frosting directly on top of the cake
- Repeat cake and frosting layers until the container is nearly full
Pro tip for dessert presentation: Leave a small space at the top for any decorative elements like sprinkles or mini chocolate shavings. Chill the assembled push pops for at least 30 minutes to help the layers set and maintain their structure.
The key to perfect layering techniques is consistency. Use a gentle, even pressure when piping frosting and ensure each layer is compact but not overly compressed. Your guests will be impressed by the beautiful, professional-looking dessert you’ve created!
Creative Decoration Ideas and Toppings
Transforming red velvet cake push pops from simple desserts to stunning visual masterpieces requires creativity and strategic push pop decorations. The right garnishes can elevate these delightful treats from ordinary to extraordinary, making them perfect for any celebration.
When exploring dessert toppings, I recommend considering both visual appeal and flavor compatibility. The key is to select embellishments that complement the rich red velvet cake and cream cheese frosting.
Seasonal Garnish Options
Seasonal garnishes can dramatically enhance the appearance of your push pop decorations. Here are some inspiring options:
- Summer: Fresh berries like raspberries and strawberries
- Fall: Candied pecans or miniature caramel drizzles
- Winter: Crushed peppermint candy or white chocolate shavings
- Spring: Edible flower petals or pastel-colored sprinkles
Color Scheme Suggestions
Coordinating your push pop decorations with specific color themes can create stunning visual presentations. Consider these color palettes for different occasions:
- Holiday parties: Red and green for Christmas, pastel colors for Easter
- Wedding events: Matching wedding color schemes
- Birthday celebrations: Themed colors based on party decorations
Remember that thoughtful seasonal garnishes and strategic color choices can transform your red velvet cake push pops into memorable, Instagram-worthy desserts that will impress guests and tantalize taste buds.
Storage Tips and Shelf Life Guidelines
Preserving the delightful taste and texture of your red velvet cake push pops requires careful dessert storage techniques. I recommend refrigerating these treats in an airtight container to maintain their freshness. When stored properly, push pops can last up to 3-4 days in the refrigerator without compromising their quality.
Refrigeration guidelines suggest keeping push pops at a consistent temperature between 35-40°F. To prevent moisture buildup, place a paper towel in the container to absorb excess condensation. For longer-term storage, you can freeze push pops for up to two weeks. Wrap each push pop individually in plastic wrap before placing them in a freezer-safe container to protect their delicate cream cheese frosting.
When transporting push pops to events or parties, use a specialized carrier or create a stable transport system with a foam block to keep them upright. Before serving, allow frozen push pops to thaw in the refrigerator for about 30 minutes. This push pop shelf life strategy ensures your desserts remain visually appealing and deliciously fresh for any occasion.
Pro tip: Always check the push pops for any signs of spoilage before serving. If the cream cheese frosting looks separated or the cake appears dry, it’s best to discard them to maintain food safety standards.


