
To propagate a rubber plant, cut a healthy stem section with at least two leaves, dip the cut end in rooting hormone, and plant it in moist soil or water until roots develop.
This guide offers expert advice on propagating rubber plants, catering to enthusiasts of all levels. It details methods and best practices for selecting propagation candidates and caring for new plants, aiming to enhance your collection and ensure their well-being.
Join us to learn how to successfully propagate and enrich your plant collection.
Benefits of Rubber Plant Propagation
Before delving into the different methods of rubber plant propagation, it’s essential to understand the numerous benefits it offers. Propagating rubber plants brings with it a range of advantages that make it a worthwhile endeavor for plant enthusiasts.
1. Cost-Effectiveness: Propagating rubber plants allows you to expand your collection without breaking the bank. Instead of purchasing new plants, propagating from existing ones can save you money in the long run.
2. Joy of Creating New Plants: There’s something incredibly fulfilling about witnessing the growth and development of a plant that you’ve propagated with your own hands. It’s a rewarding experience to see the fruits of your labor transform into a mature and thriving rubber plant.
3. Potential for Trading or Gifting: Propagated rubber plants also offer the opportunity to connect with fellow plant enthusiasts. You can trade or gift propagated plants, fostering a sense of community and sharing your love for rubber plants with others.
Selecting the Ideal Rubber Plant for Propagation

To ensure successful propagation, it’s crucial to choose a healthy and suitable rubber plant. When selecting a rubber plant for propagation, there are several factors to consider.
1. Plant Maturity
Look for a rubber plant that is mature enough to be propagated. Younger plants may not have developed enough strength and root system to support successful propagation. Aim for plants that have reached a certain level of maturity.
2. Health Indicators
Inspect the potential mother plant for signs of health. Look for vibrant and lush foliage, without any signs of discoloration, pests, or diseases. A healthy rubber plant will have strong stems and be free from any visible damage or stress.
3. Desirable Qualities
Consider the desirable qualities you want to propagate in your rubber plant. Look for attributes like variegated leaves, unique leaf patterns, or specific growth habits.
Selecting mother plants with desirable qualities will ensure the propagation of offspring with similar characteristics.
Essential Tools and Materials for Rubber Plant Propagation

Before you embark on the exciting journey of rubber plant propagation, it’s important to ensure that you have all the necessary tools and materials at your disposal.
Proper preparation will pave the way for successful propagation and the growth of healthy new plants. Here are the essential tools and materials you’ll need:
- Sharp Pruning Shears: A quality pair of pruning shears is crucial for making clean and precise cuts when taking stem cuttings from the mother plant. This will increase the chances of successful rooting.
- Rooting Hormone: Applying rooting hormone to the cut ends of the stem cuttings promotes the development of roots and enhances the overall success rate of propagation. Choose a reliable rooting hormone product suitable for plant propagation.
- Well-Draining Potting Soil: Use a well-draining potting soil mix specifically formulated for indoor plants. This will ensure proper water drainage and prevent root rot, providing an ideal environment for root development.
- Clean Containers: Select clean and sterilized containers that are appropriate in size for your stem cuttings. Consider using small pots or seedling trays with drainage holes to allow excess water to escape.
- Mister or Spray Bottle: Maintaining adequate humidity is vital during the early stages of propagation. A mister or spray bottle filled with water will help you gently mist the cuttings to create a moist environment.
- Clear Plastic Bags or Domes: Covering the containers with clear plastic bags or domes will create a mini greenhouse effect, trapping moisture and heat to aid in root formation. These can usually be found at gardening stores or repurposed from food packaging.
Propagation Methods for Rubber Plants

When it comes to propagating rubber plants, there are several methods you can choose from. In this section, we will explore the most popular techniques in detail, allowing you to expand your rubber plant collection successfully.
1. Stem Cutting Propagation:
Stem cutting propagation is the go-to method for propagating rubber plants, and for good reason. It is a straightforward and reliable technique that yields high success rates. Here’s a step-by-step guide to help you get started:
- Select a healthy stem from the mother plant.
- Using sharp pruning shears, make a clean cut just below a leaf node.
- Remove any lower leaves to expose the node.
- Optional: Dip the cut end in rooting hormone to encourage root development.
- Place the cutting in a well-draining potting soil mixture.
- Keep the soil slightly moist and provide adequate warmth and indirect sunlight.
- Wait patiently for roots to develop, which usually takes a few weeks to a couple of months.
- Once roots have developed, transfer the cutting to a larger pot with well-draining soil.
2. Air Layering:
Air layering is a more advanced propagation method that involves creating a new plant while it is still attached to the mother plant. This technique allows the newly propagated plant to establish a robust root system before separation. Follow these steps to master air layering:
- Select a healthy and flexible branch from the rubber plant.
- Make a small, shallow cut on the selected branch, just below a node.
- Apply rooting hormone to the wounded area.
- Wrap the cut section with moist sphagnum moss and secure it with plastic wrap.
- Wait patiently for roots to develop within the moss-covered section.
- Once roots have formed, carefully separate the new plant from the mother plant.
- Transplant the new plant into a well-draining potting mix and provide the necessary care.
3. Seed Propagation:
Although not as commonly practiced, seed propagation can be an exciting and rewarding way to grow rubber plants. However, it requires patience and diligence. Here’s how you can propagate rubber plants from seeds:
- Obtain fresh rubber plant seeds from a reliable source.
- Sow the seeds in a well-draining soil mix in pots or trays.
- Keep the soil consistently moist and provide warmth and indirect sunlight.
- Be patient, as rubber plant seeds can take several weeks or even months to germinate.
- Once the seedlings have emerged, transplant them into individual pots.
- Continue caring for the seedlings, ensuring they have proper lighting and watering.
Step-by-Step Guide to Stem Cutting Propagation

Stem cutting propagation is a simple and effective method for propagating rubber plants. By following these step-by-step instructions, you can successfully create new plants from stem cuttings and grow your rubber plant collection. Let’s get started!
- Prepare the cutting: Start by selecting a healthy and mature rubber plant stem. Using sharp pruning shears, make a clean cut just below a leaf node. The cutting should be about 6 inches long, with at least two sets of leaves attached.
- Remove lower leaves: Carefully remove the lower set of leaves, leaving about an inch of bare stem exposed. This will prevent the leaves from rotting when placed in the propagation medium.
- Apply rooting hormone: Dip the bottom end of the cutting into a powdered rooting hormone. This will stimulate root growth and increase the chances of successful propagation.
- Plant the cutting: Fill a clean container with well-draining potting soil. Make a hole in the soil using a pencil or your finger and gently insert the cutting into the hole. Firmly press the soil around the base of the cutting to secure it in place.
- Provide the right environment: Place the container in a warm location with bright, indirect light. Avoid direct sunlight, as it can scorch the tender cutting. Maintain a consistent temperature between 70-75°F (21-24°C) for optimal root development.
- Maintain proper moisture: Keep the soil slightly moist but not saturated. Overwatering can lead to root rot, so it’s important to strike a balance. Check the soil regularly and water when the top inch feels dry.
- Monitor and care for the new plant: Over the next few weeks, closely monitor the cutting for signs of new growth. Once you see new leaves forming, it indicates that the cutting has successfully rooted. At this point, you can gradually acclimate the new plant to normal watering and care routines.
- Nurture and watch it grow: Continue to care for your newly propagated rubber plant as it matures. Provide it with the appropriate amount of light, water, and fertilizer to encourage healthy growth. With time and proper care, your new rubber plant will grow into a beautiful addition to your indoor garden.
Mastering Air Layering for Rubber Plants

Air layering is a more advanced but rewarding method of propagating rubber plants. It involves creating a new plant by encouraging root growth on a selected branch while it’s still attached to the mother plant. This technique allows you to create a well-established plant with a developed root system before separating it.
To master air layering for rubber plants, follow these step-by-step instructions:
- Begin by selecting a healthy and mature branch on the rubber plant. Look for a branch that is flexible and about pencil thickness.
- Make a ring-shaped cut around the branch, approximately one inch wide, by using a sharp knife or pruning shears. Take care not to cut too deeply into the branch.
- Remove the bark and expose the inner layer of the branch, creating the air layer. Ensure the cut is clean and smooth, without any jagged edges.
- Apply rooting hormone to the exposed area of the air layer. This will stimulate root growth and increase the chances of successful propagation.
- Moisten a handful of sphagnum moss and wrap it around the air layer. Use plastic wrap or aluminum foil to hold the moss in place.
- Keep the moss moist by misting it regularly or covering it with a plastic bag. This will create a humid environment that encourages root development.
- Monitor the air layer regularly to ensure the moss remains moist. After a few weeks to a few months, you should begin to see roots forming within the air layer.
- Once the roots have developed sufficiently, carefully cut below the air layer using sharp pruning shears. Make sure to cut just below the newly formed roots.
- Plant the newly propagated rubber plant in a suitable pot with high-quality potting soil. Provide it with the appropriate care and conditions to continue growing.
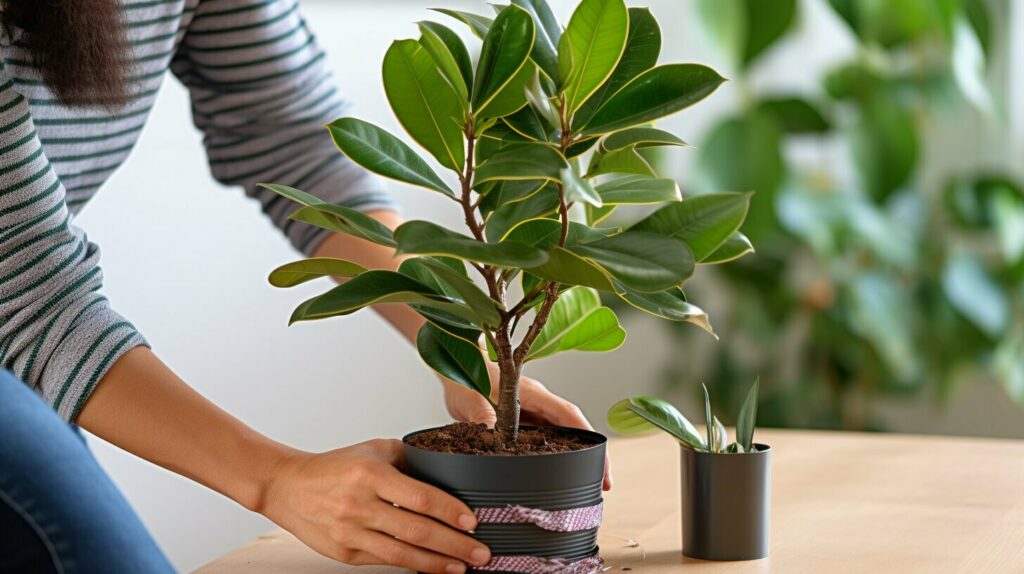
Caring for Newly Propagated Rubber Plants

Once you’ve successfully propagated your rubber plants, it’s important to provide them with the proper care to ensure their healthy growth.
Newly propagated plants require extra attention and specific care techniques to establish strong roots and thrive in their new environment. Follow these essential care tips to give your propagated rubber plants the best start:
1. Watering:
- Water your newly propagated rubber plants regularly, ensuring that the soil is evenly moist but not waterlogged.
- Avoid overwatering, as it can lead to root rot and other fungal diseases.
- Check the moisture level by sticking your finger about an inch into the soil – if it feels dry, it’s time to water.
- Remember to adjust the watering frequency based on the environmental conditions and the plant’s specific needs.
2. Lighting:
Place your newly propagated rubber plants in a location that receives bright, indirect sunlight. Rubber plants thrive in medium to high light conditions, but direct sunlight can scorch their leaves.
3. Temperature:
Maintain a consistent temperature range of 60-75°F (15-24°C) for your propagated rubber plants. Avoid exposing them to drafts or extreme temperature fluctuations.
4. Soil and Fertilizer:
- Use a well-draining potting soil mix to ensure proper root growth and prevent waterlogged conditions.
- Fertilize your propagated rubber plants with a balanced liquid or slow-release fertilizer according to the instructions on the package.
- Apply fertilizer sparingly, as rubber plants are sensitive to excessive nutrients.
5. Pruning:
Regularly prune your propagated rubber plants to encourage bushier growth and maintain their desired shape. Remove any yellowing or diseased leaves to prevent the spread of diseases.
6. Humidity:
Rubber plants appreciate higher humidity levels. To increase humidity around your propagated plants, you can mist them with water or place a tray filled with water and pebbles near the plants (avoid letting the water touch the pot).
7. Potential Challenges:
Watch out for common challenges that newly propagated rubber plants may face, such as:
- Root rot: Ensure proper drainage and avoid overwatering.
- Pest infestation: Keep an eye out for common pests like spider mites, scale insects, and mealybugs. Treat them promptly with organic insecticidal soap or neem oil.
- Leaf drooping: Adjust watering and lighting conditions to prevent leaf drooping.
- Environmental stress: Avoid exposing your plants to sudden temperature changes, drafts, or extreme conditions.
Troubleshooting Common Issues in Rubber Plant Propagation

While propagating rubber plants can be an exciting and rewarding experience, it’s essential to be aware of common challenges that may arise during the propagation process.
To ensure the success of your rubber plant propagation endeavors, we’ve compiled a list of troubleshooting tips to help you overcome any issues you may encounter.
Issue 1: Slow or No Root Growth
If you notice that your rubber plant cuttings or air layering attempts are not developing roots or are experiencing slow root growth, there may be several factors at play.
Firstly, ensure you’re using a high-quality rooting hormone and following the instructions for its application. Additionally, make sure you’re providing adequate warmth and humidity, which can be achieved by placing the cuttings or air layering in a clear plastic bag or a humidity dome.
Finally, ensure your potting soil is well-draining and not overly waterlogged, as excessive moisture can hinder root development.
Issue 2: Mold or Fungal Growth
If you observe mold or fungal growth on your rubber plant cuttings or in the soil, it’s crucial to take immediate action. Remove affected cuttings or plant parts promptly to prevent the spread of the mold.
Ensure proper air circulation around your plants by keeping them away from damp or crowded areas. Avoid overwatering, and allow the soil to dry out before watering again.
Consider using a fungicidal spray to treat the affected plants and prevent further fungal growth.
Issue 3: Wilting or Yellowing Leaves
Wilting or yellowing leaves can indicate various problems in rubber plant propagation. If the leaves are wilted but the soil is moist, it could be a sign of overwatering. In this case, reduce watering frequency and allow the soil to dry out between waterings.
If the leaves are yellowing, it may indicate nutrient deficiencies. Consider using a balanced fertilizer or adjusting the soil pH to address these issues.
Ensure your plants have adequate light and are not exposed to extreme temperature fluctuations, as these factors can also contribute to leaf problems.


