
Welcome to my delightful homemade cake recipe that transforms an ordinary dessert into a stunning pink layer cake. The strawberry ombre cake is a visual masterpiece that will steal the spotlight at any celebration. With its gorgeous gradient of soft pink hues, this cake is not just a dessert but an edible work of art.
Baking this strawberry ombre cake might seem intimidating, but I promise it’s easier than you think. The secret lies in creating a smooth color transition from pale blush to deep rose using fresh strawberries. Whether you’re preparing for a birthday, bridal shower, or simply want to impress your friends, this recipe will elevate your baking skills.
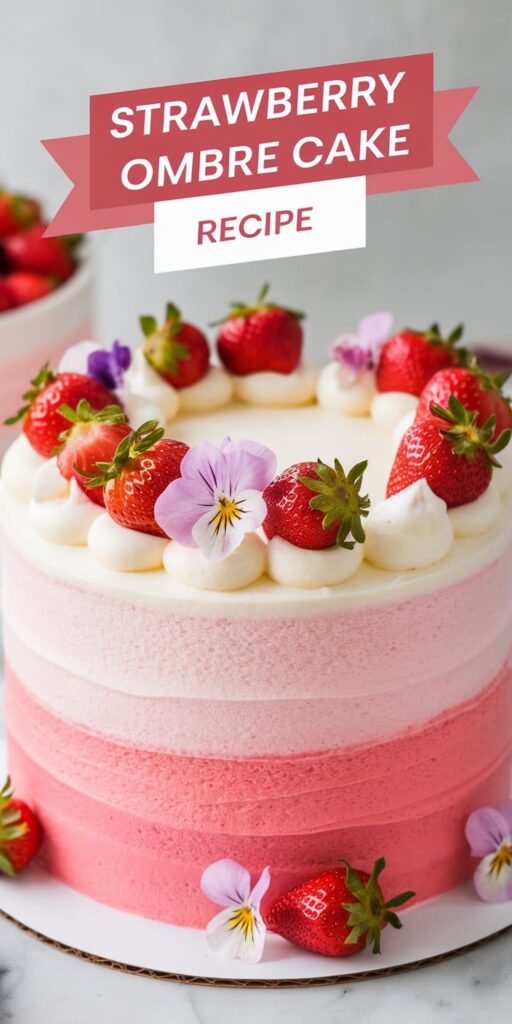
My approach to this homemade cake recipe focuses on simplicity and elegance. Each layer tells a color story, gradually deepening from the lightest pink at the bottom to a rich strawberry shade at the top. The result is a cake that looks professionally crafted but can be made right in your own kitchen.
Get ready to embark on a baking adventure that will not only satisfy your sweet tooth but also create a memorable centerpiece for any special occasion. Let’s dive into the world of pink layer cake perfection!
Essential Ingredients for Your Strawberry Ombre Cake
Creating the perfect strawberry cake ingredients requires careful selection and precise measurements. I’ll walk you through the essential components that will transform your baking project into a stunning ombre cake masterpiece.
Cake Base Components
For the perfect cake base, you’ll need these key strawberry cake ingredients:
- 2½ cups all-purpose flour
- 2 cups granulated sugar
- 1 cup unsalted butter (room temperature)
- 4 large eggs
- 1 cup whole milk
- 2 teaspoons vanilla extract
- 2½ teaspoons baking powder
- ½ teaspoon salt
Fresh Strawberries for Baking
Selecting the right fresh strawberries for baking is crucial for achieving an authentic flavor and vibrant color in your ombre cake components. Look for ripe, deep red strawberries that are free from bruises.
- 2 cups fresh strawberries (hulled and finely chopped)
- ¼ cup strawberry puree
- Pink food coloring (gel-based recommended)
Frosting Elements
The crowning glory of your strawberry ombre cake will be its luxurious buttercream frosting. These ingredients will help you create a silky, strawberry-infused masterpiece:
- 4 cups powdered sugar
- 1 cup unsalted butter (softened)
- ¼ cup strawberry puree
- 1 teaspoon vanilla extract
- Pinch of salt
Kitchen Tools and Equipment Needed
Creating a stunning strawberry ombre cake requires the right baking tools and cake decorating equipment. I’ll walk you through the essential ombre cake supplies you’ll need to bring this delightful dessert to life.
First, let’s cover the core baking equipment. You’ll want to have the following tools ready:
- Stand mixer or hand mixer
- Measuring cups and spoons
- Multiple mixing bowls
- Cake pans (preferably 8-inch round)
- Parchment paper
- Cooling rack
For creating the perfect ombre effect, I recommend some specialized cake decorating equipment. These tools will help you achieve those beautiful pink gradient layers:
- Offset spatula
- Cake leveler
- Piping bags
- Food coloring gel (pink shades)
- Bench scraper
Pro tip: If you don’t have every single item, don’t worry! Many baking tools can be substituted. A sharp knife can replace a cake leveler, and a rubber spatula works well in place of an offset spatula. The key is having the right attitude and creativity in your kitchen.
Investing in quality ombre cake supplies will make your baking experience smoother and more enjoyable. Remember, the right tools can transform a good recipe into an extraordinary dessert.
Strawberry Ombre Cake Recipe Step-by-Step Instructions
Creating a stunning strawberry ombre cake requires precision and creativity. I’ll guide you through the ombre cake tutorial that will transform your baking skills and help you craft a visually breathtaking dessert. Let’s dive into the strawberry cake recipe with some essential baking tips that will make your cake a showstopper.
Preparing the Cake Batter
Start by gathering your ingredients for the perfect strawberry cake base. Mix your dry ingredients carefully to ensure a smooth, lump-free batter. Here’s my recommended mixing technique:
- Sift flour and baking powder together
- Cream butter and sugar until light and fluffy
- Add eggs one at a time, mixing thoroughly
- Gently fold in dry ingredients
Creating the Perfect Ombre Effect
The magic of an ombre cake lies in its gradient color progression. For this strawberry cake recipe, I recommend dividing your batter into multiple bowls. Add varying amounts of strawberry puree to create different shades of pink:
- Prepare fresh strawberry puree
- Start with a small amount of puree in the first bowl
- Gradually increase puree quantity for deeper pink shades
- Mix each batter portion carefully to maintain consistency
Baking and Cooling Tips
Successful baking requires attention to detail. Follow these baking tips for perfect cake layers:
- Preheat oven to 350°F (175°C)
- Use parchment paper to prevent sticking
- Bake layers for 20-25 minutes
- Cool completely before frosting
Pro tip: Use a toothpick to check cake doneness. If it comes out clean, your layers are perfectly baked!
Assembling and Decorating Your Ombre Masterpiece
Creating a stunning strawberry ombre cake requires precision and creativity. My cake assembly techniques will help you transform your baked layers into a breathtaking dessert that looks as delicious as it tastes.
Start by leveling your cake layers to ensure a stable base. When working with ombre cake decoration, each layer matters. I recommend using a long serrated knife to carefully trim any domed tops, creating perfectly flat surfaces for smooth stacking.
- Begin with the darkest pink layer at the bottom
- Progress to lighter shades as you stack upward
- Use a rotating cake stand for easier frosting
For the crumb coat, apply a thin layer of strawberry buttercream around the entire cake. This layered cake tip helps seal in crumbs and creates a smooth foundation for your final frosting. Refrigerate the cake for 15-20 minutes to set the crumb coat before applying the final layer of frosting.
To achieve a perfect gradient, use a bench scraper and offset spatula. Gently blend the different shades of pink frosting, creating a seamless transition between layers. You can add decorative touches like piped rosettes or fresh strawberry slices to enhance the visual appeal.
When slicing your cake, use a sharp knife dipped in hot water to reveal the beautiful ombre layers. Each slice will showcase the stunning color gradient you’ve carefully created.
Tips for Achieving the Perfect Pink Color Gradient
Mastering ombre color techniques for your Strawberry Ombre Cake requires precision and creativity. I’ve learned that starting with a light-colored cake batter is crucial to creating beautiful pink gradients. By carefully adding strawberry food coloring or natural pink food dye, you can achieve stunning color variations that will make your cake truly spectacular.
When working with strawberry food coloring, I recommend using gel-based colors for the most vibrant and consistent results. These concentrated colors allow you to create subtle shade differences without altering the cake’s texture. Start with the lightest pink at the top layer and gradually intensify the color as you move down, using small amounts of coloring to build depth gradually.
Natural alternatives like strawberry puree can provide an authentic pink hue while adding incredible flavor. I suggest straining the puree to remove seeds and carefully incorporating it into different sections of your batter. This method not only creates beautiful color variations but also enhances the cake’s overall strawberry essence. Experiment with different amounts to find the perfect balance of color and taste.
Your ombre technique will improve with practice. Don’t be afraid to test different coloring methods and play with shade transitions. Each cake is an opportunity to refine your skills and create a visually stunning dessert that will impress family and friends.


