
Summer calls for an incredible nostalgic dessert that brings pure joy with every bite. I’m thrilled to share my ultimate Strawberry Shortcake Ice Cream Bars recipe – a delightful summer treat that transforms childhood memories into a delicious reality.
These homemade ice cream bars capture the essence of warm afternoons and carefree moments. Crafting your own version allows you to control ingredients and recreate that classic Good Humor flavor we all remember from childhood summers.
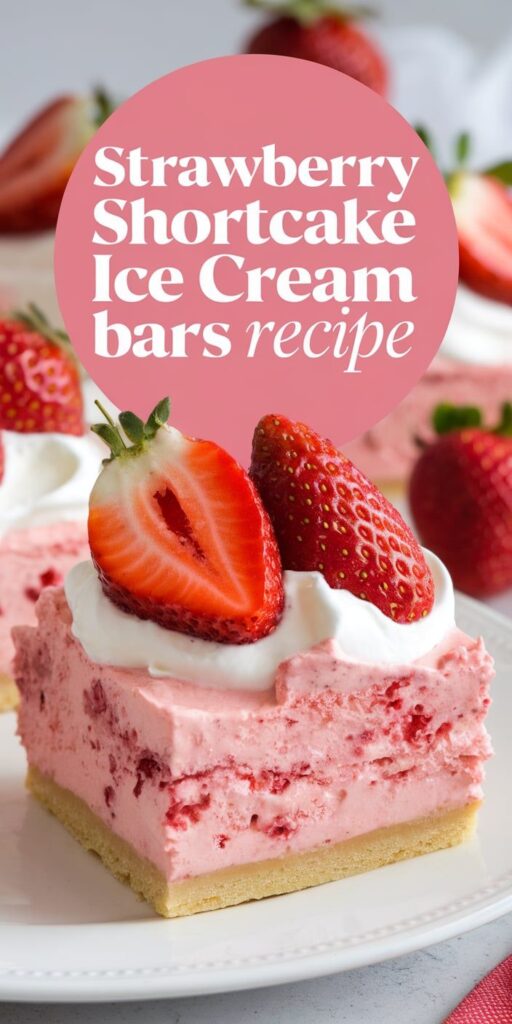
What makes these homemade ice cream bars special is their perfect balance of creamy vanilla ice cream, vibrant strawberry swirl, and crispy shortcake crumb coating. Each bite promises a symphony of textures and flavors that transport you back to simpler times.
Whether you’re looking to impress guests or relive cherished memories, this recipe offers a delightful culinary adventure. Get ready to transform your kitchen into a nostalgic ice cream workshop!
Why These Homemade Ice Cream Bars Will Transport You Back to Childhood
Imagine biting into a delicious frozen treat that instantly reminds you of summer days from your childhood. Good Humor Strawberry Shortcake Ice Cream Bars have a magical way of bringing back cherished memories. I’m excited to share why creating these iconic bars at home can be an incredible journey through nostalgia and flavor.
The History Behind Good Humor’s Classic Treat
Good Humor introduced their legendary Strawberry Shortcake Ice Cream Bars in the 1980s, quickly becoming a staple of childhood memories across America. These bars captured the hearts of kids and adults alike with their unique combination of creamy vanilla ice cream, vibrant strawberry swirl, and crunchy shortcake coating.
What Makes These Bars Extra Special
Creating homemade ice cream bars allows you to elevate the classic treat with fresh, high-quality ingredients. The benefits of homemade ice cream extend far beyond taste:
- Complete control over ingredient quality
- Ability to customize flavors
- Reduced artificial additives
- Personal touch in every bite
Benefits of Making Your Own Version
Homemade ice cream benefits go beyond just taste. By crafting these bars in your kitchen, you’re not just making a dessert – you’re creating lasting memories. The process becomes a fun family activity that connects generations and brings joy through shared culinary experiences.
Each batch of homemade Strawberry Shortcake Ice Cream Bars becomes a delicious trip down memory lane, rekindling childhood memories while offering a personalized twist on a beloved classic.
Essential Ingredients for Perfect Strawberry Shortcake Ice Cream Bars Recipe
Creating the ultimate strawberry shortcake ice cream bars starts with selecting premium ice cream ingredients. I’ll walk you through the precise components that will transform your homemade treat into a nostalgic dessert experience.
For the creamy vanilla ice cream base, you’ll need:
- Heavy whipping cream
- Sweetened condensed milk
- Pure vanilla extract
- Granulated sugar
The star of our recipe is fresh strawberries. I recommend choosing ripe, local strawberries at peak season for the most vibrant flavor. You’ll want about 2 cups of fresh strawberries, washed and hulled, to create a delicious strawberry swirl.
For the signature coating, shortcake crumbs are essential. I suggest using:
- Vanilla wafer cookies
- Butter
- Powdered sugar
Additional ingredients that elevate the bars include:
- Pinch of salt
- Corn syrup (optional, for smoother texture)
- Food-grade popsicle sticks
By carefully selecting each ingredient, you’ll craft ice cream bars that rival any store-bought version. The combination of fresh strawberries, homemade vanilla base, and crunchy shortcake crumbs creates an irresistible summer treat.
Kitchen Tools and Equipment You’ll Need
Creating delicious strawberry shortcake ice cream bars at home requires some specialized kitchen tools. I’ll walk you through the essential equipment that will help you craft these nostalgic treats with ease. Whether you’re a seasoned home cook or a beginner, having the right ice cream maker and kitchen tools can make all the difference in your culinary adventure.
Essential Ice Cream Making Equipment
An ice cream maker is the cornerstone of creating smooth, creamy frozen desserts. You have several options to choose from:
- Traditional churning ice cream makers with a freezer bowl
- Compressor-style ice cream makers with built-in cooling systems
- Manual hand-crank models for small batches
Molds and Storage Containers
Popsicle molds are crucial for shaping your ice cream bars into perfect rectangles. Look for silicone or metal molds with removable sticks for easy unmolding. For storage, invest in airtight freezer-safe containers that will keep your ice cream bars fresh and prevent freezer burn.
Additional Helpful Tools
To make your ice cream bar creation smoother, consider these kitchen tools:
- Instant-read digital thermometer
- High-quality mixing bowls
- Sturdy whisk and spatula
- Parchment paper for easy cleanup
- Sharp knife for cutting shortcake crumbs
Preparing your kitchen with these essential tools will set you up for success in making delightful homemade strawberry shortcake ice cream bars that rival any store-bought version.
Making the Creamy Vanilla Ice Cream Base
Creating the perfect homemade vanilla ice cream base is an art that transforms simple ingredients into a luscious dessert. My recipe for a creamy ice cream base starts with high-quality ingredients and precise technique.
To begin your homemade vanilla ice cream journey, you’ll need a few key components:
- Heavy cream (preferably organic)
- Whole milk
- Egg yolks
- Granulated sugar
- Pure vanilla extract
The secret to an incredible creamy ice cream base lies in the careful preparation. I start by whisking egg yolks and sugar until they become pale and slightly thick. This process helps create a smooth, rich texture that distinguishes professional-quality homemade vanilla ice cream from ordinary recipes.
Slowly warming the milk and cream mixture is crucial. I gradually temper the egg mixture by adding hot dairy, which prevents scrambling and ensures a silky-smooth base. Cooking the custard until it coats the back of a spoon signals that you’ve reached the perfect consistency.
After cooking, strain the mixture and chill completely. This step is critical for developing deep flavor and preparing the base for churning. Refrigerating overnight allows the flavors to meld and intensify, resulting in a more complex and delicious homemade vanilla ice cream.
When you’re ready to churn, pour the chilled custard into your ice cream maker. The churning process incorporates air and creates that signature creamy texture we all love in premium ice cream.
Creating the Fresh Strawberry Swirl
The strawberry swirl is the heart of these delightful ice cream bars. I’ll walk you through the process of transforming fresh strawberries into a vibrant, delicious ripple that will elevate your homemade treat.
Preparing Fresh Strawberries for Your Swirl
Fresh fruit preparation is key to creating an authentic strawberry flavor. Start by selecting ripe, bright red strawberries at the peak of their season. Look for berries that are firm, fragrant, and free from bruises.
- Wash strawberries thoroughly under cool water
- Remove stems and hull the berries
- Pat dry with clean paper towels
- Chop strawberries into small, uniform pieces
Achieving the Perfect Strawberry Ripple
To create a smooth strawberry swirl, I recommend cooking the berries down into a luscious puree. Simmer the chopped strawberries with a touch of sugar, allowing them to break down and concentrate their natural sweetness.
Tips for Natural Color Enhancement
Natural food coloring comes directly from the berries themselves. The key is to cook the strawberries just enough to release their vibrant red pigments without losing their fresh flavor. A quick reduction will give you a stunning, bright red swirl that looks as good as it tastes.
Pro tip: Strain the strawberry puree through a fine-mesh sieve to remove seeds and create an ultra-smooth swirl that will beautifully marble through your vanilla ice cream base.
Crafting the Signature Shortcake Crumb Coating
Creating the perfect shortcake crumbs is an art that transforms ordinary ice cream bars into a nostalgic treat. The cookie coating is the secret weapon that gives these bars their irresistible crunch and classic flavor. I’ll walk you through making a crunchy topping that will elevate your homemade strawberry shortcake ice cream bars.
To start, you’ll need a few key ingredients for your shortcake crumbs:
- Graham crackers or vanilla wafers
- Unsalted butter
- Powdered sugar
- Vanilla extract
The process of creating the perfect cookie coating is simpler than you might think. Begin by crushing your graham crackers into fine crumbs – the more uniform, the better. I recommend using a food processor for the most consistent texture. Mix in melted butter and a touch of powdered sugar to help the shortcake crumbs stick together and create that signature crunchy topping.
Pro tip: For maximum flavor, toast the crumbs lightly in the oven before coating. This extra step brings out a deeper, more complex taste that will make your ice cream bars truly special. The key is to achieve a golden-brown color without burning the crumbs.
Spread the prepared shortcake crumbs on a flat surface. Once your ice cream bars are frozen and ready, roll them quickly through the crumbs, ensuring an even coating that completely covers the surface. The result? A delightful crunch that takes you straight back to childhood summers.
Assembly and Freezing Instructions
Creating the perfect Strawberry Shortcake Ice Cream Bars requires precision in ice cream bar assembly and careful attention to freezing techniques. I’ll walk you through the essential steps to transform your homemade ingredients into a delightful frozen dessert.
The key to successful layering desserts lies in understanding the right process and temperature control. Let me share my tried-and-true method for crafting these nostalgic treats.
Mastering the Layering Technique
When assembling your ice cream bars, follow these critical steps:
- Start with a clean, chilled mold to prevent sticking
- Pour a thin layer of vanilla ice cream base first
- Gently add a swirl of fresh strawberry mixture
- Sprinkle a light layer of shortcake crumbs
- Repeat layers until mold is nearly full
Freezing Time and Temperature Guidelines
Proper freezing is crucial for achieving the perfect texture and preventing ice crystals. I recommend the following freezing approach:
- Initial freeze at 0°F (-18°C) for 2-3 hours
- Allow bars to set completely for 4-6 hours
- Wrap individually in wax paper or plastic wrap
- Store in an airtight container in the coldest part of your freezer
Pro tip: Use a quick-freeze method by placing the molds on a flat, cold surface to help maintain the bar’s structural integrity during the initial freezing stage.
Storage Tips and Serving Suggestions
When it comes to ice cream storage, keeping your homemade Strawberry Shortcake Ice Cream Bars at their peak requires some careful planning. I recommend storing them in an airtight container with parchment paper between each layer to prevent sticking. Wrap them individually in plastic wrap for extra protection against freezer burn.
For the ultimate dessert presentation at summer party ideas, remove the bars from the freezer about 5 minutes before serving. This allows the coating to soften slightly, creating the perfect texture. I love adding a sprinkle of fresh crushed shortbread cookies on top just before serving to give an extra crunch and elevate the visual appeal.
Get creative with your serving style! These bars work brilliantly as a standalone dessert or as a centerpiece for family gatherings. You can customize them by rolling the edges in different toppings like toasted coconut, crushed graham crackers, or even mini chocolate chips to create unique variations that will surprise and delight your guests.
Pro tip: These ice cream bars will stay fresh for up to two weeks in the freezer when properly stored. Always keep them at a consistent temperature of 0°F or below to maintain their delicious flavor and creamy texture. Your homemade treat is sure to become a summer favorite that everyone will request time and again!


