

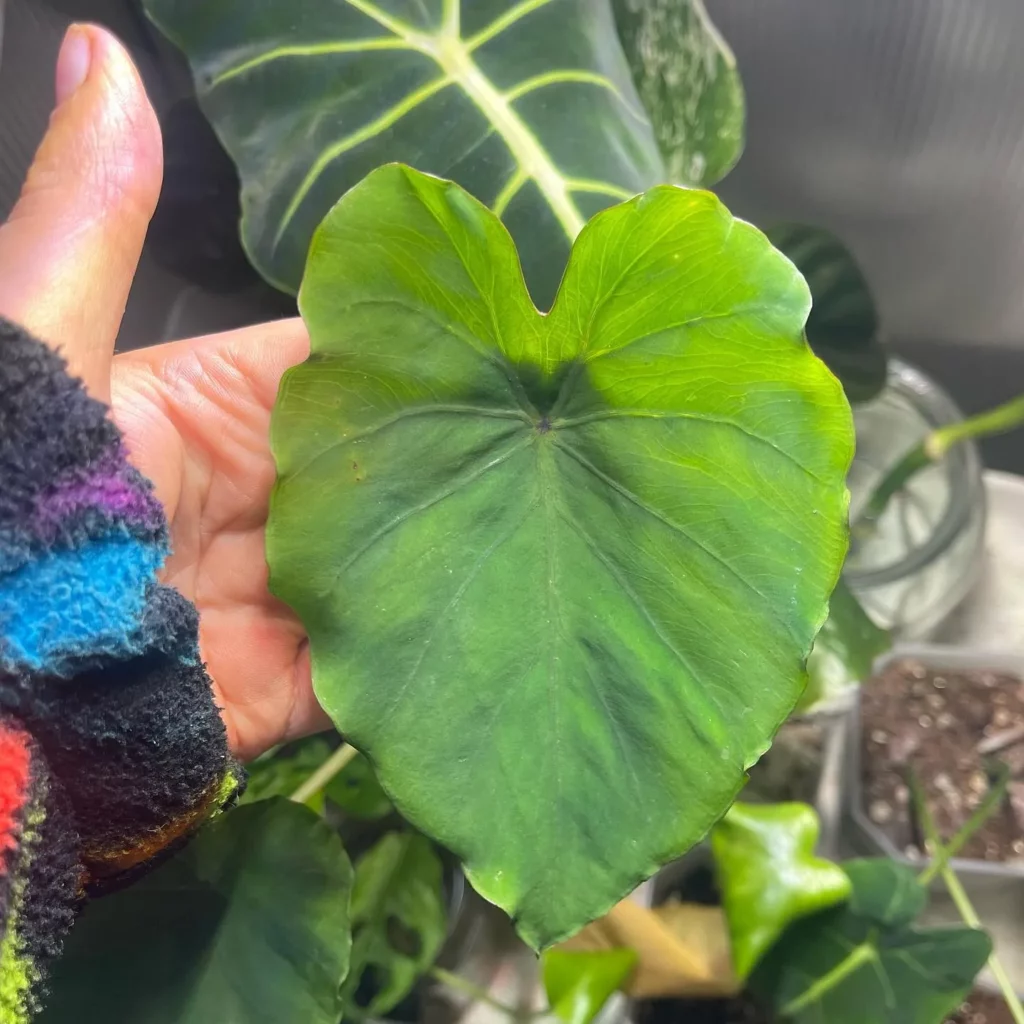
The taro plant is a large, tropical plant that can reach heights of 3-6 feet. It has heart-shaped leaves with distinct veins and comes in a variety of colors, including green, purple, and black.
Appearance of Taro Plant

The plant has a main tuber at the base, which stores nutrients and produces fibrous roots and smaller tubers. The tubers themselves are ringed and hairy, and the flesh is white or pink.
The leaves of the taro plant are also edible and can be cooked like spinach, offering a nutritious and versatile addition to various recipes.
Light Requirements for Taro Plant
Taro plants have specific light requirements for optimal growth. Whether you are growing taro indoors or outdoors, providing the right amount of light is essential for the plant’s health and development.
If you choose to grow taro as a houseplant indoors, it is important to place it in a spot that receives bright but indirect light. Taro plants thrive in partial shade, so avoid placing them in direct sunlight, as it can scorch the leaves. Indirect light mimics the dappled sunlight found in their natural tropical habitat, providing the perfect conditions for taro to flourish.
Growing taro indoors allows you to enjoy this tropical plant all year-round, regardless of the outdoor climate. It is recommended to keep taro plants near a window with filtered light or use supplemental artificial lighting, such as grow lights, to ensure they receive adequate light intensity.
If you have a greenhouse, it can also serve as an excellent environment for growing taro plants. Greenhouses provide the ideal balance of sunlight and shade, creating the perfect growing conditions for taro.
When planting taro outdoors, it is important to choose a location that offers partial shade. Taro plants are sensitive to direct sunlight and strong winds, so providing them with shelter from these elements helps prevent leaf damage and stress.
To ensure the best results, taro plants require at least 200 days of warm, frost-free weather to mature. Therefore, timing is crucial when planting them outdoors, particularly in regions with shorter growing seasons.
- Place taro plants in a spot with bright but indirect light when growing them indoors.
- Consider using supplemental lighting, such as grow lights, if needed.
- Grow taro plants in a greenhouse for optimal light conditions.
- Choose a location with partial shade when growing taro outdoors.
- Protect outdoor taro plants from direct sunlight and strong winds.
- Timing is essential when planting taro outdoors to ensure they have enough time to mature.
Watering Taro Plants
Taro plants have specific water requirements to thrive and produce healthy foliage and tubers. Proper watering is essential for their overall growth and development.
Taro plants require heavy and consistent watering to meet their moisture needs. They have an amazing ability to tolerate waterlogged conditions and can even grow in up to 6 inches of water. This makes them an excellent choice for areas that experience frequent flooding.
However, it’s important to note that while taro plants can tolerate wet conditions, they do not thrive in waterlogged soil. The soil should be kept constantly moist, but not overly saturated, to prevent root rot and other water-related issues.
When it comes to how often to water taro plants, it’s best to adjust watering based on the weather conditions. During extremely warm weather or in areas with high evaporation rates, taro plants require more frequent watering to prevent dehydration. On the other hand, during cooler or rainy periods, watering can be reduced.
Container-grown taro plants have similar watering needs as outdoor plants. The soil in containers should be kept evenly moist, ensuring that excess moisture can drain freely through the drainage holes.
- Water taro plants heavily and consistently to meet their moisture needs.
- Avoid waterlogging the soil by keeping it constantly moist, not overly saturated.
- Adjust watering based on weather conditions, with more frequent watering during extremely warm weather.
- Container-grown taro plants require similar watering as outdoor plants.
Fertilizing Taro Plants
Taro plants require proper fertilization to ensure healthy growth and maximize their potential. By providing the right nutrients, you can promote vigorous foliage, robust roots, and an abundant harvest of taro root. Here’s what you need to know about taro fertilizing:
- High-Potassium Fertilizer: Taro plants benefit from a high-potassium fertilizer. Potassium is essential for proper root development, disease resistance, and overall plant health. Look for a balanced fertilizer with a higher ratio of potassium (K) compared to nitrogen (N) and phosphorus (P).
- Pre-Planting Preparation: Before planting taro, it is recommended to work organic matter into the soil to provide additional nutrients. This can include well-rotted compost, aged manure, or other organic amendments. Incorporating organic matter improves soil fertility and helps retain moisture.
- During Growing Season: Once your taro plants are established, it’s important to continue providing them with regular nutrients. Apply a balanced liquid fertilizer monthly throughout the growing season. This helps replenish the nutrients in the soil and keeps the plants well-nourished.
- Nitrogen Considerations: While taro plants require nitrogen for leafy growth, excess nitrogen can result in weak plants. It’s important to test the soil periodically and adjust the fertilizer accordingly. Avoid excessive nitrogen fertilization, as it may lead to excessive foliage growth at the expense of root development.
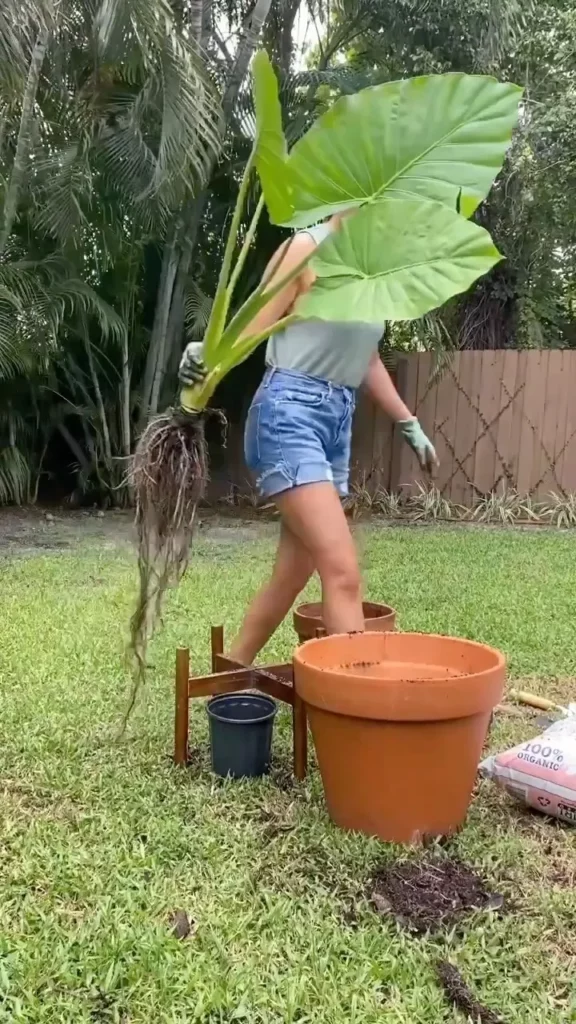
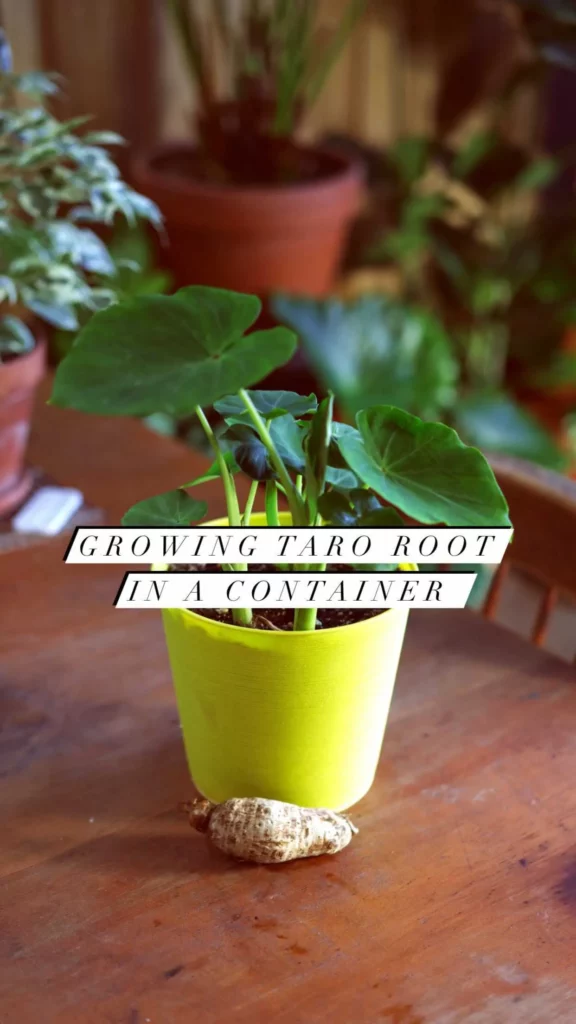
Potting Taro Plants

Taro plants have the versatility to be grown in containers, making them an excellent choice for small gardens or indoor gardening. By following a few simple steps, you can successfully pot your taro plants and enjoy their lush foliage and edible tubers.
- Choose a large container with drainage holes: To accommodate the growth of taro plants, it’s important to select a container that is at least 12-18 inches in diameter and has proper drainage. This ensures that excess water can escape and prevents waterlogged soil.
- Use a peat-free multipurpose compost: Fill the container with a well-draining peat-free multipurpose compost. This type of compost provides the necessary nutrients for healthy taro growth.
- Plant the tuber: Place the taro tuber in the container, burying it 2-3 inches deep. Ensure that the tuber is positioned with its sprouting side facing up.
- Cover with soil: Gently cover the tuber with soil, ensuring that it is completely covered but not excessively compacted. Leave some space between the soil surface and the rim of the container for watering purposes.
Propagation of Taro Plants

Taro plants can be propagated through division, which involves separating and replanting the tubers or corms. This method is widely used and highly successful for taro propagation.
- Select a healthy taro plant that is ready for division. Dig up the plant using a garden fork or shovel, being careful not to damage the tubers.
- Once the plant is dug up, identify the tubers that have sprouted off the main one. These are the tubers that can be separated for propagation.
- Using a sharp knife or garden pruners, carefully separate the sprouted tubers from the main one. Each tuber should have its own set of roots and potentially a petiole sprout.
- After separating the tubers, they can be planted directly into the ground or started in a container. If planting in the ground, dig a hole large enough to accommodate the tuber and its roots. Plant the tuber with the sprout facing upward and cover it with soil.
- If starting in a container, fill the container with well-draining potting soil. Plant the tuber in the center of the container, making sure the sprout is facing upward. Cover the tuber with soil, leaving the sprout exposed.
Growth and Development of Taro Plants
Taro plants are known for their impressive growth and development. These tropical plants require a long growing season and warm weather to reach maturity. On average, it takes around 7 months for taro plants to mature and be ready for harvest.
Taro plants can reach heights of 3-6 feet, making them a substantial addition to any garden or indoor space. With their large, heart-shaped leaves, taro plants can create a lush and tropical ambiance. The leaves themselves can grow up to 3 feet in size, adding to the plant’s impressive stature.
Whether grown outdoors in tropical areas or as houseplants indoors, taro plants need to be provided with the right conditions and care to ensure their optimal growth. Consistent watering, proper fertilization, and sufficient sunlight are essential factors that contribute to the healthy development of taro plants.
- Taro plants require a long growing season and warm weather to mature.
- They can take around 7 months to reach maturity.
- The plants can grow to heights of 3-6 feet with large heart-shaped leaves.
- Taro plants can be grown outdoors in tropical areas or as vibrant houseplants indoors.
- Providing the right conditions and care is crucial for their optimal growth and development.
Dealing with Pests and Diseases in Taro Plants
Taro plants are susceptible to various pests and diseases that can affect their growth and overall health. It’s important to be vigilant and take proactive measures to prevent and control these common problems in taro plants.
Pests
- Spider Mites: These tiny pests can cause damage by sucking the sap from the leaves. Regularly inspect the plants for spider mite infestation, especially under the leaves. If detected, use organic insecticidal soap or neem oil to control them.
Diseases
- Fungal Leaf Blight: This disease is caused by fungal pathogens that affect the leaves, resulting in yellowing, browning, and spotting. To prevent fungal leaf blight, avoid overwatering and provide proper air circulation around the plants. If necessary, treat with a suitable organic fungicide.
- Pythium Rot: Pythium rot is a common disease affecting taro plants, especially in wet conditions. It causes root rot and can lead to plant wilting and death. To prevent it, maintain well-drained soil and avoid overwatering. Remove any infected plants immediately to prevent the spread of the disease.
- Downy Mildew: Downy mildew is a fungal disease that affects the leaves, causing yellowing, browning, and a fuzzy, grayish coating on the undersides. To control downy mildew, ensure good air circulation, avoid overhead watering, and apply copper-based fungicides if necessary.
To minimize the risk of pests and diseases, follow these preventive measures:
- Proper Watering: Avoid overwatering, as it can create a favorable environment for diseases and pests. Provide consistent moisture without waterlogging the soil.
- Good Hygiene Practices: Remove any dead or diseased plant material promptly to prevent the spread of diseases. Keep the growing area clean and free from debris.
- Balance Environment: Maintain optimum growing conditions for taro plants, including adequate light, proper humidity levels, and appropriate temperature. Avoid extreme conditions that can weaken the plants.
If pesticide treatment is necessary, choose organic options and follow the instructions carefully. It’s also advisable to consult with a local extension service or expert for specific recommendations tailored to your region and the severity of the pest or disease infestation.
Harvesting and Using Taro
Once the leaves of the taro plant start to yellow and die off, it’s time to harvest the tubers for culinary use. Gently dig up the tubers, being careful not to damage them, and wash off any dirt or debris. The harvested taro roots can be cooked in a variety of ways, making them a versatile ingredient in the kitchen.
Taro roots can be boiled, steamed, baked, or fried, and they are often used as a tasty substitute for potatoes in recipes. Their starchy texture and mild flavor add a unique touch to dishes. Additionally, the leaves of the taro plant can be harvested throughout the growing season and cooked just like spinach.
It’s important to note that taro roots don’t store well, so it’s best to consume them soon after harvesting. However, if you have a surplus, you can freeze the cooked taro roots for later use. Just make sure to handle and cook taro properly, as it is toxic when raw. Following safe food handling practices will ensure a delicious and enjoyable culinary experience with taro.
FAQ
What is taro?
Taro is a tropical plant that is cultivated for its edible roots and leaves. It is a staple food in many countries and is known for its large size and unique foliage.
What does a taro plant look like?
Taro plants are large, tropical plants that can reach heights of 3-6 feet. They have heart-shaped leaves with distinct veins and come in a variety of colors, including green, purple, and black.
How do you grow taro indoors?
Taro plants can be grown indoors as houseplants. They need to be placed in a spot that receives bright but indirect light. They can also be grown in a greenhouse.
How often should taro plants be watered?
Taro plants require heavy and consistent watering. They can grow in up to 6 inches of water and the soil should be kept constantly moist, but not waterlogged. Watering should be adjusted based on the weather conditions.
What fertilizer should I use for taro plants?
Taro plants benefit from regular fertilizing with a high-potassium fertilizer. Before planting, it is recommended to work organic matter into the soil. During the growing season, apply a balanced liquid fertilizer monthly.
Can taro plants be grown in containers?
Yes, taro plants can be grown in containers, making them suitable for small gardens or indoor gardening. Choose a large container with drainage holes and fill it with a peat-free multipurpose compost.
How do you propagate taro plants?
Taro plants are propagated through division, usually using the tubers or corms. Small tubers or portions of a large tuber can be planted directly into the ground or started in a container.
How long does it take for taro plants to mature?
Taro plants have a long growing season and require warm weather to mature. They can take anywhere from 7 months to reach maturity.
How do you deal with pests and diseases in taro plants?
Taro plants can be affected by pests such as spider mites and diseases such as fungal leaf blight, Pythium rot, and downy mildew. It’s important to monitor the plants regularly and take preventive measures.
How do you harvest and use taro?
Taro plants can be harvested when the leaves start to yellow and die off. The tubers can be dug up, washed, and stored for culinary use. Taro roots can be boiled, steamed, baked, or fried and are often used as a substitute for potatoes in recipes.


