
Dive into the world of Japanese curry with this mouthwatering chicken katsu curry recipe that brings the ultimate comfort food straight to your kitchen. I’ve perfected this classic dish that combines crispy breaded chicken with rich, savory curry sauce – a culinary experience that’s both exciting and satisfying.
The chicken katsu curry has become a beloved staple in Japanese cuisine, capturing the hearts of food lovers worldwide. My recipe will guide you through creating an authentic Japanese curry that’s packed with flavor and surprisingly easy to make at home. Whether you’re a cooking enthusiast or a curious food explorer, this dish promises to transport your taste buds to the streets of Tokyo.
What makes this Japanese curry so special is its unique blend of flavors and textures. The crispy chicken katsu provides a perfect crunch, while the smooth, velvety curry sauce creates a harmony that’s simply irresistible. I’ll walk you through every step, ensuring you can recreate this restaurant-quality meal in your own kitchen.
Get ready to impress your family and friends with a restaurant-worthy chicken katsu curry that’s sure to become a new favorite in your recipe collection. From selecting the right ingredients to mastering the perfect breading technique, I’ll share all my secrets to making this ultimate comfort food.
What Makes Japanese Curry So Special
Japanese curry culture is a fascinating culinary journey that blends international influences with unique local flavors. The story of Japanese curry begins in the late 19th century when European naval traditions introduced this delectable dish to Japan during the Meiji era.
Let me take you through the remarkable evolution of this beloved cuisine that has become a staple in Japanese households and restaurants worldwide.
The Roots of Japanese Curry Culture
The introduction of curry to Japan came through British naval influences, transforming the traditional spice blend into something entirely new. Unlike its Indian counterpart, Japanese curry developed a distinct character that sets it apart from other curry styles.
Japanese vs Indian Curry: Key Differences
- Texture: Japanese curry is typically thicker and smoother
- Spice Level: Milder and more sweet-savory compared to Indian curries
- Preparation: Uses roux-based sauce instead of ground spice mixtures
| Characteristic | Japanese Curry | Indian Curry |
|---|---|---|
| Consistency | Thick, gravy-like | Varies from thin to thick |
| Flavor Profile | Sweet and mild | Complex, spicy |
| Primary Ingredients | Vegetables, meat, roux | Varied spices, herbs |
Why Chicken Katsu Pairing is Perfect
The crispy chicken katsu creates an incredible contrast with the smooth, rich curry sauce. The breaded chicken’s crunch complements the velvety curry, making it a match made in culinary heaven. This combination showcases the genius of Japanese comfort food, balancing textures and flavors in every bite.
Japanese curry has truly become a global sensation, with its unique approach to a classic dish that continues to win hearts around the world.
Essential Ingredients for the Perfect Katsu Curry
Creating an authentic katsu curry requires carefully selected Japanese curry ingredients that bring out rich, complex flavors. I’ll walk you through the key components that transform this dish from ordinary to extraordinary.
Chicken Katsu Ingredients
- Chicken breasts (boneless, skinless)
- Panko breadcrumbs
- All-purpose flour
- Large eggs
- Salt and black pepper
- Vegetable oil for frying
Japanese Curry Ingredients
The heart of katsu curry lies in its deeply flavorful sauce. Traditional katsu curry ingredients include:
- Curry roux blocks (store-bought or homemade)
- Onions
- Carrots
- Potatoes
- Chicken or vegetable stock
- Soy sauce
- Garam masala (optional)
Ingredient Quality Matters
When selecting ingredients for your katsu curry, I recommend using high-quality Japanese curry roux. Brands like S&B Golden Curry provide an authentic taste that’s hard to replicate. Fresh vegetables and good-quality chicken make a significant difference in the final dish.
| Ingredient Category | Recommended Brands/Types | Quality Impact |
|---|---|---|
| Curry Roux | S&B Golden Curry | Authentic flavor profile |
| Chicken | Organic, boneless breasts | Tender, juicy texture |
| Panko Breadcrumbs | Japanese-style breadcrumbs | Extra crispy coating |
Pro tip: If you can’t find Japanese curry roux, you can make a homemade version using curry powder, flour, and butter. The key is balancing spices to create that signature Japanese curry flavor.
Kitchen Tools and Equipment You’ll Need
Preparing a delicious chicken katsu curry requires the right katsu curry cookware and frying tools. Don’t worry if you’re not a professional chef – most of these items are likely already in your kitchen. I’ll guide you through the essential equipment that will help you create a restaurant-quality meal at home.
Your Curry Cooking Arsenal
When it comes to curry making equipment, a few key pieces can make all the difference. I recommend investing in some quality tools that will elevate your cooking experience.
- Heavy-bottomed frying pan for even heat distribution
- Deep skillet or wok for curry sauce preparation
- Sturdy cutting board
- Sharp chef’s knife
Breading and Frying Essentials
Mastering the perfect chicken katsu requires some specific frying tools. Here are my top recommendations:
- Meat tenderizer or rolling pin
- Three shallow dishes for breading station
- Wire cooling rack
- Instant-read meat thermometer
- Long-handled tongs
Specialized Curry Making Tools
While not absolutely necessary, these curry making equipment items can seriously upgrade your cooking game:
- Japanese grater for fresh ginger
- Immersion blender for smooth sauce
- Fine-mesh strainer
- Roux whisk
Remember, great cooking is about passion and technique, not just having every single kitchen gadget. With these basic katsu curry cookware items, you’ll be well-prepared to create an amazing meal that will impress your family and friends.
Chicken Katsu Curry Recipe
Creating a delicious homemade katsu curry is easier than you might think! This chicken katsu curry recipe will walk you through each step to bring an authentic Japanese restaurant experience right to your kitchen.
Let’s break down the chicken katsu curry recipe into simple, manageable steps:
- Prepare the chicken:
- Select boneless, skinless chicken breasts
- Pound chicken to an even 1/2-inch thickness
- Season with salt and pepper
- Create the breading station:
- Set up three shallow dishes
- First dish: flour
- Second dish: beaten eggs
- Third dish: panko breadcrumbs
- Breading the chicken:
- Coat chicken in flour
- Dip in egg wash
- Cover completely with panko
For the perfect homemade katsu curry, frying technique is crucial. Heat vegetable oil to 350°F in a deep skillet. Carefully place breaded chicken and cook until golden brown, about 3-4 minutes per side. The goal is a crispy, golden exterior with a juicy interior.
Pro tip: Let the fried chicken rest on a wire rack to maintain its crispiness. This prevents the breading from becoming soggy and ensures a satisfying crunch with every bite of your chicken katsu curry recipe.
Mastering the Crispy Chicken Katsu Coating
Creating the perfect crispy chicken katsu requires more than just throwing breading on meat. The secret lies in mastering specific breading techniques that transform an ordinary piece of chicken into a restaurant-quality dish with an irresistible crunch.
The art of achieving a crispy chicken katsu starts with understanding the fundamental breading techniques. Getting the right coating means paying attention to every detail of the preparation process.
Expert Breading Techniques for Maximum Crunch
- Pat chicken dry before breading to ensure crisp coating
- Use a three-step breading process: flour, egg wash, panko breadcrumbs
- Press panko firmly onto chicken to create a thick, even layer
- Let breaded chicken rest for 10-15 minutes before frying
Maintaining the Perfect Frying Temperature
Frying tips are crucial for achieving that golden-brown exterior. Maintaining the right oil temperature between 350-375°F ensures your chicken katsu develops a crispy exterior without becoming greasy.
| Oil Temperature | Cooking Result |
|---|---|
| Below 350°F | Soggy, oil-saturated coating |
| 350-375°F | Perfect crispy golden-brown exterior |
| Above 400°F | Burnt exterior, undercooked interior |
Breading Mistakes to Sidestep
- Skipping the flour dredging step
- Using wet chicken
- Overcrowding the frying pan
- Not letting chicken rest after breading
By following these breading techniques and frying tips, you’ll create a crispy chicken katsu that rivals any restaurant version. Practice makes perfect, so don’t get discouraged if your first attempt isn’t flawless.
How to Make Japanese Curry Sauce from Scratch
Creating a homemade Japanese curry sauce is easier than you might think. My personal curry roux recipe will transform your chicken katsu dish from good to extraordinary. The key is understanding the fundamental components that make this sauce so special.
To start your homemade Japanese curry sauce, you’ll need a few essential ingredients:
- Unsalted butter
- All-purpose flour
- Curry powder
- Garam masala
- Ground turmeric
- Tomato paste
The process of making a curry roux recipe involves carefully blending these ingredients to create a rich, deeply flavored base. I recommend using a heavy-bottomed pan to prevent burning and ensure even heat distribution.
Begin by melting butter in the pan over medium heat. Gradually whisk in flour to create a smooth roux. This is the critical foundation of your homemade Japanese curry sauce. Slowly add your spices, stirring constantly to develop a deep, complex flavor profile.
Cooking times matter when crafting the perfect curry roux recipe. Typically, you’ll want to cook the roux for about 10-15 minutes, allowing the spices to bloom and release their full aromatic potential. The color should develop into a rich, deep golden brown.
While store-bought curry cubes are convenient, making your curry sauce from scratch allows you to control the flavor intensity and adjust spices to your personal taste. Trust me, the extra effort is worth every delicious bite!
Tips for Serving and Presentation
Creating an impressive katsu curry presentation goes beyond just cooking delicious food. The way you serve and plate your dish can transform an ordinary meal into a restaurant-quality experience that delights both the eyes and the palate.
When thinking about katsu curry presentation, consider the visual appeal of your plate. Japanese cuisine emphasizes aesthetic beauty, so take a moment to arrange your dish with care and intention.
Traditional Japanese Side Dishes
Complement your katsu curry with classic Japanese side dishes that enhance the overall dining experience:
- Pickled vegetables (tsukemono)
- Steamed edamame
- Miso soup
- Japanese short-grain rice
- Sesame-dressed seaweed salad
Plating Techniques for Restaurant-Style Appeal
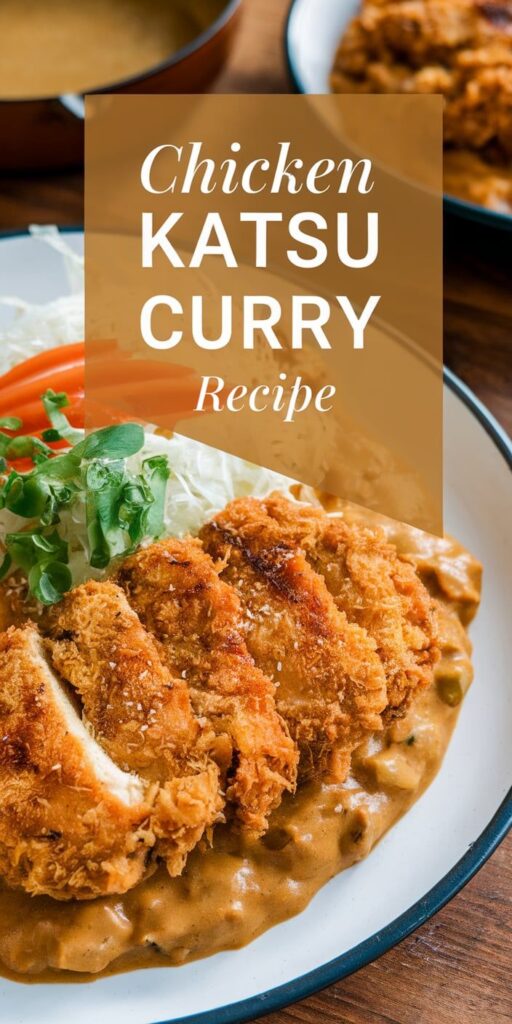
I recommend using a wide, white plate to make the golden-brown katsu and rich curry sauce pop. Carefully place the chicken katsu at a slight angle, allowing the crispy breading to remain visible. Ladle the curry sauce around the chicken, not completely covering it.
Garnish with finely chopped green onions or a sprinkle of white sesame seeds to add a professional touch to your Japanese side dishes. These small details can elevate your katsu curry from home cooking to gourmet presentation.
Storage and Reheating Guidelines
Storing katsu curry requires some strategic planning to maintain its delicious flavor and texture. I recommend storing the curry sauce and crispy chicken katsu separately to prevent the breading from becoming soggy. Place the curry sauce in an airtight container and refrigerate the chicken katsu in a separate container lined with paper towels to absorb excess oil.
When reheating curry, gently warm the sauce in a saucepan over low heat, stirring occasionally to prevent burning. For the chicken katsu, skip the microwave and use an oven instead. Preheat to 375°F and place the katsu on a wire rack for about 10 minutes. This method helps restore the crispy coating and ensures the chicken remains juicy and delectable.
Proper storage is key to enjoying leftover katsu curry. Keep refrigerated components separate and consume within 2-3 days for the best quality. When reheating curry, add a splash of water or broth to restore the sauce’s original consistency. By following these simple steps, you can enjoy a restaurant-quality meal right from your home refrigerator.
Pro tip: If you plan to make extra, consider preparing the curry sauce and chicken katsu components in advance. This meal prep strategy allows for quick and delicious reheating during busy weeknights, giving you a taste of Japanese cuisine without extensive cooking time.


