
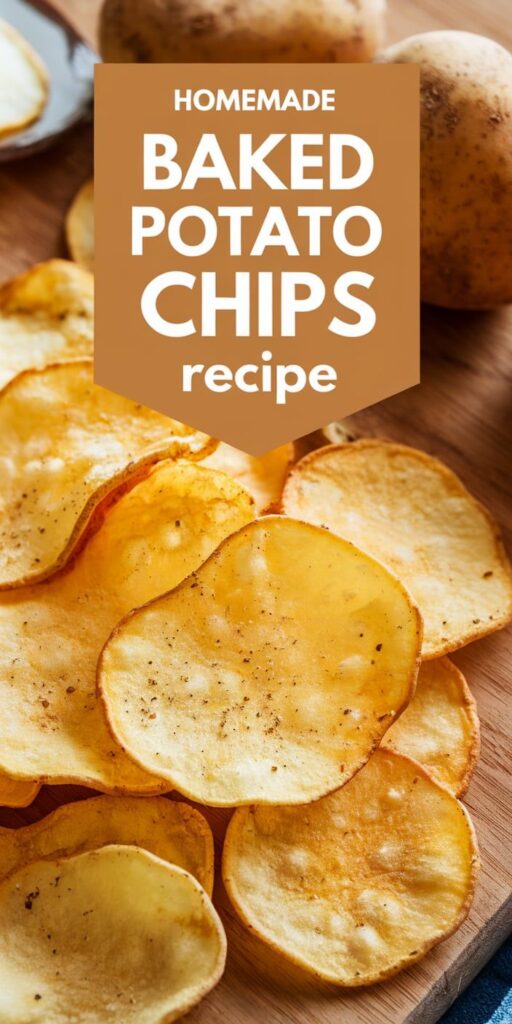
Craving a delicious and healthier alternative to store-bought chips? My homemade baked potato chips recipe is about to change your snacking game forever! These crispy, golden delights are not just a treat but a smart choice for anyone looking to enjoy a guilt-free healthy snack.
Crafting your own baked potato chips at home is easier than you might think. With just a few simple ingredients and some kitchen know-how, you can create a batch of irresistible homemade potato chips that will impress your family and friends. Forget greasy, processed snacks – these baked potato chips are packed with flavor and nutrition.
I’ll walk you through every step of creating the perfect crispy chip, from selecting the right potatoes to mastering the baking technique. Whether you’re a seasoned home cook or a kitchen novice, this recipe will help you transform ordinary potatoes into an extraordinary snack that’s both delicious and nutritious.
Why Make Your Own Baked Potato Chips at Home
Creating homemade baked potato chips isn’t just a fun kitchen activity—it’s a game-changing approach to snacking. These delightful crispy treats offer numerous advantages that store-bought chips simply can’t match. Let me walk you through why making your own chips is a smart choice for health-conscious and flavor-loving individuals.
Health Benefits of Baked vs. Fried Chips
Baked vs. fried chips present a significant nutritional difference. Healthy snack alternatives like homemade chips can dramatically reduce your calorie and fat intake. Traditional fried chips are typically loaded with unhealthy oils, while baked chips provide a lighter, more nutritious option.
- Up to 50% less fat compared to traditional fried chips
- Control over ingredients and sodium levels
- No artificial preservatives or unnecessary additives
Cost-Effective Snacking Solutions
The benefits of homemade chips extend beyond nutrition—they’re also wallet-friendly. Preparing your own chips can save significant money compared to purchasing packaged varieties.
| Chip Type | Average Cost per Serving | Nutritional Value |
|---|---|---|
| Store-Bought Chips | $1.50 | High fat, added preservatives |
| Homemade Baked Chips | $0.50 | Low fat, fresh ingredients |
Customizable Flavoring Options
One of the most exciting aspects of homemade chips is the ability to experiment with flavors. From classic sea salt to exotic spice blends, you can create unique taste experiences that commercial brands can’t replicate.
- Personalize spice levels
- Experiment with herb combinations
- Match flavors to your specific dietary preferences
By choosing to make your own baked potato chips, you’re not just preparing a snack—you’re crafting a healthier, more delicious alternative to store-bought options.
Essential Ingredients for Perfect Baked Potato Chips
Creating delicious homemade baked potato chips starts with selecting the right potato chip ingredients. Not all potatoes are created equal when it comes to making crispy chips. I recommend using Russet or Yukon Gold potatoes as the best potatoes for chips. These varieties have the perfect starch content and texture to create that satisfying crunch we all love.
Choosing the right oil is crucial for both flavor and health. Healthy oil options can make a significant difference in your chip-making process. I prefer using extra virgin olive oil or avocado oil, which not only provide great taste but also offer nutritional benefits. These oils help create a crispy exterior while keeping the chips lighter than traditional deep-fried alternatives.
- Top potato choices:
- Russet potatoes
- Yukon Gold potatoes
- Recommended healthy oils:
- Extra virgin olive oil
- Avocado oil
- Coconut oil
Beyond the basic ingredients, you’ll want to have some seasonings on hand to elevate your baked potato chips. Sea salt is a classic choice, but don’t be afraid to experiment with herbs and spices. Paprika, garlic powder, or dried rosemary can transform your homemade chips from simple to spectacular.
The key to perfect baked potato chips is using fresh, high-quality ingredients and paying attention to preparation details. With the right potatoes, healthy oils, and a bit of creativity, you’ll be making restaurant-worthy chips right in your own kitchen.
Kitchen Tools and Equipment You’ll Need
Creating delicious homemade baked potato chips requires some specific potato chip tools that will make your cooking process easier and more efficient. I’ll walk you through the essential equipment that will help you craft perfect crispy chips every time.
Mandoline Slicer: Your Secret Weapon
A mandoline slicer is crucial for achieving uniform, thin potato slices. These precision tools allow you to create consistent chip thickness, which ensures even cooking and crispy results. When selecting a mandoline slicer, consider these key features:
- Adjustable slice thickness settings
- Safety guard to protect your fingers
- Stainless steel blade for durability
- Compact storage design
Choosing the Right Baking Sheets for Chips
Selecting appropriate baking sheets for chips can dramatically improve your cooking outcome. Look for heavy-gauge aluminum sheets with a non-stick surface that promotes even heat distribution. The ideal baking sheets will help you achieve golden, crispy potato chips without burning.
Additional Essential Tools
Beyond the mandoline slicer and baking sheets, I recommend gathering these additional potato chip tools:
- Large mixing bowls for seasoning
- Paper towels for moisture removal
- Sharp kitchen knife as a backup
- Cooling rack for crisp chip texture
Homemade Baked Potato Chips Recipe
Creating the perfect potato chip recipe at home is easier than you might think. My homemade chips instructions will help you transform simple potatoes into crispy, delicious snacks that beat store-bought options every time.
Ingredients You’ll Need
- 2-3 medium russet potatoes
- 2 tablespoons olive oil
- Sea salt to taste
- Optional seasonings:
- Garlic powder
- Paprika
- Dried herbs
For successful baking potato chips, selecting the right potatoes is crucial. I recommend using russet potatoes because they crisp up beautifully and have the perfect starch content for creating that satisfying crunch.
Step-by-Step Preparation
- Wash potatoes thoroughly and pat dry
- Slice potatoes extremely thin (1/8 inch thick) using a mandoline
- Soak potato slices in cold water for 30 minutes to remove excess starch
- Drain and pat slices completely dry with paper towels
- Toss slices with olive oil and seasonings
- Arrange in single layer on baking sheet
- Bake at 400°F for 15-20 minutes, flipping halfway
Pro tip: Watch chips carefully during the last few minutes of baking to prevent burning. The key to perfect homemade chips is consistent thickness and thorough drying before baking.
Tips for Achieving Maximum Crispiness
Creating the perfect crispy potato chips requires precision and technique. I’ll share my top secrets to transform your homemade chips from soft and soggy to delightfully crunchy every single time.
Mastering Slicing Techniques for Potato Chips
Slicing potatoes for chips demands careful attention. I recommend using a sharp mandoline slicer to ensure uniform thickness, which is crucial for consistent crispiness. Aim for potato slices between 1/16 to 1/8 inch thick. Uneven slices lead to uneven cooking and disappointing results.
- Use a sharp mandoline for precise cuts
- Slice potatoes uniformly to ensure even cooking
- Maintain consistent slice thickness of 1/16 to 1/8 inch
Removing Moisture for Crispy Perfection
Removing moisture from potatoes is a game-changing step in achieving crispy potato chips. My favorite method involves thoroughly patting potato slices dry with paper towels. Excess water prevents the chips from becoming crisp and can result in steaming instead of baking.
- Pat potato slices completely dry
- Use clean kitchen towels or paper towels
- Remove all visible moisture before baking
Temperature Control for Crunchy Chips
The right temperature makes all the difference when baking potato chips. I suggest preheating your oven to 400°F and spreading chips in a single layer on a baking sheet. Rotate the pan midway through cooking to ensure even browning and maximum crispiness.
- Preheat oven to 400°F
- Use a single layer on baking sheet
- Rotate pan during cooking for even crispness
Creative Seasoning Combinations
Discovering exciting potato chip seasonings can transform your homemade chips from simple to spectacular. Crafting flavored chips at home allows you to experiment with unique taste profiles that store-bought varieties can’t match.
When exploring homemade chip flavors, I recommend starting with classic combinations and gradually building your seasoning confidence. The key is balancing salt, spice, and aromatic herbs to create memorable chip experiences.
- Classic Salt & Pepper: A timeless combination that never disappoints
- Spicy Chili Lime: Brings a zesty kick to your potato chips
- Rosemary Garlic: Elegant and sophisticated flavor profile
- Smoky Paprika: Adds depth and warmth to your chips
- Ranch-Style Seasoning: Mimics popular packaged chip flavors
The secret to perfect potato chip seasonings is applying them immediately after baking while the chips are still warm. This helps the spices adhere better and intensifies the flavor absorption.
| Seasoning Type | Primary Ingredients | Flavor Profile |
|---|---|---|
| Mediterranean Herb | Dried oregano, thyme, basil | Fresh and aromatic |
| Cajun Spice | Paprika, cayenne, garlic powder | Spicy and bold |
| Parmesan Herb | Grated parmesan, dried parsley | Rich and savory |
Remember that creating unique flavored chips is an art form. Don’t be afraid to mix and match seasonings to develop your signature chip recipe!
Storage and Make-Ahead Tips
Crafting the perfect batch of homemade potato chips is an art, but keeping them crispy is just as important. Storing homemade chips requires some strategic planning to maintain their delightful crunch and flavor.
Best Storage Containers
Selecting the right storage container is crucial for keeping chips crispy. I recommend using these top storage options:
- Airtight glass containers with tight-sealing lids
- Vacuum-sealed plastic bags
- Ceramic containers with silicone gaskets
Maintaining Freshness
Preserving the crisp texture of your homemade potato chips involves a few key strategies:
- Add a silica gel packet to absorb excess moisture
- Store chips at room temperature
- Keep away from humid environments
Reheating Potato Chips
When your chips lose their initial crunch, reheating potato chips can bring them back to life. Here’s a quick method to restore their crispy texture:
| Reheating Method | Temperature | Time |
|---|---|---|
| Oven | 350°F | 3-5 minutes |
| Air Fryer | 375°F | 2-3 minutes |
Pro tip: Spread chips in a single layer and watch carefully to prevent burning. Your homemade chips can stay deliciously crisp for up to a week with proper storage techniques!
Troubleshooting Common Issues
Navigating potato chip problems can be tricky, but don’t worry! I’ve learned that even experienced home cooks encounter challenges when making baked potato chips. Uneven cooking is often the most frustrating issue, but with a few simple techniques, you can achieve crispy, golden chips every time.
Fixing soggy chips starts with proper preparation. Ensure you pat your potato slices completely dry before baking, as excess moisture prevents that perfect crunch. Spread the chips in a single layer with enough space between them for even cooking. I recommend using a wire rack or parchment paper to help prevent moisture buildup and promote that satisfying crisp texture.
Temperature control is key to resolving most baking challenges. If your chips are burning on the edges while remaining soft in the center, try lowering the oven temperature and extending the cooking time slightly. Watch them closely during the last few minutes of baking. Remember, every oven is different, so you might need to experiment a bit to find the perfect settings for your kitchen.
Don’t get discouraged if your first batch isn’t perfect. Even imperfect chips can be delicious, and practice makes perfect when it comes to creating homemade baked potato chips. Each attempt will help you understand your oven better and improve your technique for that ideal crispy, evenly cooked chip.


